Hand-pollinating a plumeria can mean two different things: helping one flower move its own pollen, or deliberately making a controlled cross between two known parent plants. Both involve the flower’s deeply recessed reproductive structures, but only the second method supports a recorded seed-parent × pollen-parent cross.
This guide keeps those methods separate so the label on a future seed pod says only what the procedure can actually prove. For the broader explanation of natural pollination and seedling variation, begin with Plumeria Seed Pollination and Pollinators.
Why Plumeria Pollination Is Different
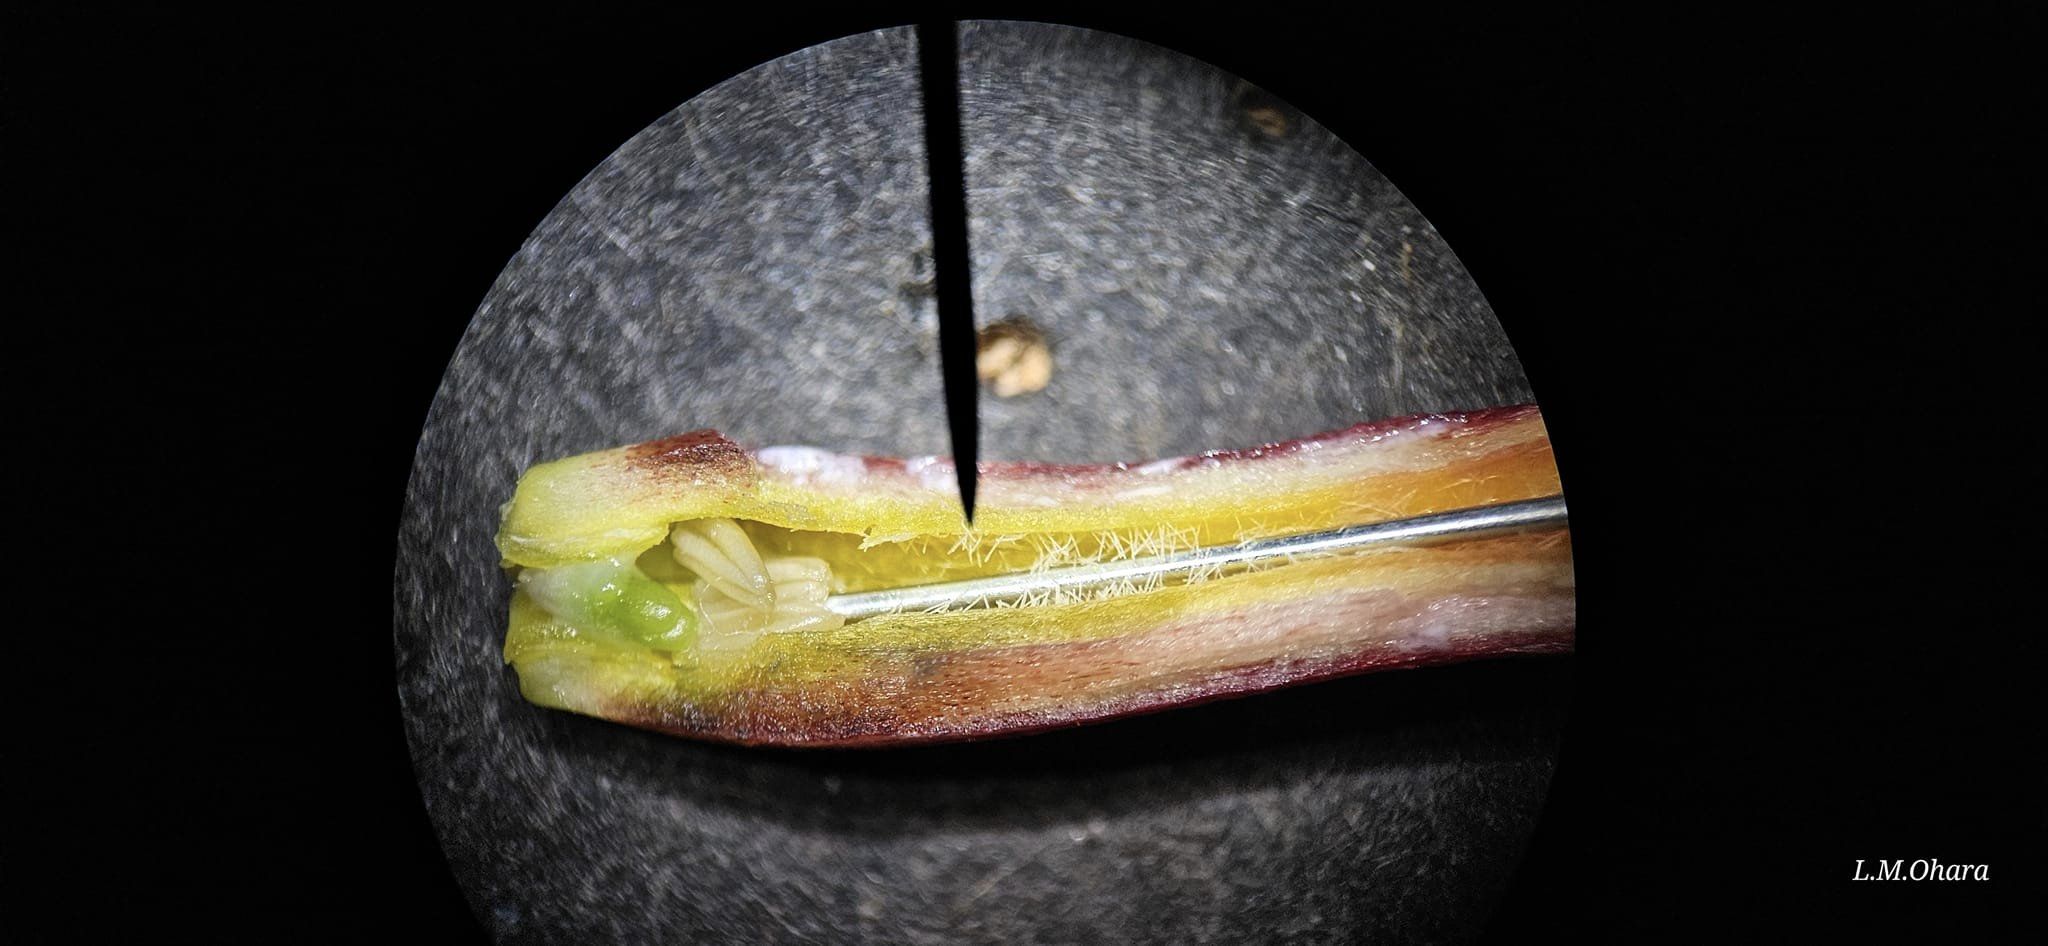
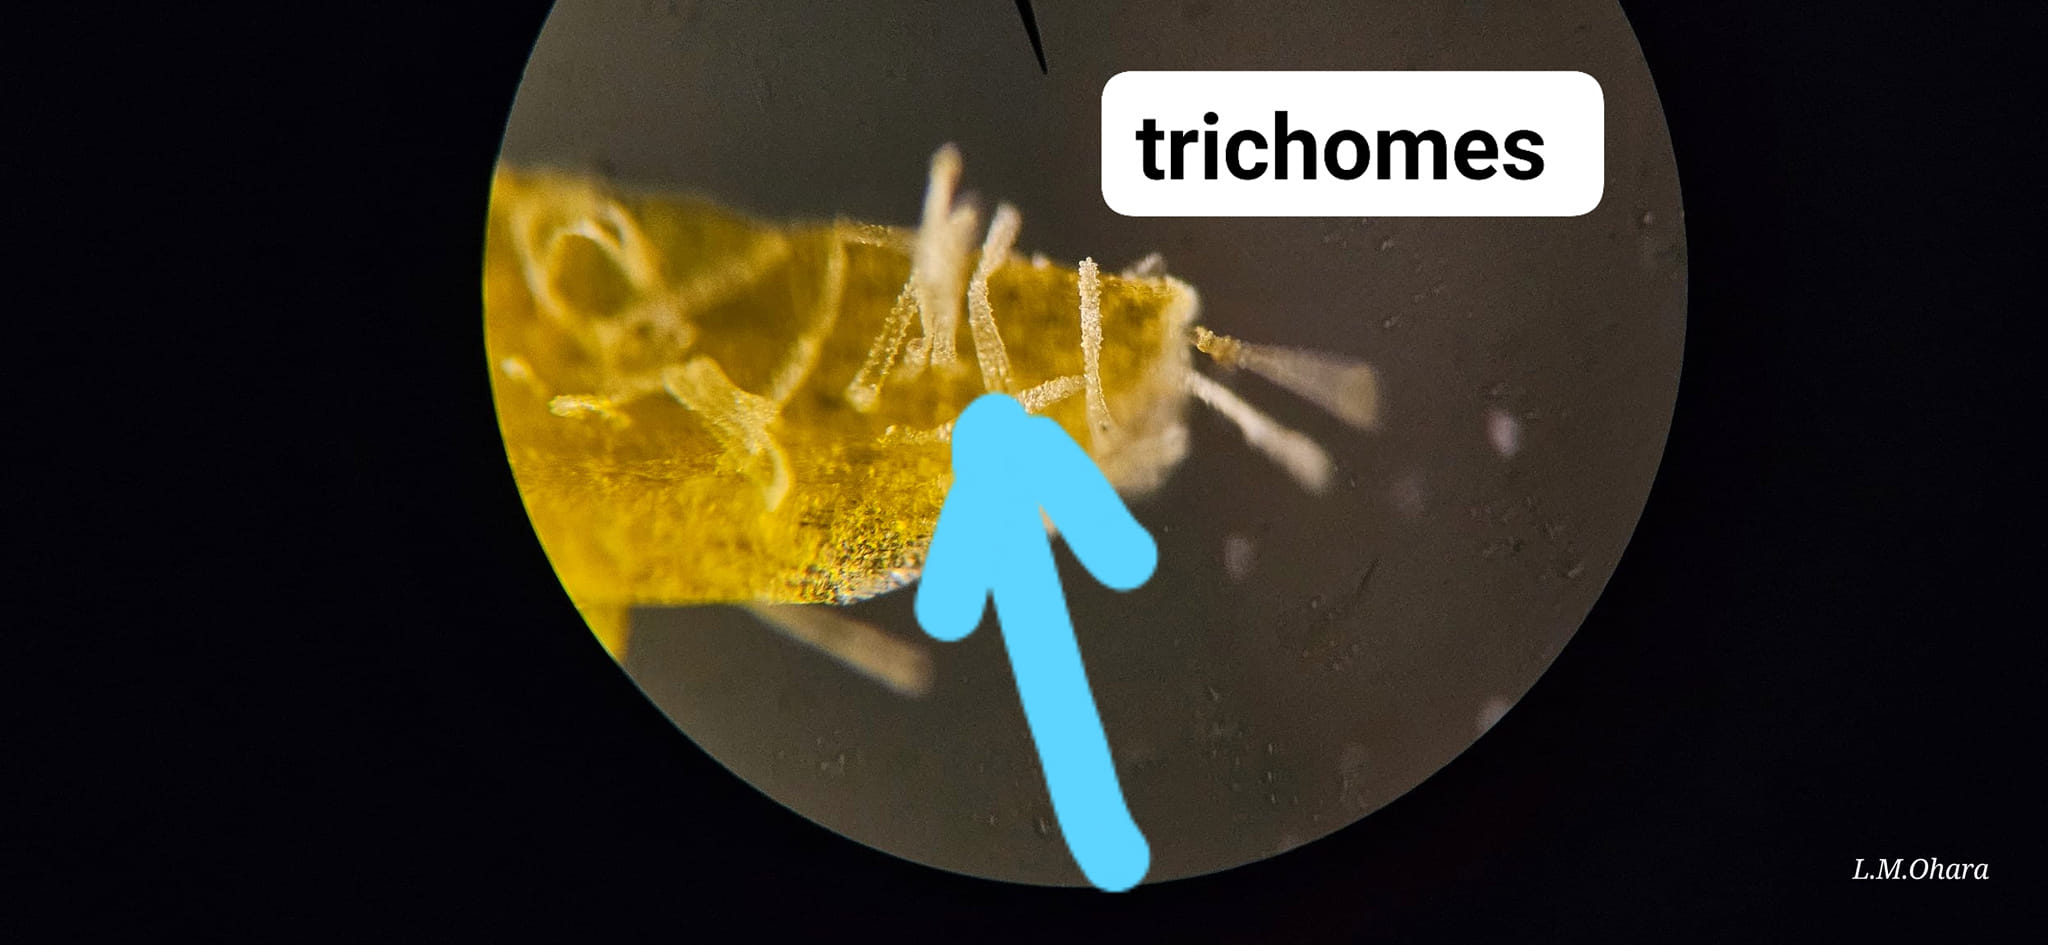
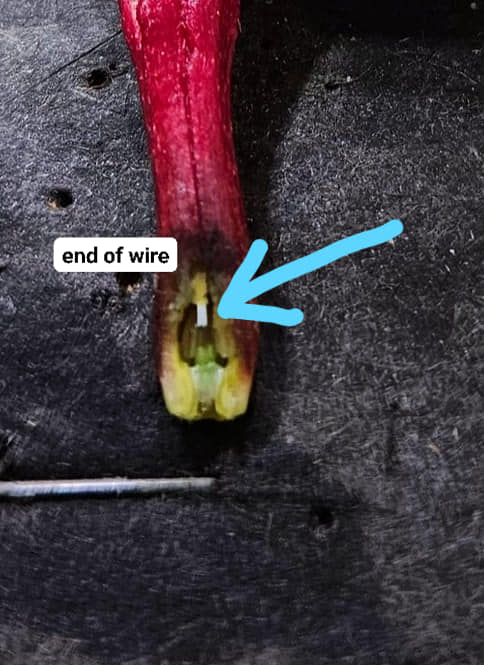
Plumeria does not present a large, exposed stigma where a brush can simply be wiped across the center of the flower. The anthers and specialized style head are recessed inside the narrow corolla tube. In Plumeria rubra, the receptive region is restricted near the base of the style head, while other portions produce sticky secretion and present pollen. That hidden arrangement is why a generic flower diagram or a brush placed only at the open throat can be misleading.
Safety First
Plumeria releases milky latex when cut or damaged. The sap can irritate skin and eyes, and a controlled cross uses a sharp fine tool. Wear gloves and eye protection, keep sap away from your face, work where children and pets cannot reach the tools or plant, and wash your hands and tools afterward. Stop if you cannot hold the flower and tool securely.
Method 1: Assisted Self-Pollination With Soft Line
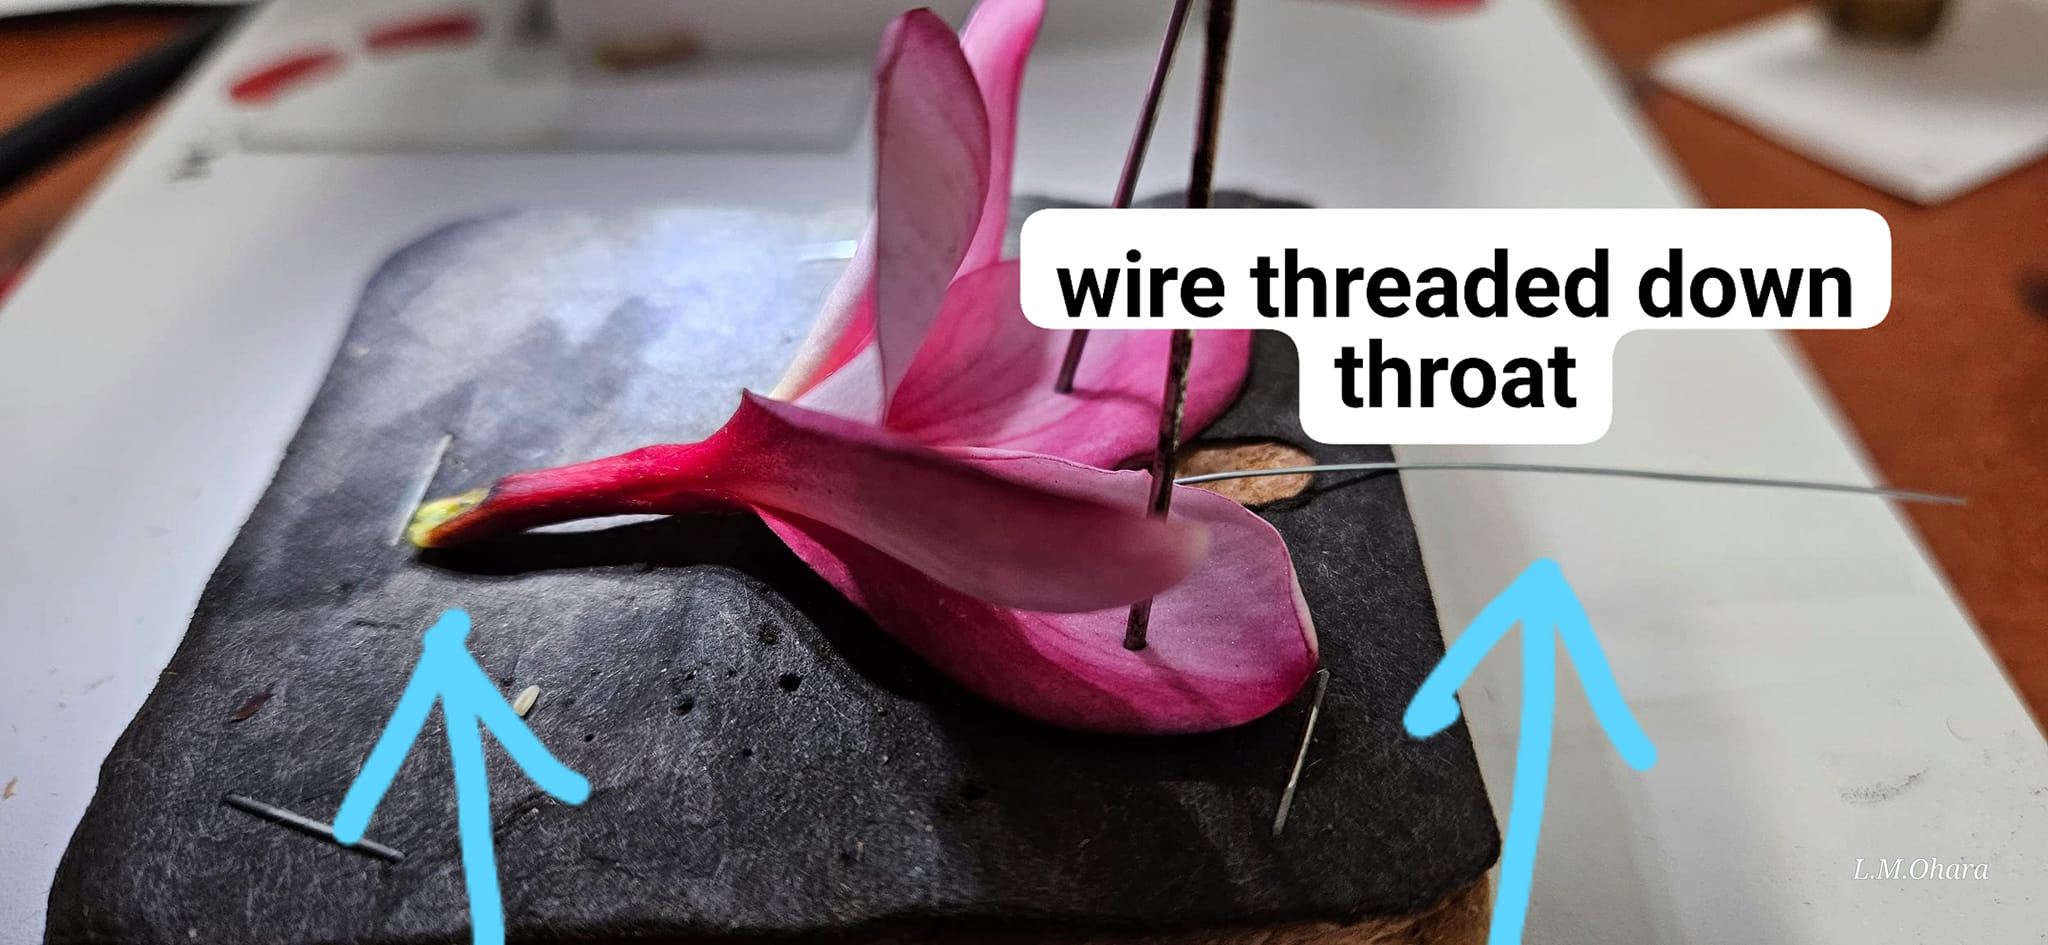
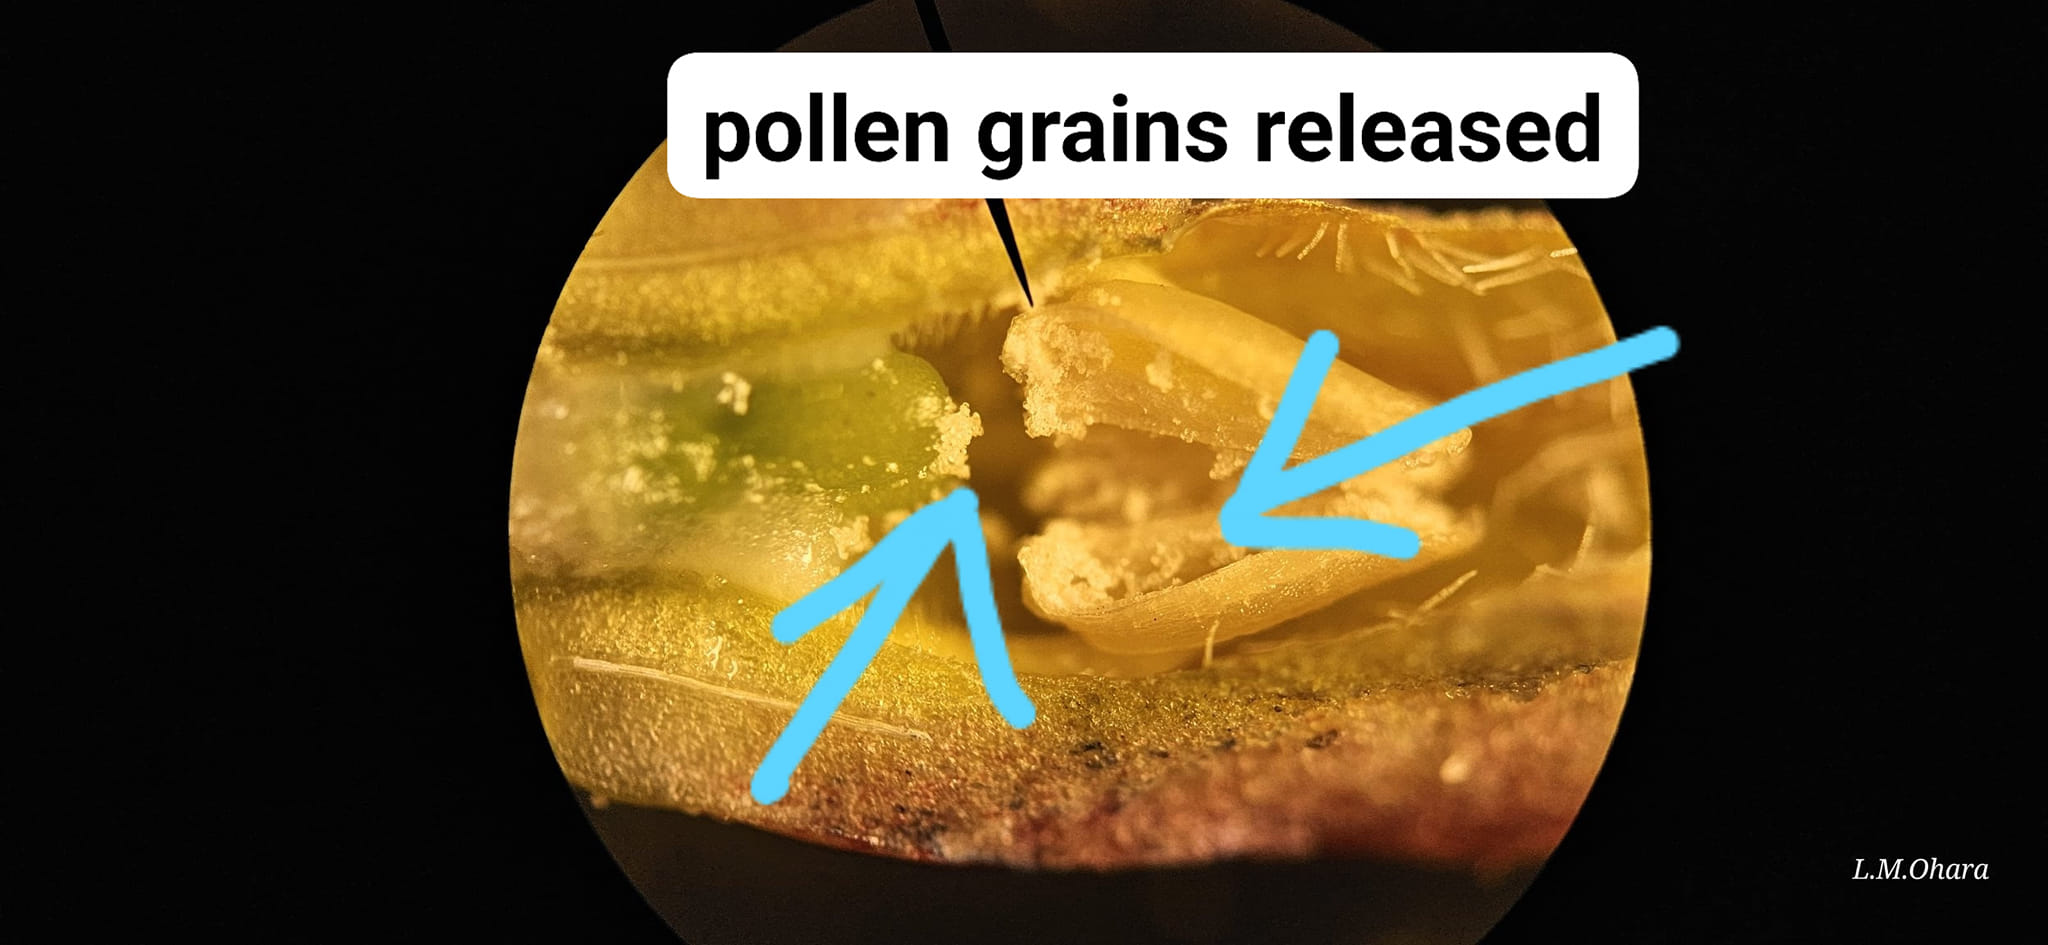
This method uses a clean, flexible filament to imitate the movement of a pollinator’s proboscis inside the flower tube. The line is inserted gently into a newly opened flower and rotated carefully so it can disturb pollen within that same flower. Use soft fishing line or another flexible filament rather than rigid metal wire, which can damage the internal tissue and trigger latex flow.
Insert the line without forcing it. Rotate it gently, withdraw it, and discard or isolate that piece before working on another cultivar. Reusing the same line can move pollen between flowers and make the pollen parent uncertain.
How to label this attempt
Record this as assisted self-pollination attempt — cultivar — date. Do not write a second cultivar as the pollen parent. Moving pollen inside one flower may encourage pod set, but it is not evidence of a controlled cross.
Method 2: A Controlled Cross Between Known Parents
A controlled cross has a different goal: remove or isolate the seed parent’s pollen and place pollen from a separately identified parent on the receptive area. The classic Hawaiian method selects newly opened flowers in the morning, opens the seed-parent corolla tube, removes its anthers, introduces pollen from the known pollen parent, protects the exposed structure, and labels the cross immediately.
1. Choose and document both parents
Choose one healthy, newly opened flower as the seed parent and one as the pollen parent. Photograph both plants and their cultivar labels before cutting either flower.
2. Open the seed-parent flower safely
The historical method cuts the corolla tube roughly one-half inch above the point where the flower tube meets its stem, controls the latex, and carefully opens the remaining tube with a fine tool. Do not crush the hidden reproductive structures.
3. Remove the seed parent’s anthers
Remove the seed-parent anthers carefully to reduce the chance that its own pollen is involved. Avoid scraping or puncturing the style head. If the anatomy cannot be seen clearly or the structure is damaged, record the failed attempt and use another newly opened flower.
4. Introduce pollen from the known pollen parent
Use a separate clean tool to obtain pollen from the identified pollen-parent flower. Place it at the verified receptive area near the base of the seed parent’s style head—not merely on a petal or at the open throat. Because the receptive area is small and flower anatomy can vary, stop if you cannot identify it clearly. Pollen placed only on a petal or at the open throat does not document a controlled cross.
5. Protect and label the cross
The historical method uses a short section of large plastic straw and a damp cotton plug to reduce drying. Any clean protective cover must avoid crushing the flower or trapping free water against the tissue. Attach the tag immediately in this format:
Seed parent × Pollen parent — date
Monitor Without Assuming Success
Some attempts will fail and the flower will drop. If the base remains attached and begins to swell, continue photographing the same label and location. Pod development takes many months and varies with the plant and growing conditions. A pod confirms seed development, but honest records are still essential when the pollen parent was not fully controlled.
Keep the Record Through First Bloom
- Keep the pollination label connected to the pod, seed lot, germination batch, and each seedling.
- Assign each seedling its own identifier; siblings from the same pod are genetically different.
- Do not expect a seedling to duplicate either parent’s flowers.
- Preserve the record until first bloom and continue photographing later bloom cycles.
Continue the Seed-to-Bloom Project
- Plumeria Seed Pollination and Pollinators — natural pollination, controlled records, and parent roles.
- Plumeria Seed Pod Timeline — pod set, maturation, opening, and collection.
- Plumeria Seed Pod Gallery — developing and mature pod photographs.
- 2018 Plumeria Pollination Projects — a historical project record.
- Germinating Plumeria Seeds — continue after collection and seed selection.
Sources, Method, and Photo Credit
The controlled-cross procedure is attributed to Watson, Chinn, Clay, and Brewbaker’s 1965 University of Hawaiʻi Cooperative Extension Circular 410, Hawaiian Plumerias. The circular is listed as out of print in Plumeria in Hawaiʻi; its pollination steps are reproduced in The Handbook on Plumeria. The fishing-line method has been used in experimental work described by Fairchild Tropical Botanic Garden; practical soft-line handling is described by Dennis Schmidt. Style-head anatomy was checked against peer-reviewed research on Apocynaceae style heads. Safety guidance was checked against University of Wisconsin Extension, University of California Agriculture and Natural Resources, and UF/IFAS Extension. Microscope photographs are by Linda O’Hara and are used with permission.