When someone wants a simple place to start, this is the method I would explain first. The seed germinates where its roots will begin growing. There is no wet towel to unwrap and no bare root to move on the day it opens. The important choice is a mix that stays evenly damp without becoming a heavy, airless mass.
Best fit: A straightforward first batch; little handling of new roots.
What you need
- Plumeria seeds, labels and a pencil or planting stick.
- Clean small pots or individual cells with drainage holes; roughly 3–4-inch nursery pots are a practical home option, not a required size.
- Fresh seed-starting mix, clean water, a fine watering spout and a thermometer. An optional vented cover is useful in dry air.
Step by step: what to do and why
1. Choose a mix before adding extras
Use a fresh commercial seed-starting mix. Read whether it already contains fertilizer. A coir-and-perlite blend is another grower option, but test a small wetted pot before committing the seeds.
Why: The mix must hold water against the seed while allowing excess water to leave. Coarse chunks can leave a small seed suspended in an air gap; fine, compacted material can stay saturated.
2. Wet the mix throughout
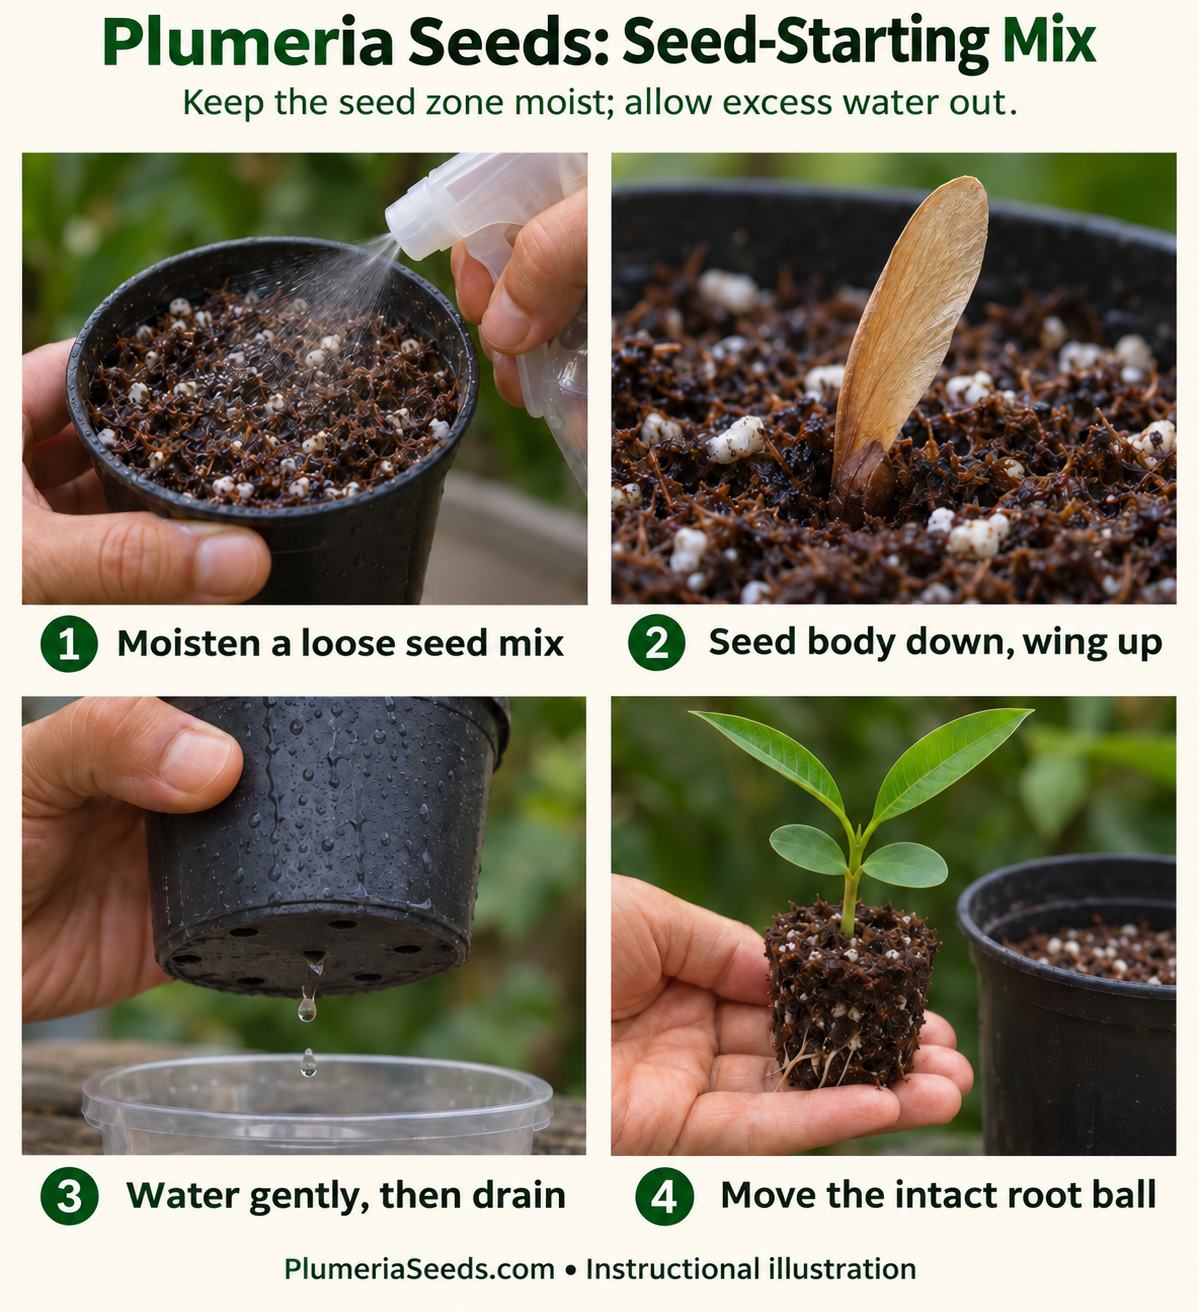
Add water in a separate clean container, mix thoroughly, then fill the pots without packing hard. Water once and let the pots drain.
Why: Prewetting exposes dry pockets before the seed is planted. A damp handful should feel moist rather than release a stream when gently squeezed.
3. Record the seed identity
Label each pot with seed parent, pollen parent if known, date and an individual number. Leave an unknown pollen parent as unknown. An optional several-hour plain-water soak can precede sowing.
Why: A seedling is a new individual. Good labels keep an interesting future flower connected to its actual history.
4. Set the body down and the wing up
Make a hole that fits the thicker seed body. Set that body into the mix, bring loose mix into contact around it and leave the papery wing exposed. Do not use the full wing length as a planting-depth measurement.
Why: The living part needs moisture contact. Burying the whole wing can put the seed unnecessarily deep; leaving the entire body above the mix can let it dry.
5. Choose a stable location
Keep the pots warm, with bright filtered light available. For an indoor trial, about 77°F (25°C) at seed depth is a reasonable starting setting, not a proven optimum. Check the medium rather than relying on the room thermostat.
Why: The seed experiences its immediate surroundings. A sunny enclosed tray can become much hotter than the reported air temperature.
6. Water according to the pot
Check daily. Feel near seed depth at a spare edge and compare pot weight. Water gently when the seed zone is beginning to lose moisture; let surplus drain and empty the catch tray.
Why: A fixed daily dose may drown a slow-drying pot or under-water a fast-drying one. A dry-looking surface alone does not describe the whole root zone.
7. Open the growing space as shoots emerge
If a cover was needed, increase its opening as seedlings rise and remove it once they remain upright without wilting. Supply bright light and gentle air movement.
Why: A cover conserves water, but young leaves soon need room, light and conditions that do not remain continually wet.
8. Move the root ball when it is ready
Pot on when roots hold the mix together and the plant needs more room. Support the root ball, keep the stem at its former depth and water it in gently. A shared flat generally needs earlier separation than individual pots.
Why: The aim is continuous root growth. Waiting for a particular birthday can leave one seedling crowded while another is still too small to handle.
When something is not going as expected
The pot stays heavy and wet
Clear blocked holes, empty standing water and increase ventilation. For the next batch, change the medium or container rather than repeatedly stirring around the seed.
Nothing is visible yet
Keep sound seeds under observation. Many grower reports describe roughly one to three weeks, but that is not a discard deadline. Check actual temperature and moisture before assuming failure.
A seedling collapses at the surface
Separate the affected pot and review water, cleanliness and light. A soft, constricted stem is concerning for damping off; extra fertilizer is not the remedy.
What I would watch next
My measure of success is a seedling with continuing leaf and root growth. Once true leaves and an active root system are present, use a suitable seedling fertilizer according to its label, accounting for any starter charge already in the mix.
Method infographic
Sources and scope
The steps are an original home-growing synthesis. Source accounts establish documented use; the added monitoring and handling instructions are practical guidance, not results from a controlled comparison.
- University of Hawaii CTAHR — Plumeria, OF-24 (1998) — Extension guidance for plumeria: shallow sowing and transfer after true leaves. This older publication is not a current seed-market or universal flowering-time reference.
- University of Georgia Extension — Starting Plants From Seed for the Home Gardener (2025) — General container, medium, moisture and pellet principles; not a plumeria temperature trial.
- University of Minnesota Extension — How to prevent seedling damping off — General disease prevention; shared water can spread pathogens. Symptoms alone do not identify a pathogen.