The best way to germinate plumeria seeds depends on your space, seed quantity, humidity, and how closely you want to watch the roots. After comparing plumeria-specific grower guides and nursery instructions, the most reliable approaches all come back to the same basics: fresh seed, labels, warmth, clean moisture, air around the seed, and bright light ready when seedlings stand up.

Before Any Method: Prepare the Seeds
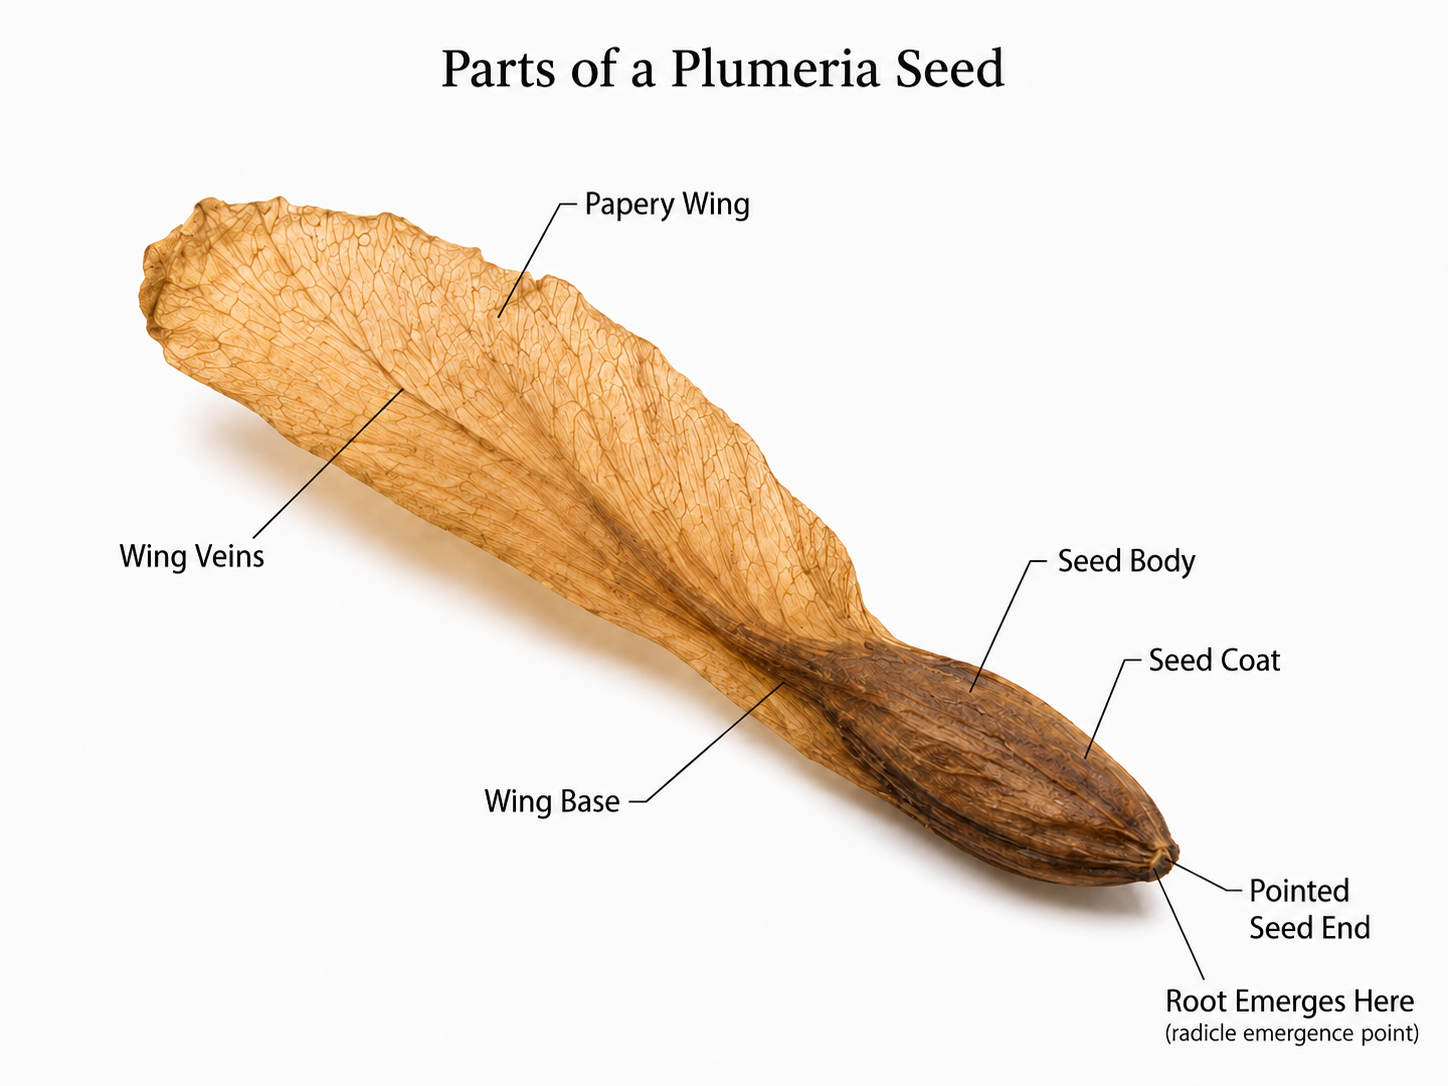
- Label first. Write the pod parent, seed source, date, and method before the seeds get wet.
- Inspect the seed. Full seeds usually feel thicker than paper-thin empty seeds.
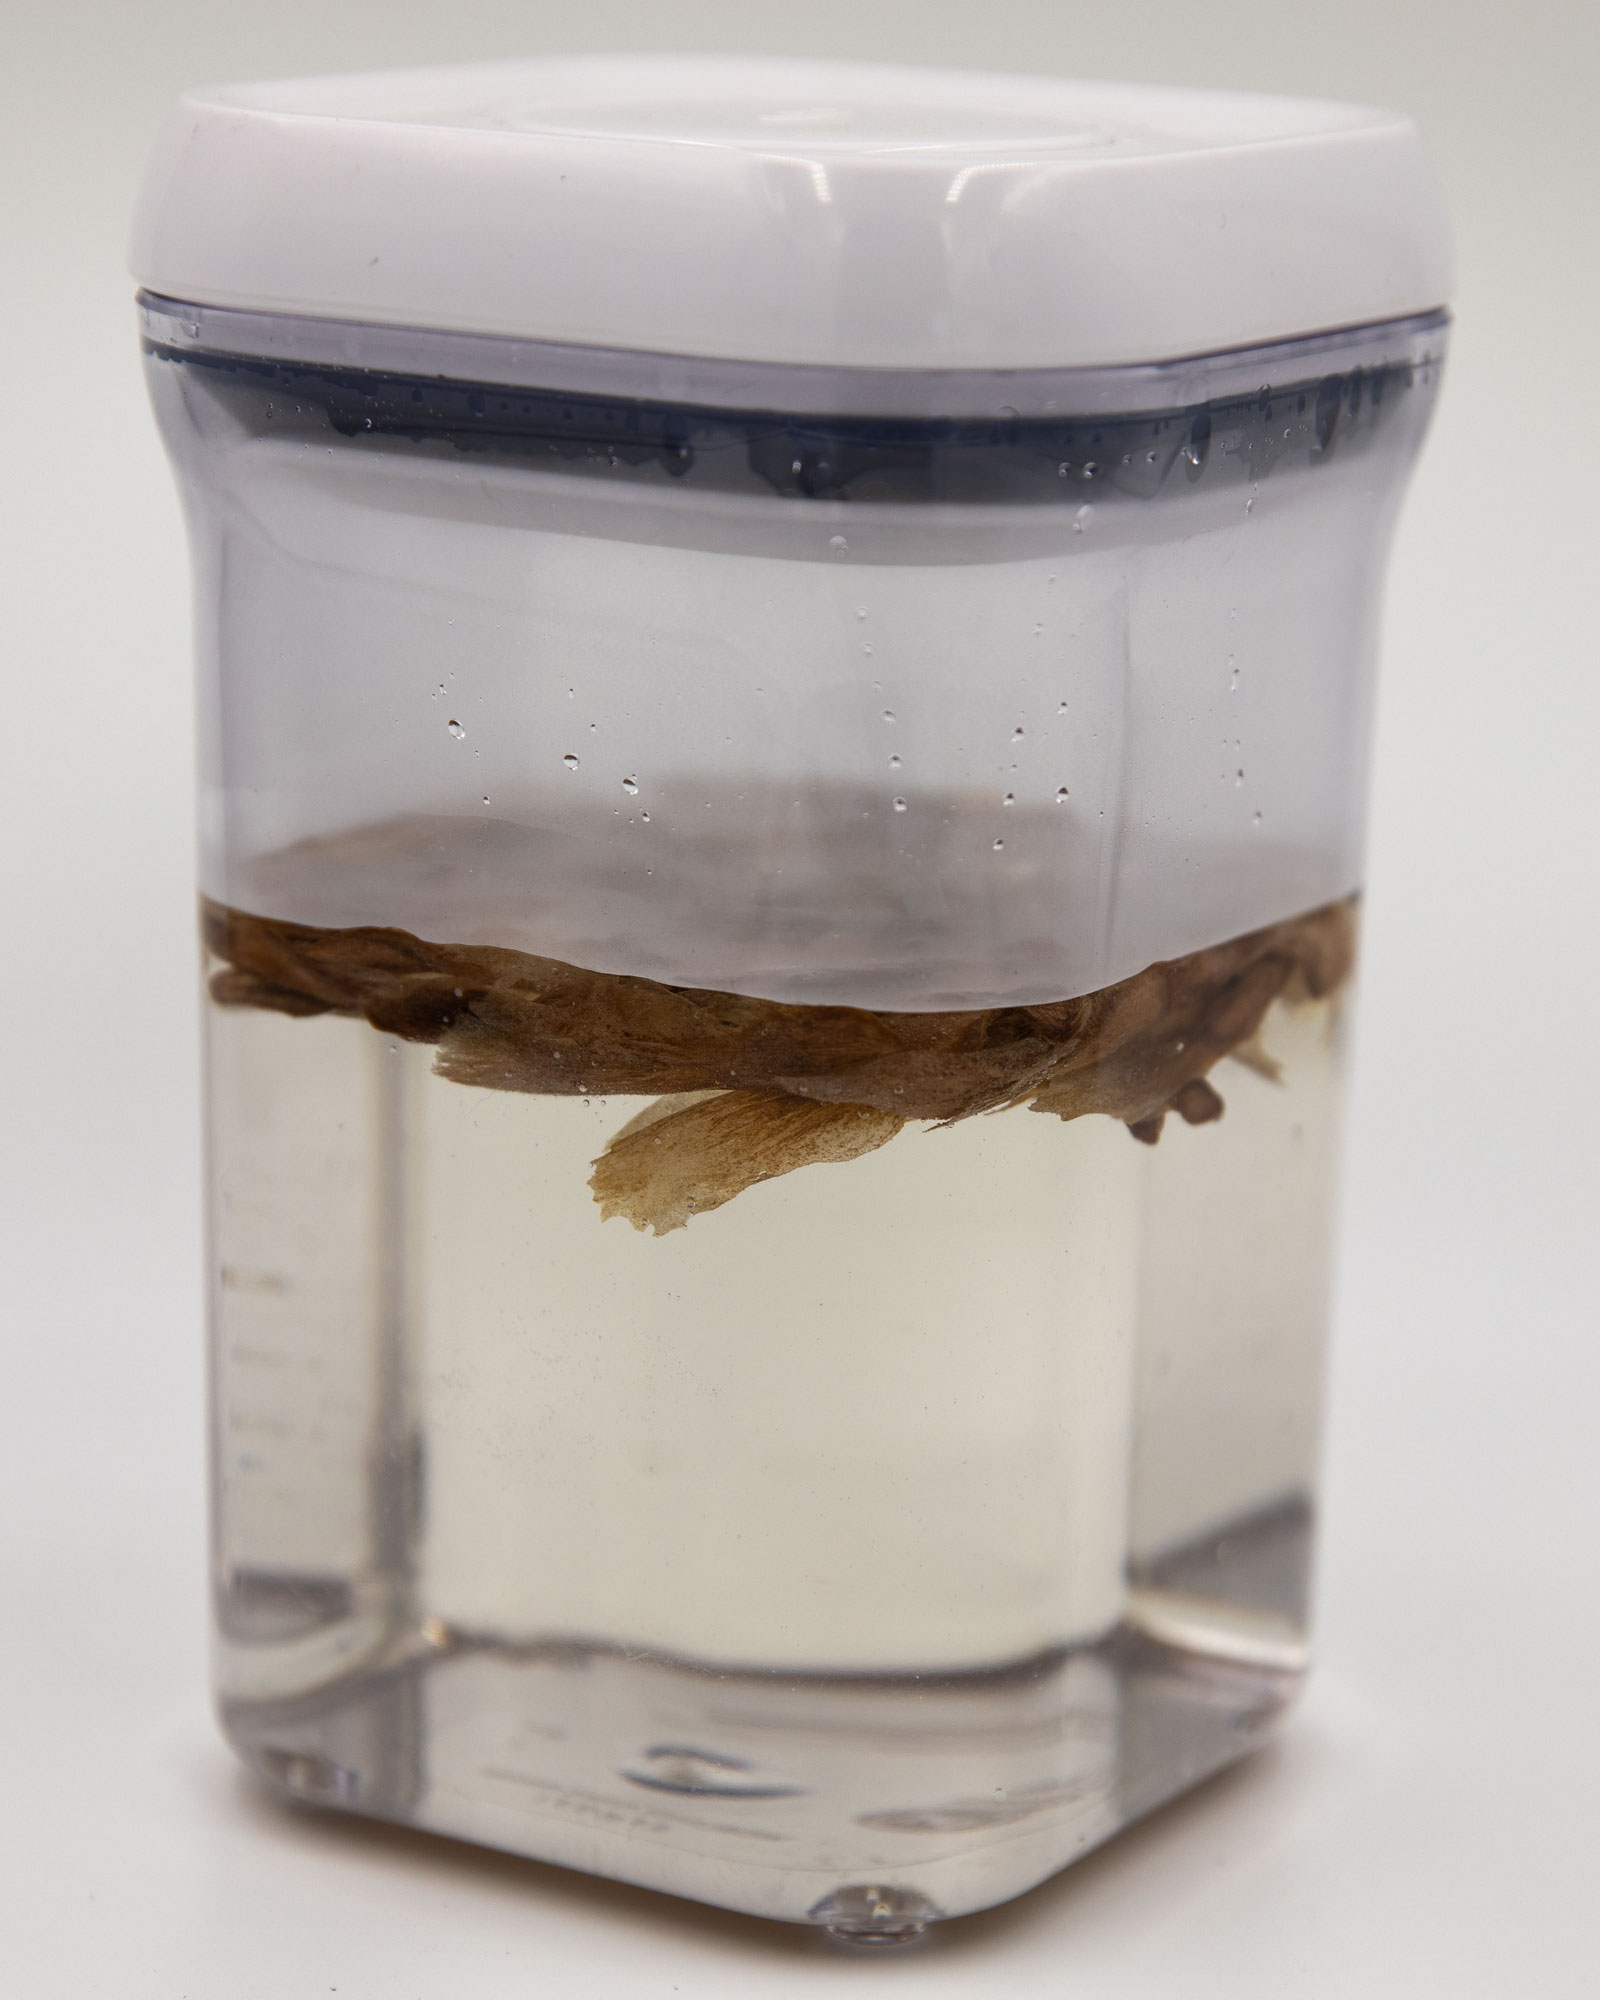
- Soak briefly if using a planting method. A 2 to 8 hour soak is enough for many batches. Overnight can work, but do not keep seeds soaking after roots appear.
- Use warmth. Most plumeria seed guides aim for warm conditions, commonly around 70 to 85 F, with the seed medium damp but not wet.
- Prepare light before germination. Seeds do not need strong light to crack, but seedlings need bright light quickly once they stand up.
Comparison Table
| Method | Best For | Typical Steps | Pros | Main Risks | My Use |
|---|---|---|---|---|---|
| Soak and direct sow in mix | Simple home setup, small pots, seed trays | Soak, plant shallowly, keep warm and damp | Simple, fewer transfers, easy for beginners | Mix can stay too wet; roots are hidden | Reliable basic method |
| FlexiPlug or starter plug | Seed projects, labeled batches, easier transplanting | Soak plugs, insert seed body, wing up, keep tray warm | Good air/moisture balance, less root disturbance | Plugs dry out if neglected; tray labels must stay clear | Best all-around |
| Paper towel / baggie | Checking viability and watching roots | Damp towel, seeds spaced apart, warm bag, plant when root shows | Easy to see germination, space-saving | Roots can be damaged if left too long; mold if too wet | Good for small batches |
| Perlite tray or perlite cell | Growers who want drainage and air | Dampen perlite, set seed head down, keep warm and damp | Excellent air, lower compaction, easy root oxygen | Can dry quickly; needs careful transplant timing | Good in humid areas |
| Peat or coir pellet | Tidy indoor seed starting | Hydrate pellet, open top, insert seed shallowly, keep warm | Clean, compact, easy to move as one unit | Netting can restrict roots; pellets can stay too wet | Useful with caution |
| Short water start | Viability check before another method | Soak in warm clean water, remove when plump or root shows | Fast hydration, easy to sort obvious weak seed | Long soaking can damage new roots or encourage rot | Prep step, not final home |
| Covered tray / humidity dome | Dry indoor air or cool starts | Sow in tray, cover lightly, vent daily, remove cover after sprouting | Holds steady humidity and warmth | Stale air and fungal problems if never vented | Helpful if vented |
| Hydroponic plug start | Advanced projects and controlled systems | Start in plug, move to hydro system after seedling is stable | Strong control over moisture/nutrients once established | Too much water too early; system failure; nutrient mistakes | Advanced experiment |
Method 1: Soak and Direct Sow in Seed-Starting Mix
This is the simplest method and the one most beginners should understand first.
- Fill a small pot, cell tray, or shallow seed tray with a loose seed-starting mix or cactus-style mix amended with perlite.
- Moisten the mix evenly before planting. It should be damp, not muddy.
- Soak seeds for several hours in warm clean water.
- Plant each seed shallowly with the thicker seed body in the mix and the wing or tail pointing upward.
- Keep the tray warm and bright, but avoid harsh direct sun through glass if seedlings may overheat or stretch.
- Mist or water gently when the top begins to dry. Do not flood the seed.
- Once seedlings stand up and produce leaves, increase light and airflow.
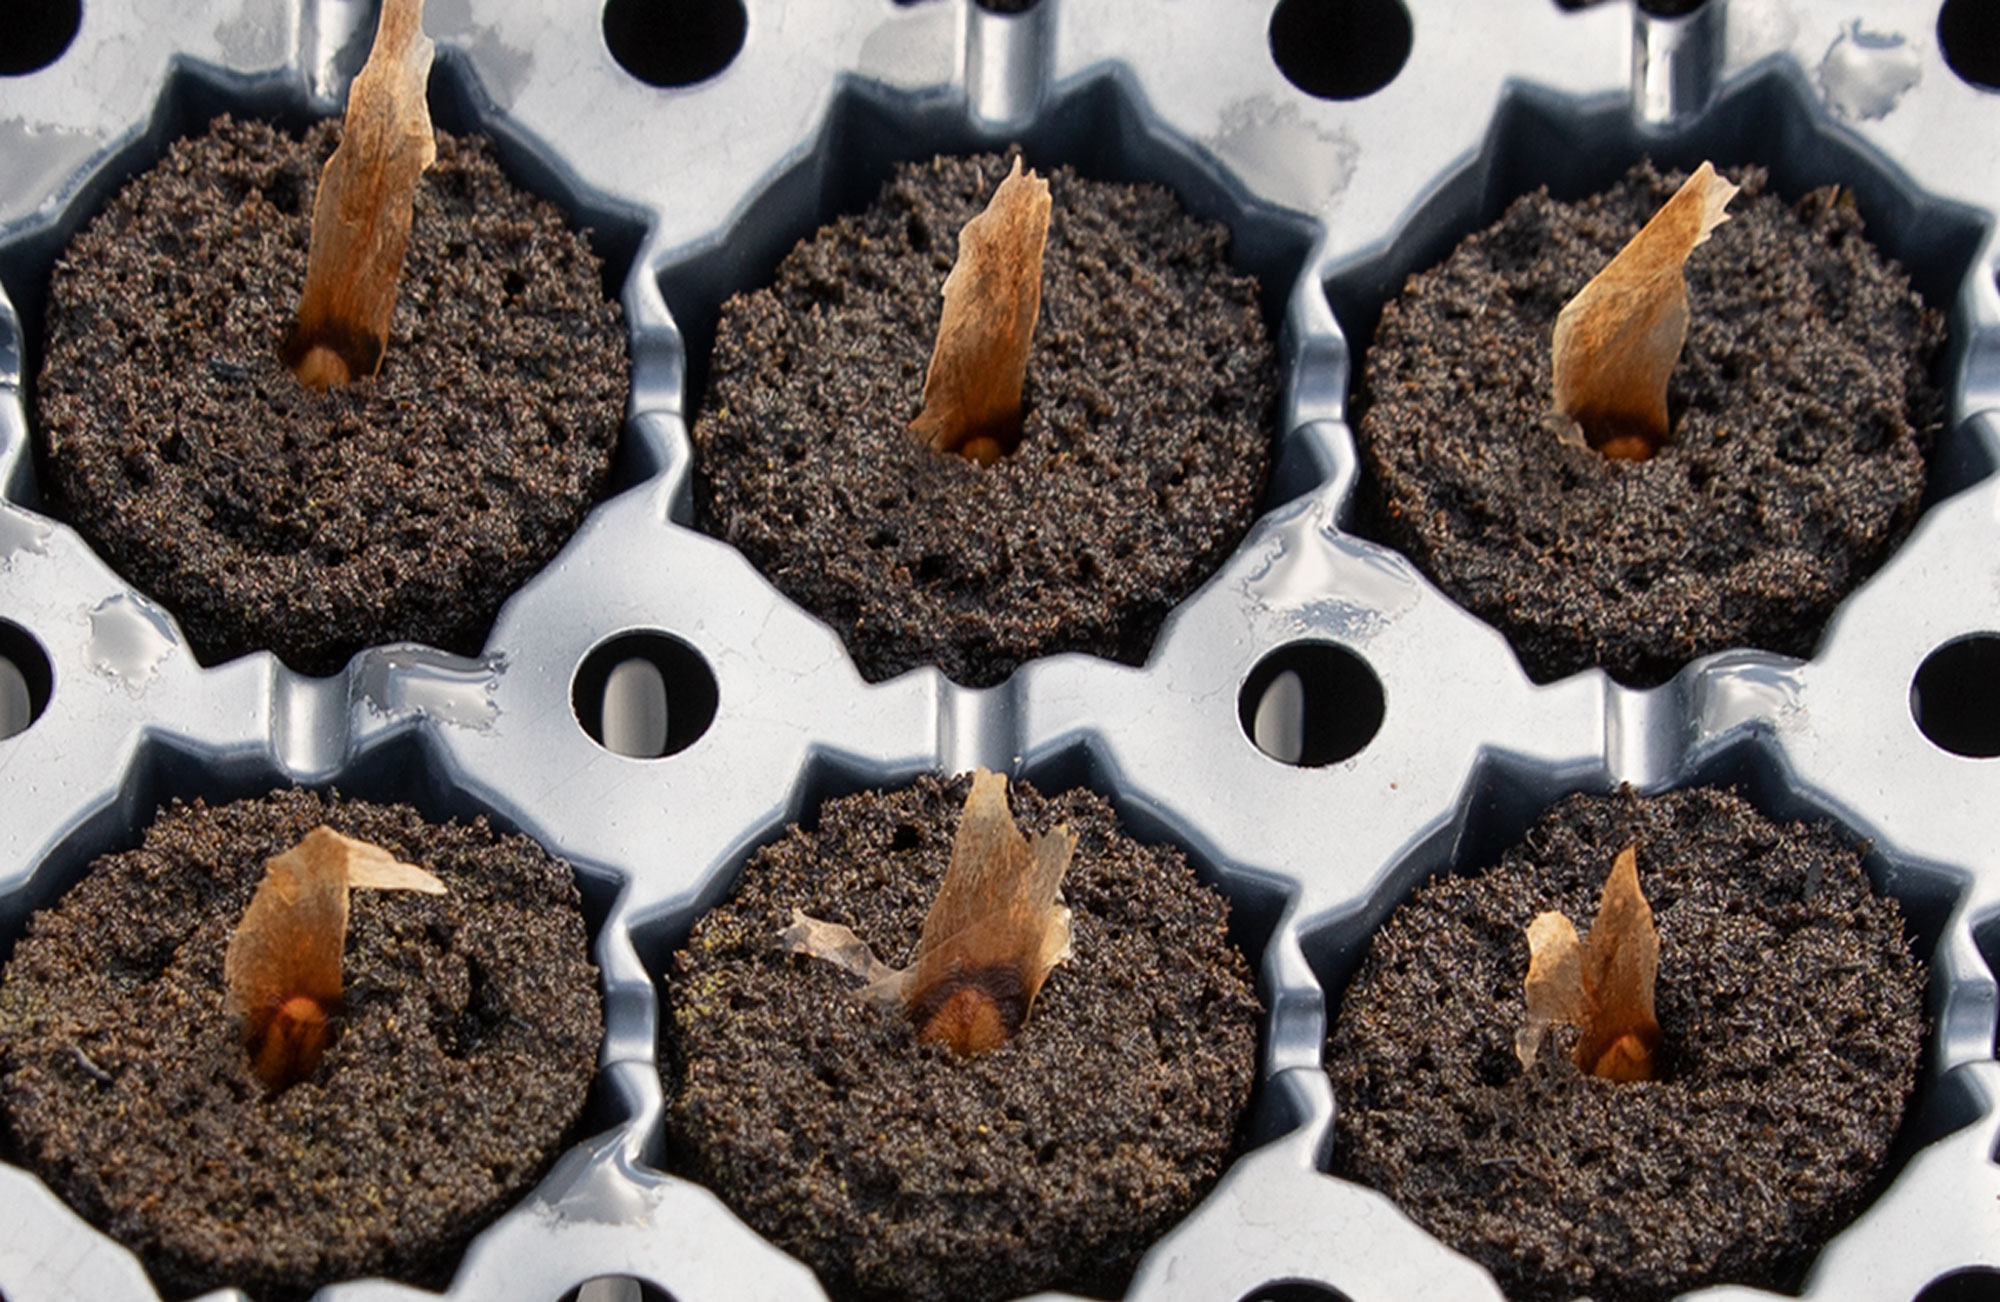
Method 2: FlexiPlug or Starter Plug Method
This is my favorite all-around method for seed projects because plugs reduce root disturbance and make it easier to move seedlings later.
- Place plugs in a tray and soak them until evenly moist.
- Drain excess liquid so plugs are moist but not sitting in standing water.
- Make a small opening in the top of each plug.
- Insert the seed body into the plug with the wing sticking up.
- Keep the tray warm. A humidity cover can help, but vent it daily.
- Check moisture each day. Plugs should not dry hard, but they should not smell sour.
- Transplant when roots show and the seedling has enough top growth to handle the move.
Method 3: Paper Towel or Baggie Method
The paper towel method is useful when you want to see which seeds crack before planting. It is not a place to grow seedlings for long.
- Moisten a paper towel with clean water. It should be damp, not dripping.
- Place seeds on one half of the towel with space between them.
- Fold the towel over the seeds and slide it into a plastic bag or covered container.
- Keep the bag warm and bright but out of scorching sun.
- Open the bag daily for air and to check for mold.
- As soon as a root appears, move that seed into a plug, perlite, or seed mix.
- Plant carefully. Hold the seed body, not the new root.
Method 4: Perlite Tray or Perlite Cell Method
Perlite gives roots air and drainage. It can work well, especially where wet soil is a problem.
- Fill cells or a shallow container with clean perlite.
- Dampen the perlite before planting.
- Set each seed with the seed body partly covered and the wing exposed.
- Keep the container warm and evenly damp.
- Because perlite can dry quickly, check moisture more often than with soil.
- When the seedling has leaves and enough root to move, transplant into a more complete growing mix.
Method 5: Peat or Coir Pellet Method
Pellets are tidy and easy indoors. I treat them like plugs, but I watch moisture and root restriction closely.
- Hydrate pellets fully, then pour off standing water.
- Open or loosen the top of the pellet.
- Insert the seed shallowly with the wing up.
- Keep the pellet warm and lightly moist.
- Vent any dome daily.
- When roots reach the edge, transplant before the pellet netting or dense peat slows growth.
Method 6: Short Water Start
A water start is best as a short pre-germination or viability step, not a long-term growing method.
- Place seeds in warm clean water for a few hours.
- Watch for seeds to plump. Some growers use sinking as one clue, but it is not a perfect test.
- Remove seeds before roots become long and fragile.
- Plant into plugs, perlite, or seed mix.
- If a root has already appeared, handle the seed very gently and plant immediately.
Method 7: Covered Tray or Humidity Dome
A covered tray can help in dry indoor air, but stale humidity is dangerous if the cover never comes off.
- Plant seeds in mix, plugs, or pellets.
- Cover the tray loosely with a dome or clear cover.
- Keep warm and bright.
- Open daily to exchange air and check for excess condensation.
- Remove or prop the cover open once seedlings emerge.
- Add gentle airflow as seedlings begin active growth.
Method 8: Hydroponic Plug Start
Hydroponics is better treated as an advanced seedling-growing system than a beginner germination shortcut.
- Start seeds in plugs rather than loose water.
- Wait until the seedling is upright and roots are visible.
- Move the plug to the hydro system only after the seedling is stable.
- Use a mild nutrient approach at first.
- Keep water oxygenated and avoid drowning the crown of the seedling.
- Track each seedling carefully because growth can move quickly in a controlled system.
Removing the Seed Shell or Seed Coat
With plumeria seeds, the safest rule is to let the seed remove its own coat. The papery wing and seed coat protect the embryo while the seed is waking up. Removing the shell before germination can injure the seed body, expose the embryo, dry the seed, or introduce disease.
| Choice | Possible Benefit | Main Risk | Best Practice |
|---|---|---|---|
| Leave the shell alone | Lowest risk; the seedling often sheds it naturally. | A tight seed coat can occasionally trap the cotyledons. | Default choice for most seedlings. |
| Soften a stuck shell | Humidity or a drop of water can help the coat loosen without force. | Too much humidity for too long can raise damping-off risk. | Moisten only the seed coat and give it time. |
| Gently remove a softened shell | Can free trapped cotyledons if the shell is clearly preventing opening. | Easy to tear cotyledons, break the stem, damage the growing point, or pull the seedling loose. | Use clean tweezers only after the coat softens and slides with almost no resistance. |
| Peel a dry shell | None worth the risk. | Often kills or permanently damages the seedling. | Do not pull a dry, tight seed coat. |
Removing the Shell Before Germination
Some growers remove part or all of the seed coat before germination. I consider that an advanced, optional experiment rather than a beginner method. It can help a few difficult seeds, but it can also ruin good seeds if the embryo is bruised, nicked, dried, or exposed to contamination.
| Possible Pros | Possible Cons | My Recommendation |
|---|---|---|
| Water reaches the seed body faster, especially on older or very dry seed. | The embryo and root-emergence point lose their protection and can be damaged easily. | Do not use this as the default method for healthy fresh seed. |
| You can inspect suspicious seed and remove loose dirty or moldy outer material. | Handling can introduce disease or dry the seed before it is planted. | Only test a few seeds from a batch before treating all of them. |
| It may reduce stuck seed-coat problems after emergence. | Removing too much coat can lower germination instead of improving it. | Moisten first, remove only what loosens easily, and plant immediately. |
How I Handle a Stuck Seed Coat
- Do not remove the shell before germination.
- If a seedling stands up with the coat stuck on the cotyledons, wait first. Many shed it on their own.
- Moisten the seed coat with clean water, or briefly raise humidity around that seedling, then wait 12 to 24 hours.
- If the shell softens and loosens, support the seedling and ease the coat sideways with clean tweezers.
- If there is resistance, stop. A stuck shell is less dangerous than tearing off the growing tip.
My Ranking for Most Growers
- FlexiPlug or starter plug method: best balance of moisture, air, and transplant safety.
- Soak and direct sow: easiest for beginners and works well with a light, draining mix.
- Paper towel or baggie: useful for checking viability, but plant quickly after roots show.
- Perlite tray: good for experienced growers who can monitor moisture closely.
- Pellets, domes, and hydro systems: useful in the right hands, but each adds a management detail that can cause problems if ignored.
Research Notes and Sources
This guide was prepared by comparing plumeria-specific growing instructions and grower methods, including Florida Colors Nursery guides to growing plumeria from seeds and soaking plumeria seeds, Plumeria Care articles on perlite tray growing and the paper towel method, Black Cat Plumeria’s paper towel/baggie method, GrowingPlumeria.com’s seed and seedling care notes, and PlumeriaSeeds.com’s own hydroponic seedling experiment.
Keep Learning
- Germinating Plumeria Seeds – a shorter step-by-step starter guide.
- Soaking Plumeria Seeds – soaking photos and observations.
- When to Transplant Plumeria Seedlings – what to do after germination.
- Common Plumeria Seedling Mistakes – what to avoid with new seedlings.