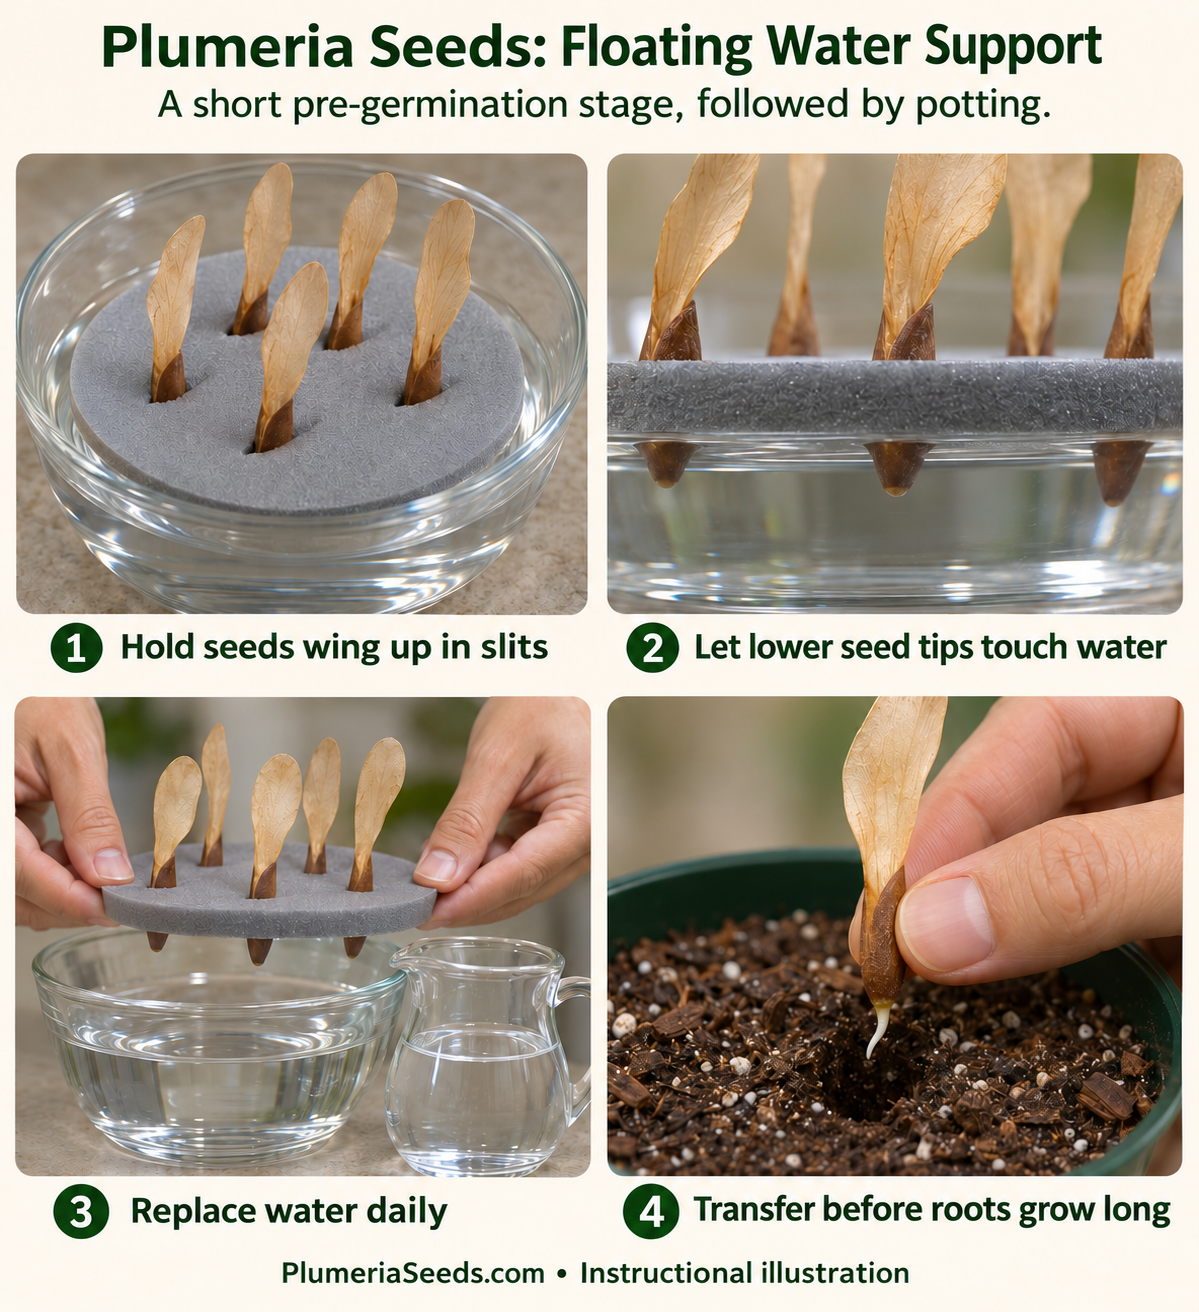
A floating support holds the seed with its lower end in water and its wing above the surface. It is useful for seeing the first root, but I would treat it as a short pre-germination stage. Jean Thielmann documented this approach in 2014. Her experience is a useful starting point, not a promise that every seed lot will respond at the same speed.
Best fit: A small, closely watched batch with visible root emergence.
What you need
- A clean, stable bowl or shallow container and clean water.
- Clean, inert closed-cell sheet foam suitable for water contact, or a purpose-made floating seed support; avoid floral foam and treated or unknown packing materials.
- Scissors, a safe cutting surface, labels and prepared pots of damp seed-starting mix.
Step by step: what to do and why
1. Prepare pots and labels first
Make the next-stage planting holes before handling sprouted seeds. Assign each seed a marked position on the support.
Why: This method creates exposed roots. Preparing ahead reduces the time they spend drying in the air.
2. Make a loose-fitting raft
Cut the support smaller than the container so you can lift it easily. Make spaced slits just large enough to grip each seed without crushing it. Cut away from your hands.
Why: A removable support makes water changes possible without pulling individual seeds out.
3. Insert seeds before floating
Place each seed through its slit, body down and wing up. Adjust so the lower seed tip contacts the water while the wing remains above it. Do not fully submerge the seeds.
Why: The support controls position; it does not generate oxygen or sterilize the water.
4. Use plain clean water for the trial
Add enough water to float the support freely, with room below for short roots. Keep the container warm and in bright indirect light, away from direct sun through glass.
Why: The first task is hydration and germination. An unmeasured fertilizer or hormone mixture adds another variable and can increase salt exposure.
5. Replace the water daily
Lift the raft carefully, replace the water with clean water at a similar temperature and return the raft promptly. Keep exposed roots moist during the change. Clean away visible residue without scrubbing the seeds.
Why: Daily replacement is part of the documented grower method. It limits stagnation but does not guarantee freedom from disease or a particular oxygen concentration.
6. Watch each seed separately
Check for an emerging pale root and a sound seed body. Move sprouted seeds individually rather than waiting for the slowest ones. Remove decomposing seeds.
Why: Seeds from one pod are not identical. A single long wait can leave early roots tangled while other seeds are still swelling.
7. Release the support around the seed
Transfer while the root is short; roughly 5–10 mm is a practical handling target rather than a biological requirement. Open the slit sideways, or cut the foam away at a safe distance from the root.
Why: Pulling a root backward through a tight slit can break it. Releasing the support is preferable to forcing the plant through it.
8. Set the root into moist mix
Make a hole long enough for the root, place it downward without bending, and settle the mix gently around it. Keep the seed body near the surface and the wing exposed. Water gently and use a bright, protected recovery location.
Why: The move changes the root’s surroundings. Close moisture contact and protection from drying help it continue growing.
When something is not going as expected
Water gets cloudy or smells
Replace it, clean the vessel and examine seeds for decay. Do not continue topping up a deteriorating container.
A seed floats without a raft
Floating does not prove it is dead. Surface tension, the wing and trapped air affect buoyancy. Direct sow it or use a supported trial.
Roots are getting long in water
Transfer them carefully now. Sustained hydroponic growing requires a separate oxygen and nutrient plan; this bowl is not a complete long-term system.
What I would watch next
An unsupported water start is a variation of the same approach, but orientation and handling are harder to control. For routine home use, I would end a plain soak after several hours or overnight and plant, rather than leave valuable seeds fully submerged for days. Neither floating nor sinking is a stand-alone viability test.
Method infographic
Sources and scope
The steps are an original home-growing synthesis. Source accounts establish documented use; the added monitoring and handling instructions are practical guidance, not results from a controlled comparison.
- Jean Thielmann — Rooting Plumeria Seeds, Water Method (2014) — Firsthand floating-support germination and potting account. Reported success rates are not comparative evidence.
- PlumeriaKopen — Growing and care instructions — Primary seller instructions documenting loose-medium bags and foam-supported water starts; sparse operational detail and no controlled comparison.
- University of Minnesota Extension — Small-scale hydroponics — General root oxygen, nutrient and reservoir principles; no validated plumeria nutrient recipe.