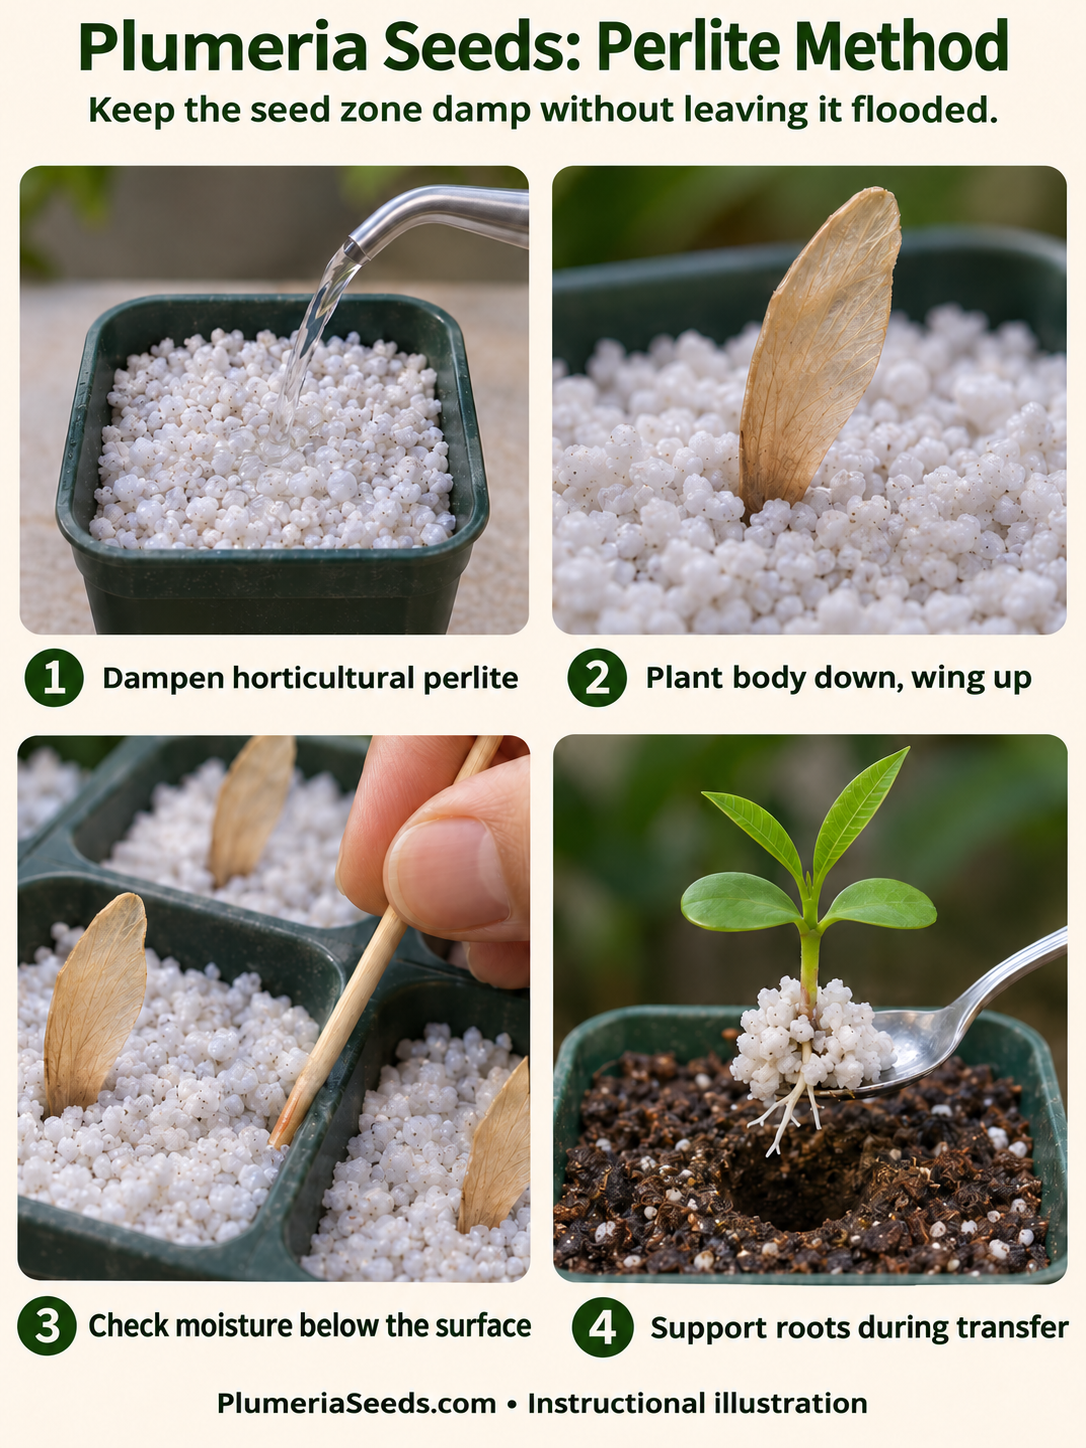
Perlite offers a very different feel from peat or coir. Its pale particles make the seed position easy to see, and it does not collapse into a dense soil mass. The tradeoff is that a small perlite cell can dry quickly and provides little nutrition on its own. Carl Herzog described using perlite cells for plumeria seeds; the procedure below adapts that idea for a small home batch.
Best fit: Growers who can monitor a fast-draining, low-nutrient medium closely.
What you need
- New horticultural perlite, drained individual cells or small pots and a catch tray.
- A small piece of clean mesh if drainage holes are large enough to lose the perlite.
- Labels, clean water, a fine watering spout and seedling potting mix for transfer.
Step by step: what to do and why
1. Choose clean horticultural material
Use perlite sold for growing plants. Dampen it while handling to limit dust, following its package precautions. Avoid crushing it into powder.
Why: Particle structure matters. Dusty fines and compacted particles do not behave like an open bed of horticultural perlite.
2. Prepare drainage
Place a small mesh patch over overly large holes, then fill the cells loosely. Do not seal the holes or add a separate gravel layer.
Why: The container should retain the particles while allowing excess water out. Adding gravel does not replace proper drainage.
3. Wet and let it settle
Water slowly until the perlite is uniformly wetted and excess drains. Top up if necessary without pressing hard.
Why: Dry perlite can float or shift under a fast stream. Settling it before sowing reduces disturbance afterward.
4. Place one seed per cell
Make a small recess, put the seed body down and bring damp particles around it. Leave the wing visible. Label the position.
Why: The seed needs several points of moist contact. A large gap beneath it can leave the body dry despite a wet-looking tray.
5. Protect from rapid drying
Place the tray warm and bright, sheltered from strong wind. A vented cover may help in dry air; do not put a covered tray in direct sun.
Why: The main adjustment from a peat-based mix is moisture monitoring. A method that works in humid weather may demand more attention in a dry room.
6. Check below the visible surface
Use a spare cell or a clean stick at the edge to check moisture, and compare cell weight. Rewater gently as the seed zone begins drying, then drain.
Why: The white surface is a poor moisture gauge. Frequent tiny sprays can leave the root zone dry while making the top look recently watered.
7. Plan nutrition after establishment
As true leaves develop, use a fertilizer labeled for seedlings at its directed rate, or move the rooted plant into a suitable mix. Do not put concentrated granules beside an emerging root.
Why: Perlite is a support medium, not a complete food supply. Germination uses seed reserves, but continued growth needs an appropriate nutrient source.
8. Transfer before roots become difficult to separate
Moisten the perlite and support the young root system with a spoon and its surrounding particles. Lower it into a prepared hole, settle mix around it gently and water.
Why: Loose perlite may fall away. The objective is to support the roots throughout the move rather than shake them clean or hold the plant by its stem.
When something is not going as expected
Seed moves when watered
Slow the flow and water along the cell edge. Reset only before rooting; afterward settle material gently around the existing position.
Seedling wilts in a seemingly wet tray
Check moisture at root depth, heat and root condition. A wet catch tray cannot help a cell that is not in useful contact with that water.
Perlite remains flooded
Empty the catch tray and clear blocked drainage. High porosity does not make a permanently flooded cell oxygen-proof.
What I would watch next
Vermiculite, clean horticultural sand, pumice and blends are related substrate options, not equivalent substitutes. Vermiculite generally holds more water; sand and pumice vary substantially by grade. Test the chosen medium’s wetting and drainage in an empty cell first rather than carrying over the same watering schedule.
Method infographic
Sources and scope
The steps are an original home-growing synthesis. Source accounts establish documented use; the added monitoring and handling instructions are practical guidance, not results from a controlled comparison.
- Carl Herzog — Growing plumeria from seeds (2014) — Firsthand account of perlite cells. Timing and fertilizer choices belong to that grower; this series supplies an adapted home workflow.
- New Mexico State University — Seed Propagation of Plants, H-112 — General paper germination testing and substrate choices. The old kitchen-oven sanitation procedure is not carried into these guides.
- Yafuso et al. (2019) — Water and air relations in propagation substrates — Peer-reviewed substrate physics, DOI 10.21273/HORTSCI14145-19. Peat, rockwool and phenolic foam in propagation cells; not a test of FCN plugs or plumeria seeds.