Pellets are convenient because the growing medium arrives compressed and expands with water. I would choose them for ease of handling, not because a pellet automatically provides better germination. A small pellet can dry rapidly, while the same pellet under an unvented cover can stay too wet.
Best fit: A tidy, small indoor batch using inexpensive supplies.
What you need
- Seed-starting peat or coir pellets with enough expanded depth for the seed body.
- Waterproof catch tray, a draining support if available, clean water, labels and a planting stick.
- Small pots and seedling mix ready for the next stage.
Step by step: what to do and why
1. Read the pellet label
Check expanded dimensions, any nutrient charge and whether the netting is intended to remain at planting. Choose horticultural coir rather than an unknown salty fiber product.
Why: Pellets vary in size and construction. Coir source and processing affect its suitability; a brand name is not a substitute for checking the current package.
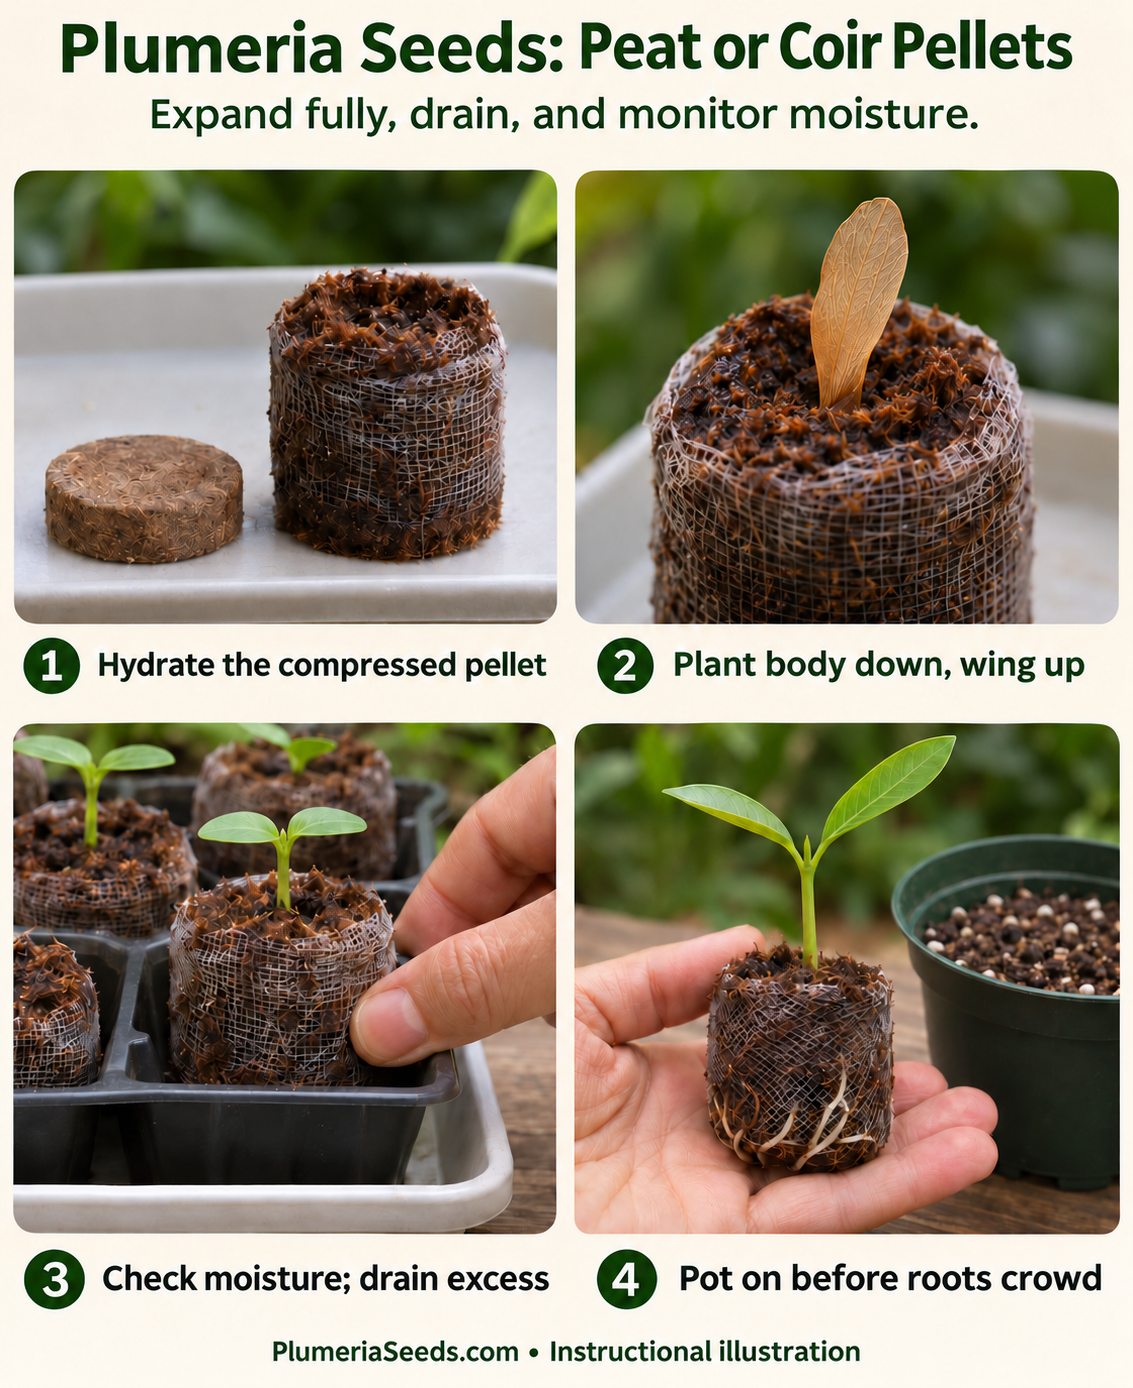
2. Expand fully
Add clean water in stages and wait for the pellet to reach its specified size. Check for a hard, unexpanded center, then pour away excess water.
Why: A hydrated outer layer can conceal a dry center. Planting into an incompletely expanded pellet can give uneven contact or disturb the seed later.
3. Open the top
Ease the top opening apart without dismantling the pellet. Make a recess sized to the plumeria seed body.
Why: The seed needs direct contact with the moist medium, rather than resting on netting over a hollow pocket.
4. Plant and label
Insert one seed body down, leave the wing exposed and close the medium lightly around the body. Label the pellet’s tray position. An optional plain-water presoak is separate from pellet hydration.
Why: Keeping one seed per pellet avoids a later need to tease two root systems apart.
5. Use a cover only when it helps
Place the tray in a warm, bright protected area. A vented cover can reduce drying in low humidity; keep it out of direct sun and check beneath it daily.
Why: A cover changes both evaporation and temperature. It is not a reason to put a sealed tray on a hot windowsill.
6. Check the whole pellet
Watch for shrinking, light weight or a dry center. Rewet gently and drain. If the pellet remains heavy and saturated, stop adding water and improve ventilation.
Why: Small volumes have little reserve, but permanent standing water can eliminate much of the available air. This drained pellet method is not the reservoir method.
7. Make space for the seedling
As it emerges, vent the cover and then remove it once the seedling tolerates open air. Provide adequate light. Avoid pushing on a stuck seed coat.
Why: The first pair are seed leaves, or cotyledons. True leaves follow from the growing point between them; that point is easily damaged.
8. Pot on before the pellet becomes restrictive
Support the pellet in your palm and inspect the net. Follow product instructions; if a tough mesh is visibly trapping roots, carefully slit only accessible mesh without cutting roots or pulling it off embedded roots. Set the pellet into moist mix at its former stem depth.
Why: The goal is an unobstructed path into the new mix. Aggressive net removal can cause more damage than leaving root-penetrated material in place.
When something is not going as expected
Roots emerge but the top is drying
Pot on and monitor the original pellet after transplant. A larger surrounding pot does not automatically keep its small central pellet moist.
Pellet tips over
Support it in a properly sized cell or pot it on when rooted. Do not mound wet material high around a tender stem to hold it upright.
Seedling is pale or slow
Check roots, light and moisture first. Once established with true leaves, account for the pellet’s fertilizer charge before adding a labeled seedling feed.
What I would watch next
For the next batch, compare pellet size and watering workload as well as germination. An inexpensive pellet is useful only if its moisture pattern fits how often you can check it.
Method infographic
Sources and scope
The steps are an original home-growing synthesis. Source accounts establish documented use; the added monitoring and handling instructions are practical guidance, not results from a controlled comparison.
- University of Georgia Extension — Starting Plants From Seed for the Home Gardener (2025) — General container, medium, moisture and pellet principles; not a plumeria temperature trial.
- Florida Colors Nursery / GrowingPlumeria — Propagation — Nursery guidance for seed mix, pellets and germination. Its temperature claims are grower guidance, not a comparative trial cited here.
- University of Minnesota Extension — Starting seeds indoors — General seedling handling, light and gradual outdoor acclimation.