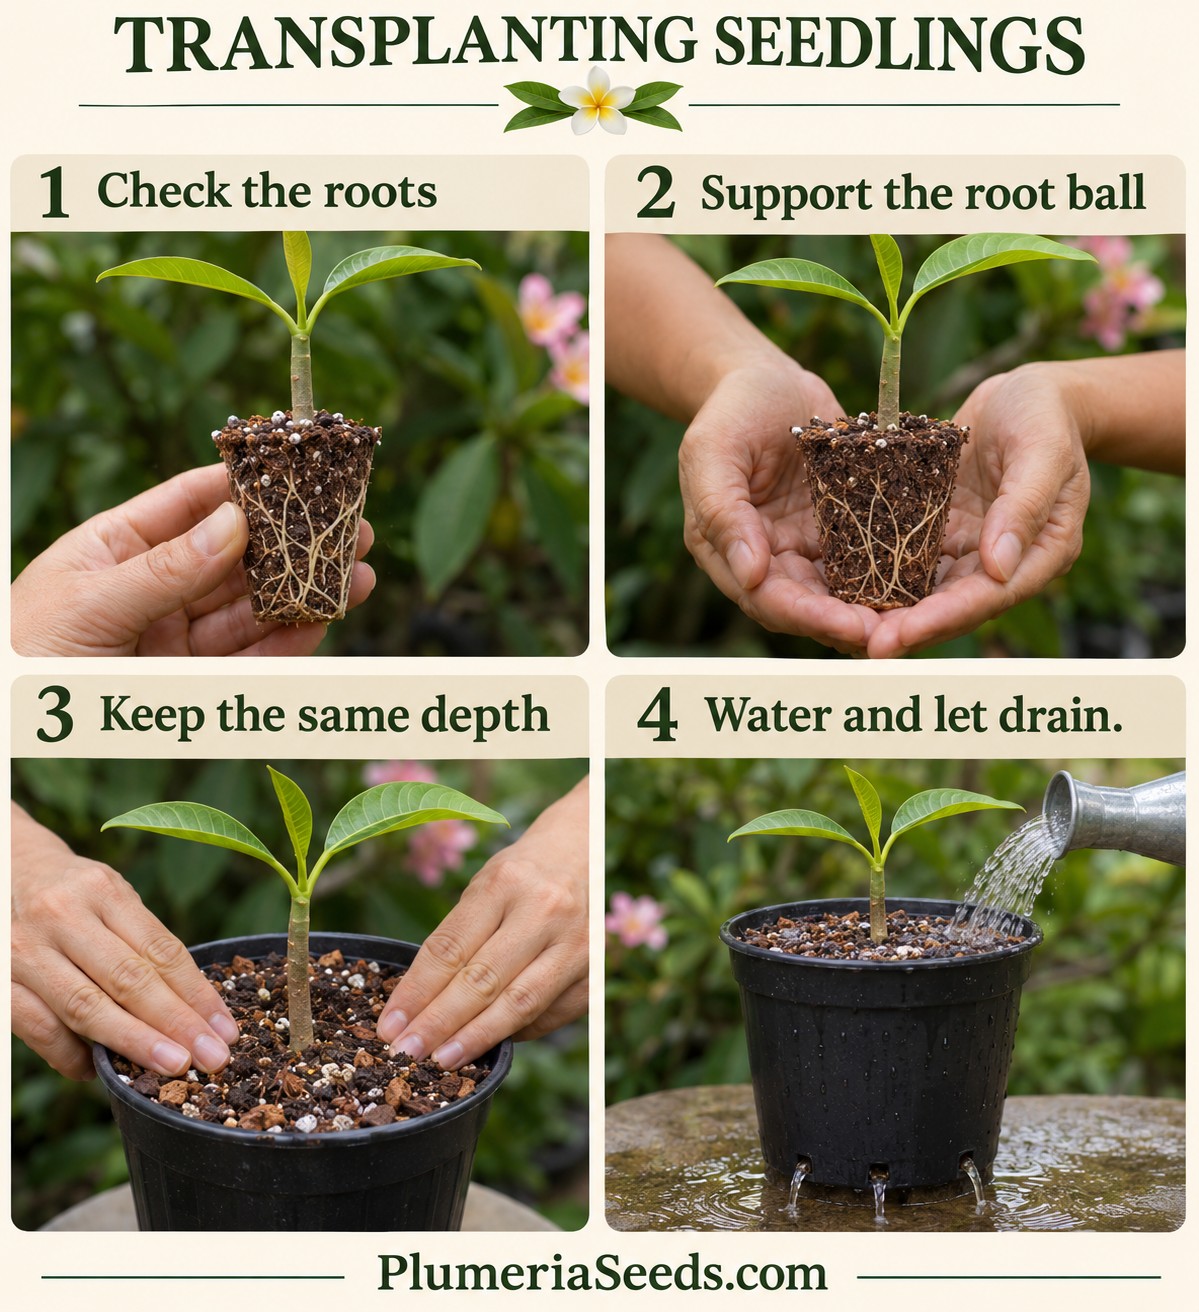
I look at the roots and the plant before I look at the calendar. A seedling that is ready for more room should move without having its young root system torn apart. Another seedling from the same pod may need more time.
For seedlings already growing in mix or plugs, one or two pairs of true leaves are a useful checkpoint in the University of Hawaiʻi guidance. I would also look for active growth, roots reaching the plug edge, and a root ball that can be supported intact. A single root through a drain hole is a reason to inspect, not an automatic instruction to repot.
A different situation: A seed sprouted in paper towel, a bag, or floating water should move into its first growing medium while its root is still short and manageable. Do not keep it there waiting for several pairs of leaves. That first transfer is different from potting up an established seedling.
-
Prepare the next home first
Label a clean pot with drainage holes. Choose a modest increase in root space; about 1–2 inches wider than the existing root ball is a useful home-growing starting point. Use a pot deep enough to take the root system without folding it. Pre-moisten the mix.
Why: The new pot should fit the roots and your watering conditions. A large volume of unoccupied wet mix can be difficult to manage.
-
Choose a good working time
Work during mild conditions with shelter from wind. Have the new pot ready before removing the seedling. The old medium should be lightly moist, rather than dripping or crumbling dry.
Why: Exposed young roots dry quickly. Preparation keeps handling brief.
-
Move the root ball, not the stem
Support the plug or root ball from below. Ease the container away, or cut a disposable cell if needed. Keep a sound plug intact and do not wash off healthy roots. If mesh restricts the roots, follow the pellet instructions and carefully slit accessible mesh without pulling roots through it.
Why: Preserving fine roots helps the plant continue taking up water.
-
Keep the same planting depth
Set the plug or root ball so its surface meets the new mix surface. Fill gently around it, without burying extra stem or packing the mix hard. Leave room below the rim for watering.
Why: Good contact reduces dry gaps; burying the stem does not substitute for a stable root system.
-
Water in and check both media
Water slowly to settle the mix and allow excess to drain. Empty the saucer. During establishment, check the original plug as well as the surrounding mix: one may be dry while the other is still wet.
Why: A moist-looking new pot can hide a dry plug, and a damp plug can hide inside otherwise dry mix.
-
Let the plant settle
Maintain suitable warmth and light. If roots were disturbed, provide brief protection from the harshest sun and wind. Watch for resumed leaf expansion before increasing fertilizer. If it was already growing outdoors in full sun and moved intact, avoid an unnecessary long stay in deep shade.
Why: Aftercare should respond to the amount of disturbance, rather than follow one fixed recovery period.
My 2024 example: I transplanted my Majestic-parent seedlings into one-gallon pots at six weeks. That timing worked for that batch; it is not a six-week rule or a requirement that every small seedling go straight into a gallon pot.
Existing guide: When to Transplant Plumeria Seedlings.
References: University of Hawaiʻi CTAHR: Plumeria; My 2024 Water-Tray Growing Account.