How Nutrients work with Plumeria Seedlings

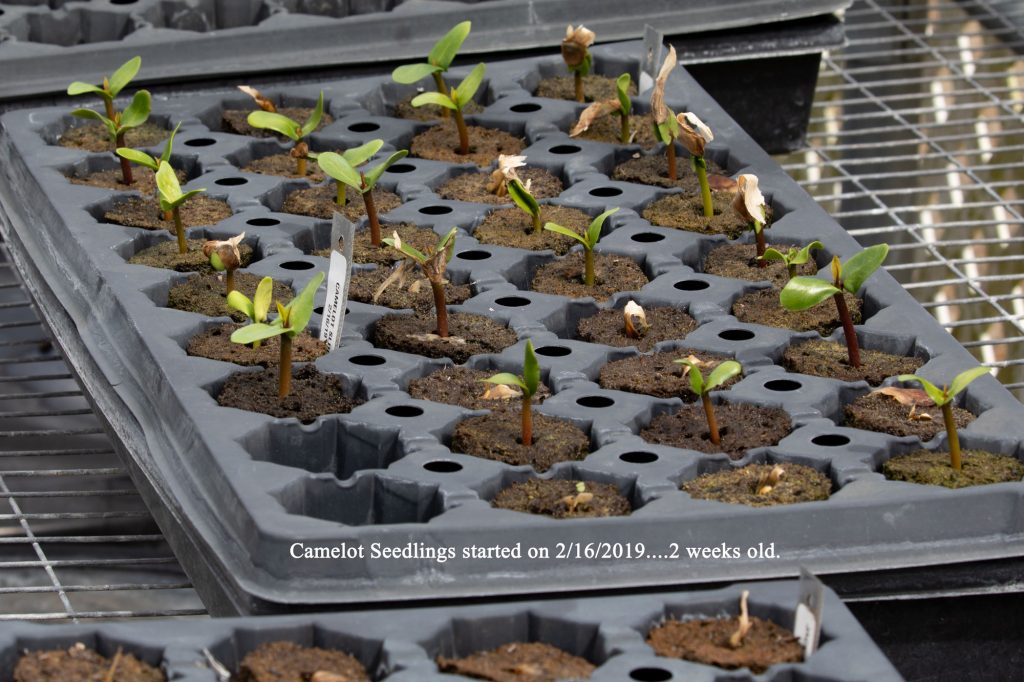
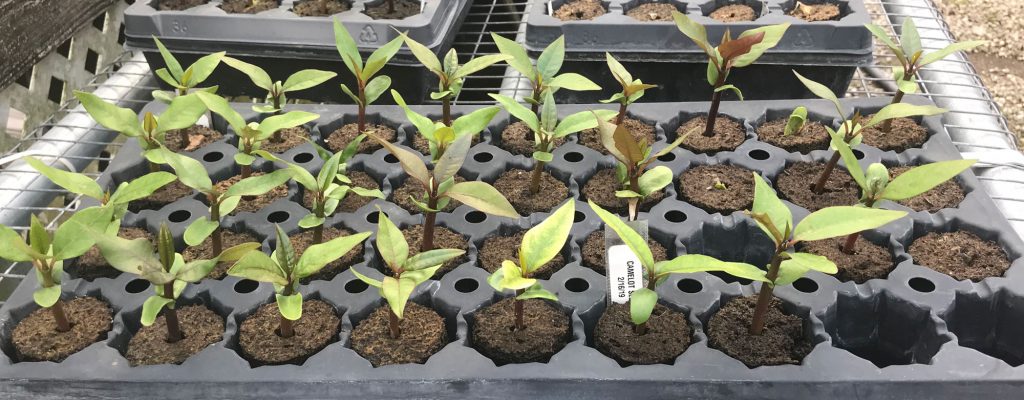
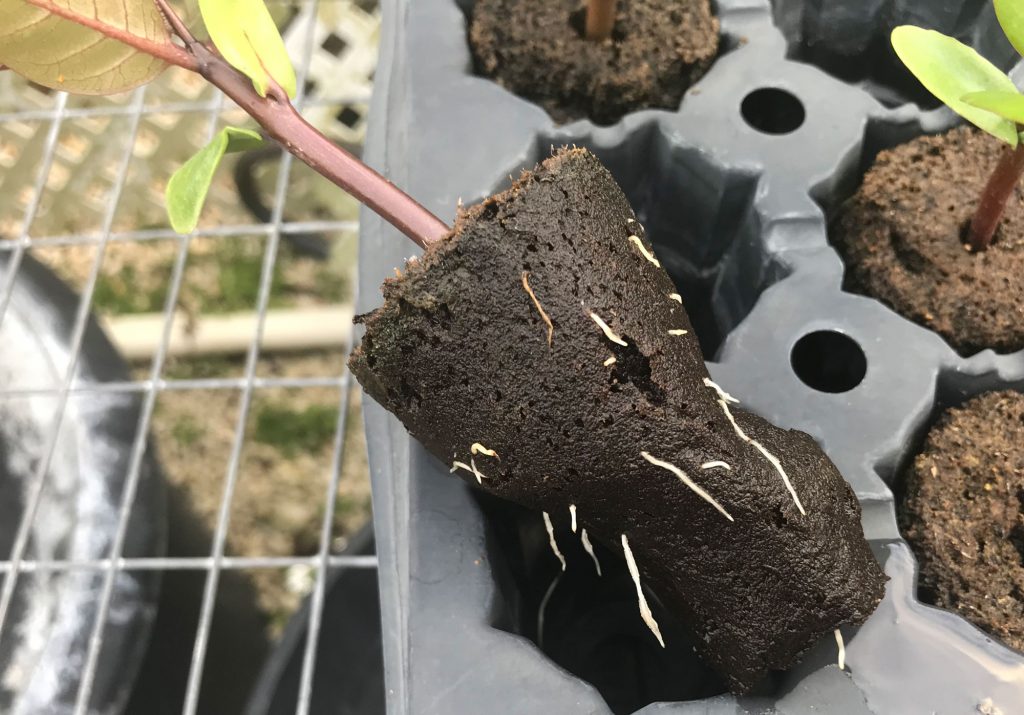
Plumeria seedlings need nutrients as soon as possible to grow well, along with water and adequate sunlight.

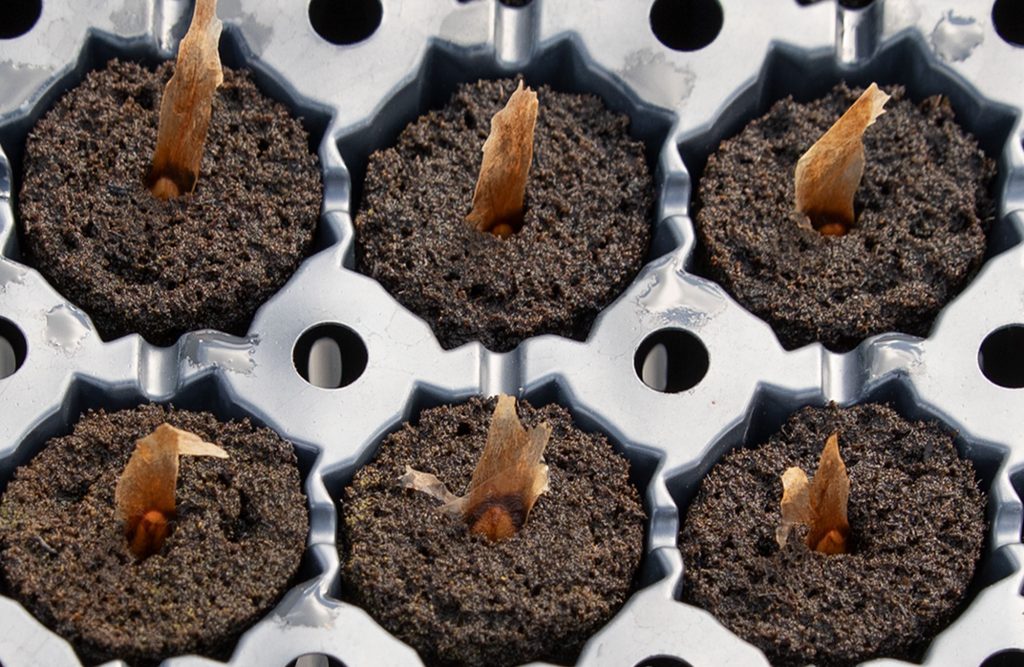
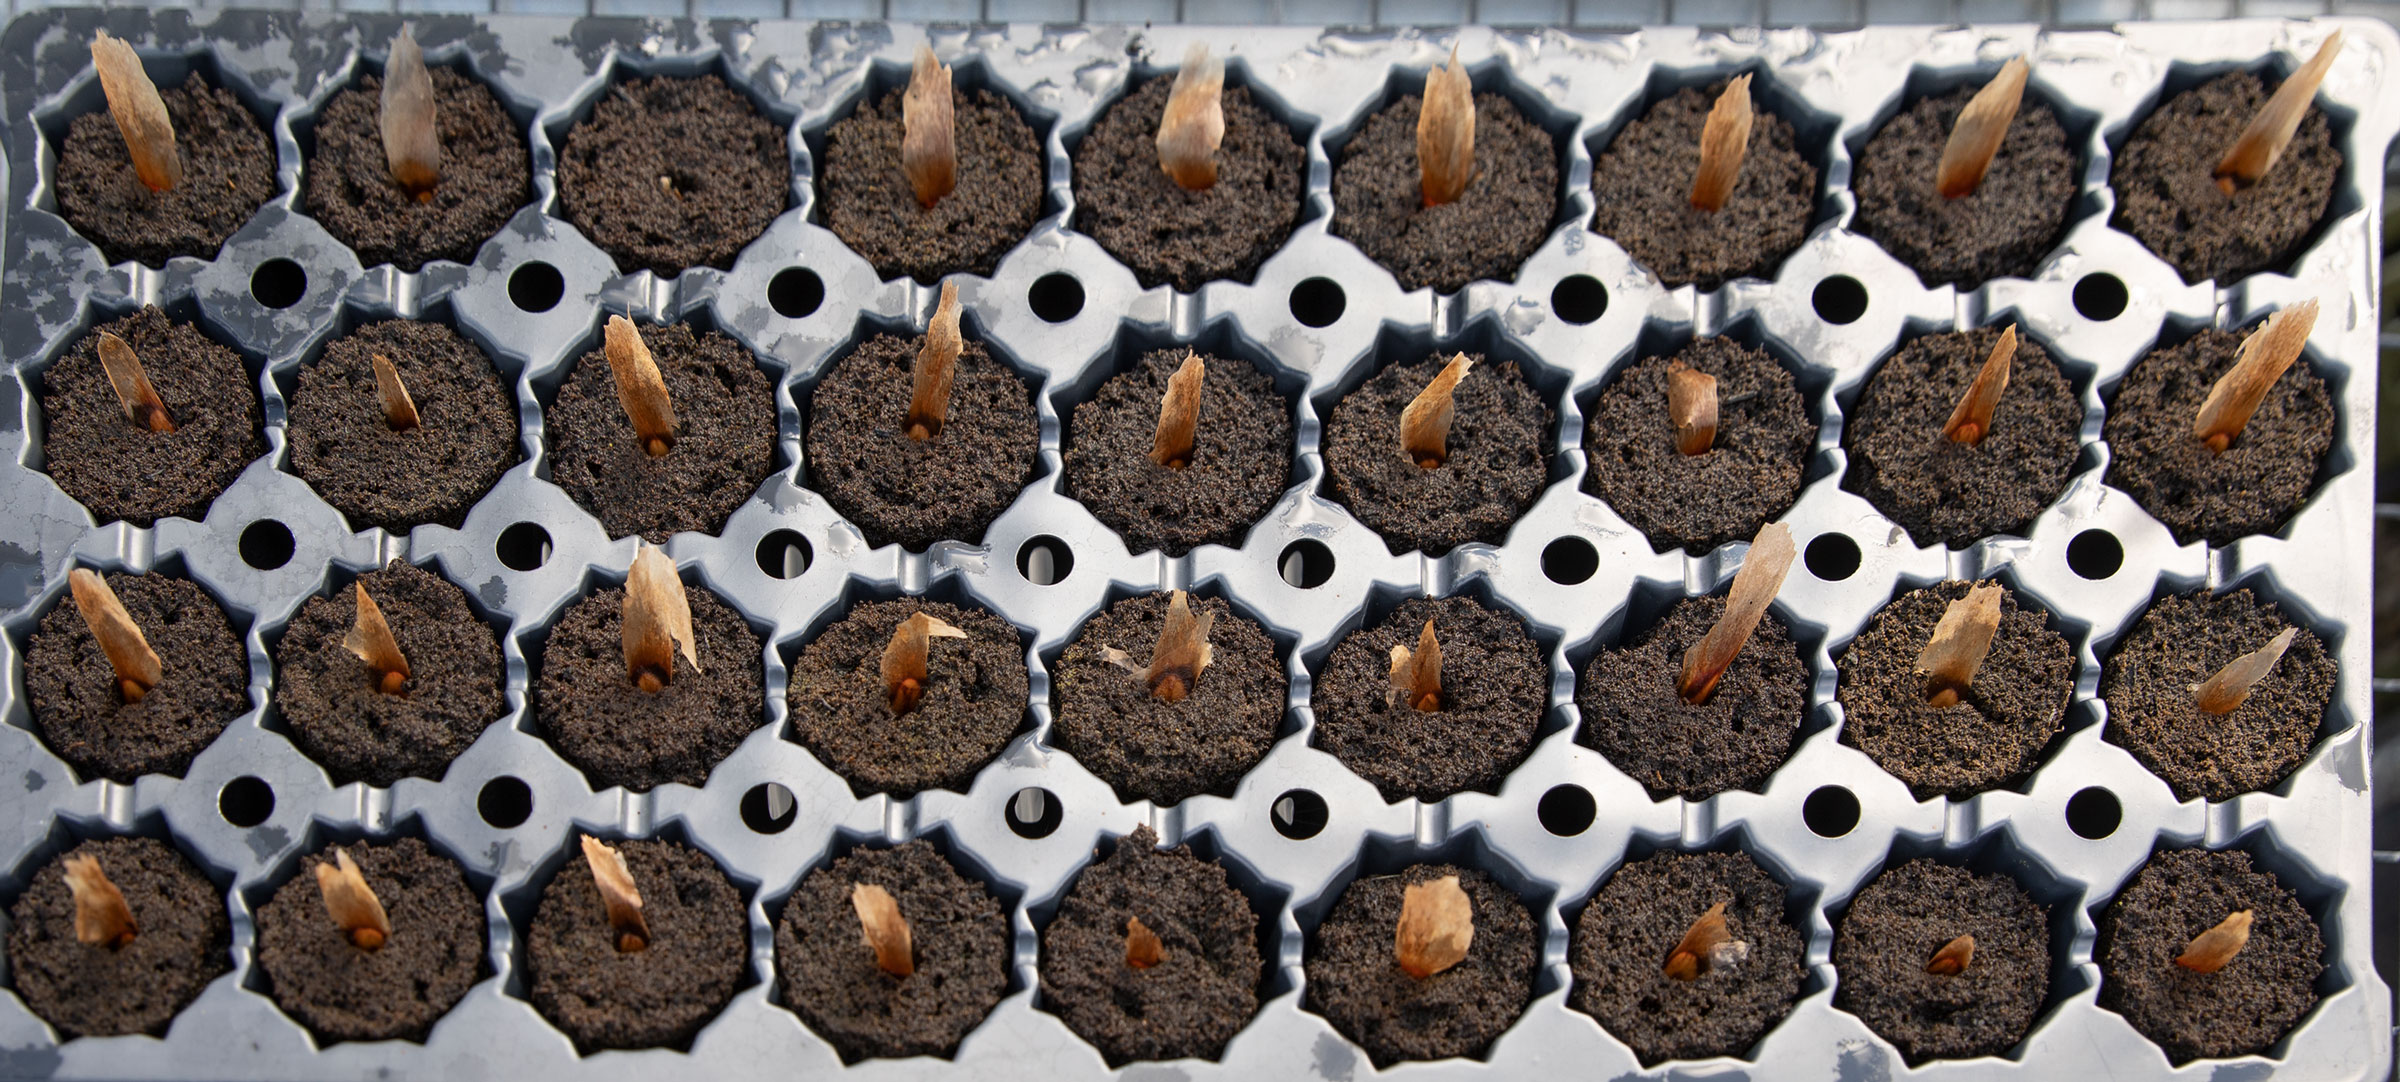
When plumeria seedlings have roots they are looking for nutrients, when they have real leaves they are capable of processing nutrients into plant food via photosynthesis.

Fertilizers supplement essential nutrients in the soil needed by plumeria for healthy, vigorous growth. Contrary to popular belief, fertilizers are not plant food. Plants manufacture their own food from water and carbon dioxide through photosynthesis. Fertilizers provide the nutrients plants need to convert into plant food and grow.

To grow healthy crops full of nutrients, growers need to ensure they have healthy soil. Plants use up nutrients as they grow and without fertilizers, nature struggles to replenish the nutrients in the soil. The soil and water pH is also a major factor in a plant’s ability to convert nutrients into plant food.

A soil test is the only accurate and definitive way to determine how much of any substance is present in your soil. You can send samples to your local county extension or to a testing lab, or you can use a test kit purchased from a nursery or garden center. If the test shows a high concentration of Nitrogen, Phosphorus or Potassium, it could mean that the fertilizer you are using contains too much of it.

What is plumeria fertilizers?

Fertilizers are frequently referred to as plant food, which is really not correct. Actually, it is the carbon dioxide in the air and the water in the soil, which in the presence of sunlight are converted into sugars and carbohydrates by a process called ‘Photosynthesis’, that do the actual feeding of the plant. Fertilizer is much more analogous to vitamins. The Nitrogen, Phosphorus and Potassium and other trace elements contained in the fertilizers are necessary for cell division and enzyme processes that allow photosynthesis and growth to proceed. A fertilizer, often referred to as plant food, is a broad term for either a mixture of chemicals or naturally occurring matter that is used for enhancing the growth of plants.

How do fertilizers work?

Fertilizers work by providing essential nutrients needed to developing flowers, roots, branches, and vegetation. Many fertilizers also improve the way the soil works by helping it to retain water better and allowing air to flow freely, very good for roots.

The main ingredients in most popular fertilizers are N, P and K the basic elements required in plant growth, Nitrogen (N), Phosphorus (P) and Potassium (K).

The Nitrogen element works by increasing the plant’s capacity to produce new stems, flowers or fruit. It also increases the speed at which it will grow and improves the quality and appearance of the foliage.

Phosphorus helps the plumeria produce all of that nice organic stuff like oils and starch which is great for forming large, strong root systems. Phosphorus also helps the plant to develop Chlorophyll, which allows it to turn solar energy into chemical energy (photosynthesis). Combined with Potassium, Phosphorus helps produce healthy flowers and seeds. 

Lastly, Potassium helps to build protein, fight off diseases and, just like Phosphorus, is essential in the process of photosynthesis.

All of the above are required to work together to produce a good healthy plumeria if just one of these valuable nutrients are missing or lacking your plant will struggle to produce fruits or flowers of the highest quality.

What else do plumeria love about fertilizers?

Nutrients normally occur naturally in well-maintained soils but if there’s a drainage issue or other problem, nutrients can soon disappear. Plumeria loves water but does not like to stand in water. The best soil for plumeria is soil mix that drains well and may require more watering than other soils and also causes the nutrients to wash out sooner. Adding fertilizer is a way of giving nature a helping hand.

Natural and man-made fertilizers can contain a variety of ingredients, but here are a few of the most important ones for plumeria in addition to the standard Nitrogen, Phosphorus and Potassium as described above.

  • Zinc
  • Magnesium
  • Copper
  • Calcium
  • Sulfur
  • Manganese
  • Molybdenum
  • Iron
  • Boron

You can also get fertilizers that are fit for the purpose of a specific plant or species. These are important as different plants, Plumeria, requires a careful balance of certain nutrients. If a general purpose fertilizer is used it may not provide all the nutrients plumeria require.

Too Much Nitrogen

  • Excess Foliage Growth – One of the main actions of nitrogen is increasing chlorophyll production; this process is done by creating bigger leaf structures with larger surface areas for the photosynthesizing pigment. Excess nitrogen fuels fast foliage growth so that your garden has an appearance of a jungle gone wild, but another plant growth suffers as a consequence. Energy for flower growth is redirected to foliage proliferation, so plants may not even produce their necessary reproductive organs during the growing season.
  • Burning and Salt Concentration – If you use a high-nitrogen fertilizer mixture, you also increase the soil’s mineral salts; excessive elemental nitrogen takes water away from the plant while leaving the salts behind. As a result, the leaves take on a burnt look from dehydration. Leaf edges become yellow or brown and wilt. Flushing the area with water to remove the excess nitrogen is the best course of action to revive the plant. Although the nitrogen produces desired large foliage, you may find that the rapid growth becomes decimated with leaf burn if nitrogen stays at high levels.
  • Root Growth Stunting – Energy used for large leaf growth stifles the root system below with high nitrogen soil levels. Roots slow their naturally spreading habit since they do not have the necessary nutrients to use as energy as the elements are redirected upward. As a result, the plant may be destabilized in its soil position; if it is tall enough, it may blow over in heavy winds. Additionally, stressed roots invite disease through soil pathogens as well. In the end, both leaves and roots succumb to nitrogen-induced stresses that damage the plant throughout its length.
  • Groundwater Pollution – Plants cannot absorb all the excess nitrogen in the soil. Those extra nitrogen levels slowly leach out of the soil through water runoff; the nitrogen is effectively in the form of nitrates due to microbial conversion when it leaches from the soil. As a result, groundwater and drinking water becomes contaminated from the nitrate levels. Between harming the plants and the surrounding water supplies, high nitrogen levels around plants need to be closely monitored and amended for natural harmony.

Too Much Phosphorus!

  • Iron Deficiencies in Plants – When there is too much phosphorus in the soil, the plant’s ability to take up necessary amounts of iron is compromised. Even where soil levels are tested and show appreciable amounts of iron, plants may have trouble utilizing it because the phosphorus disrupts their natural processes. Usually, the symptoms are most evident in young plant tissues and can be confused with the symptoms of zinc deficiency, making it hard to correct the problem.
  • Zinc Deficiencies in Plants – Exactly as in the case of iron deficiencies, an overabundance of phosphorus in the soil means it is hard for plants to get necessary levels of zinc from their growing medium, even when the zinc is there for the taking. A zinc deficiency manifests in a bleaching effect of the plant tissues, in rosetted terminal leaves and in yellowing of the leaves in between the veins. Because the symptoms are often the same as iron deficiency, the best way to correct the problem is to perform soil tests to figure out how much phosphorus already exists and to add only enough to keep plants healthy.
  • Phosphorus Buildup From Application of Nitrogen – Many gardeners and crop growers use animal manure to supply the soil with nitrogen, a necessary nutrient for plant growth. Most manures contain around the same amount of nitrogen and phosphorus, but plants use 2.4 to 4.5 times as much nitrogen as phosphorus, leaving much of the phosphorus untouched in the soil. This can also happen in the application of biosolids or commercial fertilizers. In the case of commercial fertilizers, however, you can buy a mix balanced fertilizer to meet your needs, which often means that the amounts of phosphorus are lower (for instance, 20-10-10, which is 20 parts nitrogen to 10 parts each phosphorus and potassium).
  • Water Pollution – Because phosphorus is water-soluble, it easily becomes waterborne. Whenever a buildup of the nutrient in the soil cannot be utilized by plants, it is free to run off during rains into the streams, rivers, and waterways in the surrounding areas as well as leach into the water table through the soil. This increases the fertility of watery areas, called eutrophication, causing algae blooms and the explosion of quickly growing fish populations at the expense of beneficial organisms. It also makes purifying water more difficult and can result in insect increases that feed on the algae.

Too Much Phosphate 

  • Preventive Measures – Establishing the right balance between potassium and other soil components is more about controlling how much goes into the soil than trying to reduce it once it’s there. If a soil test indicates a high level of potassium, literally start from the ground up by not adding more to it in the form of a multipurpose fertilizer. Typical fertilizer blends are generally composed of the three most important substances — nitrogen, phosphorus, and potassium — which are indicated on the packaging by the letters N, P, and K. Selecting a blend that is low in potassium, or K, or contains none at all, is a first step in assuring that it doesn’t build up to unsuitable levels in the soil.
  • Plant Distress Signals – Too much potassium disrupts the uptake of other important nutrients, such as calcium, nitrogen, and magnesium, creating deficiencies that usually produce visible effects. A calcium deficiency produces irregularly shaped new leaves and blossom end rot on plants, such as tomatoes (Lycopersicon esculentum ), that produce fruit. As frost-tender plants, tomatoes can be grown in U.S. Department of Agriculture plant hardiness zones 2 to 10 if set out into the garden once the soil has warmed to at least 60 degrees Fahrenheit. A nitrogen deficiency is suspected when older lower leaves on plants turn yellow while the rest remains a light green. Plants lacking magnesium will exhibit yellowing of the edges of older leaves that may also develop an arrowhead shape in their centers. While adding more of these substances to correct the imbalance may help, the excess potassium will most likely impact their long-term effectiveness.
  • A Healthy Balance – When present in the soil in proper amounts, potassium helps with photosynthesis, the process by which plants manufacture their own food using the sun’s energy; helps plants absorb other nutrients more efficiently; creates a favorable environment for micro bacterial action; and provides turgor, or the ability of plants to stay upright. Distribute excess potassium more evenly by thoroughly working dense soil until it is loose and friable. Dilute and flush out large amounts of potassium by watering the soil any time it appears dry to a depth of one inch. Schedule any fertilizing within several weeks before planting, so that the potassium doesn’t have time to accumulate during the off-season. To minimize long-term potassium buildup, consider using aged or composted animal manure as a substitute for commercial fertilizers, as its components break down more slowly to keep up with plant demand. If using manure, apply it at a rate of 40 pounds for every 100 feet, and work it into the soil to a depth of 6 to 9 inches.
How Nutrients work with Plumeria Seedlings

2019 Project – Planting and Growing Plumeria from Seeds

My favorite way to germinate and grow plumeria seeds.
After soaking I placed the Camelot seeds in FCN FlexiPlugs leaving their flags sticking out. After soaking for 4 hours, 68 out of 70 seeds passed the viability test. Usually, viable seed will soak up enough water to cause them to sink to the bottom of the container. The plumeria seed embryo is the part of a seed that contains the earliest forms of a plant’s roots, stem, and leaves. The two that didn’t sink in the water appeared to have underdeveloped embryos.

After soaking I placed the Camelot seeds in FCN FlexiPlugs leaving their flags sticking out. (Soaking Plumeria Seeds) After soaking for 4 hours, 68 out of 70 seeds passed the viability test. Usually, a viable seed will soak up enough water to cause them to sink to the bottom of the container. The plumeria seed embryo is the part of a seed that contains the earliest forms of a plant’s roots, stem, and leaves. The two that didn’t sink in the water appeared to have underdeveloped embryos.

This year my experiments are one to determine the benefits of correcting pH and two to determine if growing seedlings in nutrient saturated FlexiPlugs until time to transplant into pots is beneficial.

Similar to or maybe a version of hydroponics.

Day 1, 2/16/2019

Camelot Plumeria Seeds in FCN FlexiPlugs
Day 1, 2/16/2019
Plumeria Seeds in FCN FlexiPlugs
Day 1, 2/16/2019
Plumeria Seeds in FCN FlexiPlugs
Day 14, 3/3/2019
Hope Seedling in FCN FlexiPlugs

Hope Seedling in FCN FlexiPlugs. What I look for when evaluating my seedlings. When seedlings have a dark trunk, dark leaves with dark veins in the leaf, I believe they have a greater chance of having a colorful flower. Of course, there is no guarantee. This seedling was 19 Days old on 3/7/19 and about 3″ tall.
Camelot seedlings, March 17th, 2019. 29 days Old, time to start transplanting.

Camelot seedling, March 17th, 2019, After 29 days I’m starting to see roots emerge from the plugs.
2019 Project – Planting and Growing Plumeria from Seeds

Soaking Plumeria Seeds

This is a method I’m using to start the first batch of 70 Camelot seeds this year on Feb. 16th, 2019. From the first double pod to open this year at 9:30 AM. I filled one of Kay’s plastic containers about half full of hot tap water (not so hot that I couldn’t hold my finger in it). FYI, We are on well water. The seed will absorb hot water quicker and it adds some heat to the germination process. The seeds are less than 2 weeks old.

It all comes down to water’s viscosity. Cold water is more viscous than hot water, which means that its molecules more readily cling to one another. When water is heated, the water molecules begin to move around much more rapidly, keeping them from clinging together and making the water runnier, that is, less viscous.


Camelot plumeria seeds put on to soak in sealed container with hot water.

Plumeria seeds after 2 hours soaking in sealed container, water still warm.

The third picture is after 3 hours of soaking. Only a few left floating…I knew two very thin ones looked like they would not be viable.

The Camelot seeds are fresh, less than two weeks old. Older seeds will take longer to absorb enough water. I like to soak a minimum of 4 hours, (overnight is good) especially if they are 3 years old or older seeds. When I plant for rootstock, I do not soak them.

Next: Planting Plumeria Seeds in FCN FlexiPlugs

Soaking Plumeria Seeds

Plumeria Seed Starter Kit

As always, we are pleased to share our experiences and technology!

I’m using the Plumeria Seed Starter Kit from FCN

After several years of experimenting with various media and products for germinating and growing seedlings, We, Florida Colors Nursery, decided to make them available on our site. The Florida Colors Nursery Plumeria Seed Starter Kit consists of a flat tray without drain holes, a plug tray and 36, pH neutral 2″ x 3″ foam injected peat plugs pre-saturated with micro-nutrients (Why I use FCN FlexiPlugs). Specific micro-nutrients have been added to promote seed germination and give young seedlings a kick start. The Plumeria Seed Germination Kit is for the serious grower who wants the most out of their seeds.

For best results always start with the freshest seeds possible. Purchase from a trusted seller known to provide quality plumeria seeds.

Nutrient Mix – 1 oz of Carl Pool’s Root Activator (Why I use Carl Pool’s Root Activator) and 1 oz Vital Earth’s Vitazyme (Why I use Vitazyme) per gal of water. The products used for the nutrient mix are products we have been using and also sell on our website, but you can certainly replace them with similar products.

Phase I – Seed Germination

If you need to test viability or speed up initial germination, you may want to soak your seeds before planting. See “How to Soak Plumeria Seeds”
https://plumeriaseeds.com/soaking-plumeria-seeds/  

There are many methods for seed germination. The method below is the best for me in my climate.

  1. Remove the plastic cover. (The tray and plugs are wrapped in plastic and sealed to keep the plugs moist.)
  2. Use a knife to make a slice in each plug, make a 1/2″ wide slice and about 2″ down into the plug.
  3. Place the seed in the slice in the plug allowing the seed’s flag to stick out.
  4. Fill the flat tray with the nutrient mix (1 oz of Root Activator and 1 oz Vitazyme per gal of water) The best way to accomplish this is to lift a plug out, add nutrients and replace the plug.
  5. Seed germination will take from 7-14 days, sometimes longer.

Phase II – Seedling Growth

Phase II is the initial seedling growth

  1. Check the flat tray every few days and add water when needed to keep the tray full. The easiest way is to lift a plug out, check and add nutrients if needed, then replace the plug.
  2. After your seedling has produced three or four real leaves, start fertilizing with Bioblast 7-7-7 (Why I use Bioblast) every two weeks (Mix: 1 teaspoon per gallon, this is half strength), early in the morning or late in the afternoon. Do not spray during the heat of the day.
  3. Check the water level in the trays often and add water as needed to keep the flat tray full of water.
  4. Check and add nutrients as needed, the same mix as above or similar.
  5. Every two weeks foliar feed with Bioblast 7-7-7 fertilize (1 teaspoon per gallon, half strength), early in the morning or late in the afternoon. Do not spray during the heat of the day.
  6. When you see substantial growth and lots of roots, it is time to transplant into soil.
  7. Initial seedling growth is usually 2-3 months before it has enough root to transplant into 1 gal or larger pots.

NOTE: Your seedlings growth will vary depending on the weather and time of year. Spring is the best time for planting and growing plumeria seeds. Seeds need warmth and moisture to germinate; seedlings need warmth, moisture, and light to grow.

 Phase III – Transplanting to Soil and Fertilizing

When you have sufficient roots, it’s time to transplant the plugs into 1 gal or larger pots. I prefer to use Pro-Mix BX with Mycorrhizae (Why I use Pro-Mix BX) for the first transplanting of seedlings in soil. Usually good for eight months before time to move to larger pots.

  1. Fill a one gal pot or larger with Pro-Mix BX with Mycorrhizae.
  2. Drench the Pro-Mix with the same mix as above, (1 oz of Root Activator and 1 oz Vitazyme per gal of water)
  3. Make a hole large enough for the plug to fit in, (we use a rooting tube to make an indention into the soil).
  4. Insert the plug in the soil (Be careful not to damage the roots).
  5. Sprinkle two tablespoons of Excalibur VI (Why I use Excalibur Plumeria Fertilizer) around the plug and the top of the soil. Excalibur should last until the seedlings are approximately eight months old. I like to use the six months because the seedling should need to be transplanted every 6 months or so.
  6. Add soil to cover the fertilizer and the plug with about 1/2″ to 1″ of soil.
  7. Tamp the soil around the plug to assure good contact between the plug and the soil.
  8. Water the first time after transplanting, until the soil is soaked with the Nutrient mix (1 oz of Root Activator and 1 oz Vitazyme per gal of water).
  9. Add soil when needed.
  10. Be sure to monitor soil moisture and water well when the soil is almost dry. (A moisture meter is a good tool to use)
  11. Every two weeks Foliage feed with Bioblast 7-7-7 fertilize (1 tablespoon per gallon, full strength), early in the morning or late in the afternoon. Do not spray during the heat of the day.
  12. Treat for insects as needed.

Now that you have labored so hard to give your seeds the best possible care to help your seeds germinate and grow all you have to do is wait. I can assure you the feeling you get when you a plumeria seedling bloom that you grew from seed is worth it. Hopefully, you will find out how it feels for yourself in a few years.

Plumeria Seed Starter Kit

What does it mean when plumeria go dormant?

In gardening, the term “dormancy” refers to a perennial plant’s state of temporary metabolic inactivity or minimal activity. Plumeria generally goes dormant in response to adverse growing conditions, such as during the cold winter months when daylight is shortest and temps are below 50 degrees. Dormancy can also happen during a period of intense heat or drought. It’s important to remember that plants don’t die at this time, but are simply in suspended animation. While the leaves may fall off and above-ground foliage may look like it just a dead stick, life still lurks in the roots and core of the plumeria. The term “dormancy” isn’t often used to describe annual plants with a life cycle of a single growing season. Their biology does not include the mechanism for going dormant.

During dormancy, plumeria stop or slow down growth to conserve energy until better cultural conditions present themselves. This happens naturally as seasons and weather changes.

Plumeria Dormancy definition:

A period in which a plumeria does not grow, awaiting  necessary  environmental conditions such as temperature, moisture, nutrient  availability, etc.
A state of quiet, but temporary inaction. 
Quiet and inactive rest fullness. A state when organisms are in unfavorable conditions, and slow down their metabolic processes to a minimum to retain resources until conditions are more favorable. Plants may do this when their is a lack of water, while animals, such as the garden dormouse, hibernate, which is also a form of dormancy.

Growing Plumeria From Seed

Whether you plan on growing plumeria for pleasure or profit, you should know growing from seeds is a major commitment that grows bigger and bigger every year. Growing a plumeria from seed is the only way to produce a new cultivar. Typically it will take a plumeria 2-3 years to bloom and sometimes much longer. I believe only 1 out of 500 seedlings is worthy of growing to the point of being a commercially viable plumeria, but 1 out of 100 will be considered a keeper for most growers. And, it could take as long as 10 years to have enough product to bring to market. This is the main reason the newest cultivars cost more.

So, if you have the commitment and really want to make an incredible journey, I encourage you to grow plumeria from seed. It is a very rewarding journey and the feeling you get when you see YOUR seedling blooming for the fist time is a feeling you will never forget. It won’t mater if it is a world class plumeria flower or just a common white. The first is always special, but you will have that feeling of anticipation and excitement with every new seedling bloom.

Growing Plumeria from seeds has been my passion for many years. This year is no different, it’s time to try new things and have new successes and of course failures. Armed with all the data from past years, it an ongoing goal to determine what the best methods are for my growing environment, needs and budget. Some methods may be outstanding, but for me they are far too labor intensive. Some products may work great, but may be just too expensive to justify using. With all this in mind, the first thing to do is develop a plan for the next seedling project.

Plumeria Seed Selection 

IT’S EXTREMELY RARE FOR PLUMERIA SEEDS TO GROW TRUE TO IT’S PARENT(S). This is a very important fact to know. The good news, you can expect plumeria seeds to inherent some of its parent’s characteristics possibly going back 7 generations. The bad news is, most will inherent the less desirable characteristics. So the selection of which seeds you want grow is very important.

Selecting healthy seeds is imperative, if you are going to spend a lot of time and energy growing plumeria seeds, you deserve to have the best chance of success possible. 

Whether you are growing for fun or pleasure, you should select quality seeds from a trusted grower who will guarantee the pod parent. I would suggest you purchase a complete seed pod when possible or at least all the seeds in a seed pod. Be cautious of any seller who claims to know the pod and pollen parents, unless they are a very respected grower. Even though a plumeria seed typically does not grow true to its parent(s) you can improve the chances of getting an outstanding plumeria by knowing as much about a seed’s heritage as possible. Selecting seeds from a cultivar know to produce good seedlings is a good way to improve your chances of getting better seedling.

Viability Testing

A dormant plumeria seed certainly looks dead. It does not seem to move, to grow, nor do anything. In fact, even with biochemical tests for the metabolic processes we associate with life (respiration, etc.) the rate of these processes is so slow that it would be difficult to determine whether there really was anything alive in a seed.

Testing the viability prior to planting can be a resource and time saver. The viability of plumeria seeds can be checked by using one of several methods. 

Quick check: By simple feeling the seed to see if it feels firm and thicker in the center of the seed, there is a good chance it is viable.

Drop the seed in a bowl of lukewarm water and allow to set for several hours, as the seed takes on water and removes air it will sink in the bowl. If a seed sinks, there is a good chance it is viable.

Germination

If a plumeria seed is not allowed to germinate (sprout) within some certain length of time, the embryo inside will die. Each species of seed has a certain length of viability. Some plumeria seeds have been known to germinate after 12 years. It is best to plant within a few months of being dispersed. It is believed a few cultivars, such as Dwarf Singapore Pink, will lose viability as it dries out and should be planted as soon as possible.

Assuming the seed is still viable, the embryo inside the seed coat needs something to get its metabolism activated to start the embryo growing. The process of getting a plumeria seed to germinate is simple.

Plumeria seeds lack true dormancy. The seeds are ready to sprout. All they need is some moisture to get their biochemistry activated, and temperature warm enough to allow the chemistry of life to proceed.

Place the seed in soil with the fan part of the seed sticking up out of the soil and water well, keep the soil moist. The seed will germinate in a few days and you will seed the seed emerge within 5-10 days, sometimes longer.

Spread the seeds out on soil laying flat in a try and cover with 1/4″ of soil. Water well and keep the soil moist. The seed will germinate in a few days and you will seed the seed emerge within 5-10 days, sometimes longer.

Place the seed between two paper towels, soak with water, place the towels in a warm area. Leave until you see roots developing. Do not allow the towels to dry out, if the seeds start to germinate and then dries, it could stop it from germinating. As soon as roots appear, it is time to plant. You should see roots within a few days.

The seed cotyledon, which forms in the embryo of seeds before germination, stores food for the embryo. Along with the endosperm, the cotyledon nourishes the new growth of the plant. It is the part of the seed that emerges from the testa, or hard covering, during germination. It grows upward, turning into a set of seed leaves as the seed germinates, using photosynthesis to nourish the newly forming plant further. The seed leaves will fall off after true leaves form.

Initial Transplanting to soil & the First 3-5 Months of Growth

After true leaves form the growing needs change. As the seedling grows it will need more sunlight, warmth, moisture and nutrients. I believe the first three months of a seedlings life is the most important.

In 2016, I performed an experiment where I applied Excalibur granular fertilizer to a two-month-old group (Group “B”) of seedlings, I keep another group for control (Group “A”) without additional fertilizer, after 5 weeks I compared the groups. Group “B” had grown approximately 25% more in height and has substantially more roots. After 2 months, I added the same granular fertilizer to Group “A” and started treating both the same after that. The interesting fact is, after 10 months there was still an approximately 25% difference between Group “A”  and Group “B”. I will continue to track the growth of these groups over the next few year.

Care after transplanting to 1 gal or larger, approximately 3-5 Months

After approximately 3 months, it is important to start treating seedlings as young adults. For me this means, water as soon as needed, fertilize with micronutrients, organic matter, bio-stimulates, etc. that enhance the roots system and overall maturity of the plant. At the same time, I provide additional nutrients to the leave and tips to keep the plant healthy and pest free. The goal is to allow the plumeria to mature as much as possible in the shortest amount of time. It is important to understand the concept of “allow the plumeria to mature”. It is important to provide a balanced diet of nutrients, organic matter, bio-stimulates, moisture and heat without overdoing or under doing any one factor.

Right now I would say 99% plus of all plumeria seeds produced are pollination by nature. My overall goal is to grow seedling to bloom and establish a reliable seedpod parents to use with cross-pollination projects. I’m fortunate to have a company like Florida Colors Nursery with a real need to grow seedling for root stock and new plumeria for future sales. This provides a need for the 99% of our seedling that will not be outstanding enough to grow to a marketable size.