Fertilizing New Seedlings

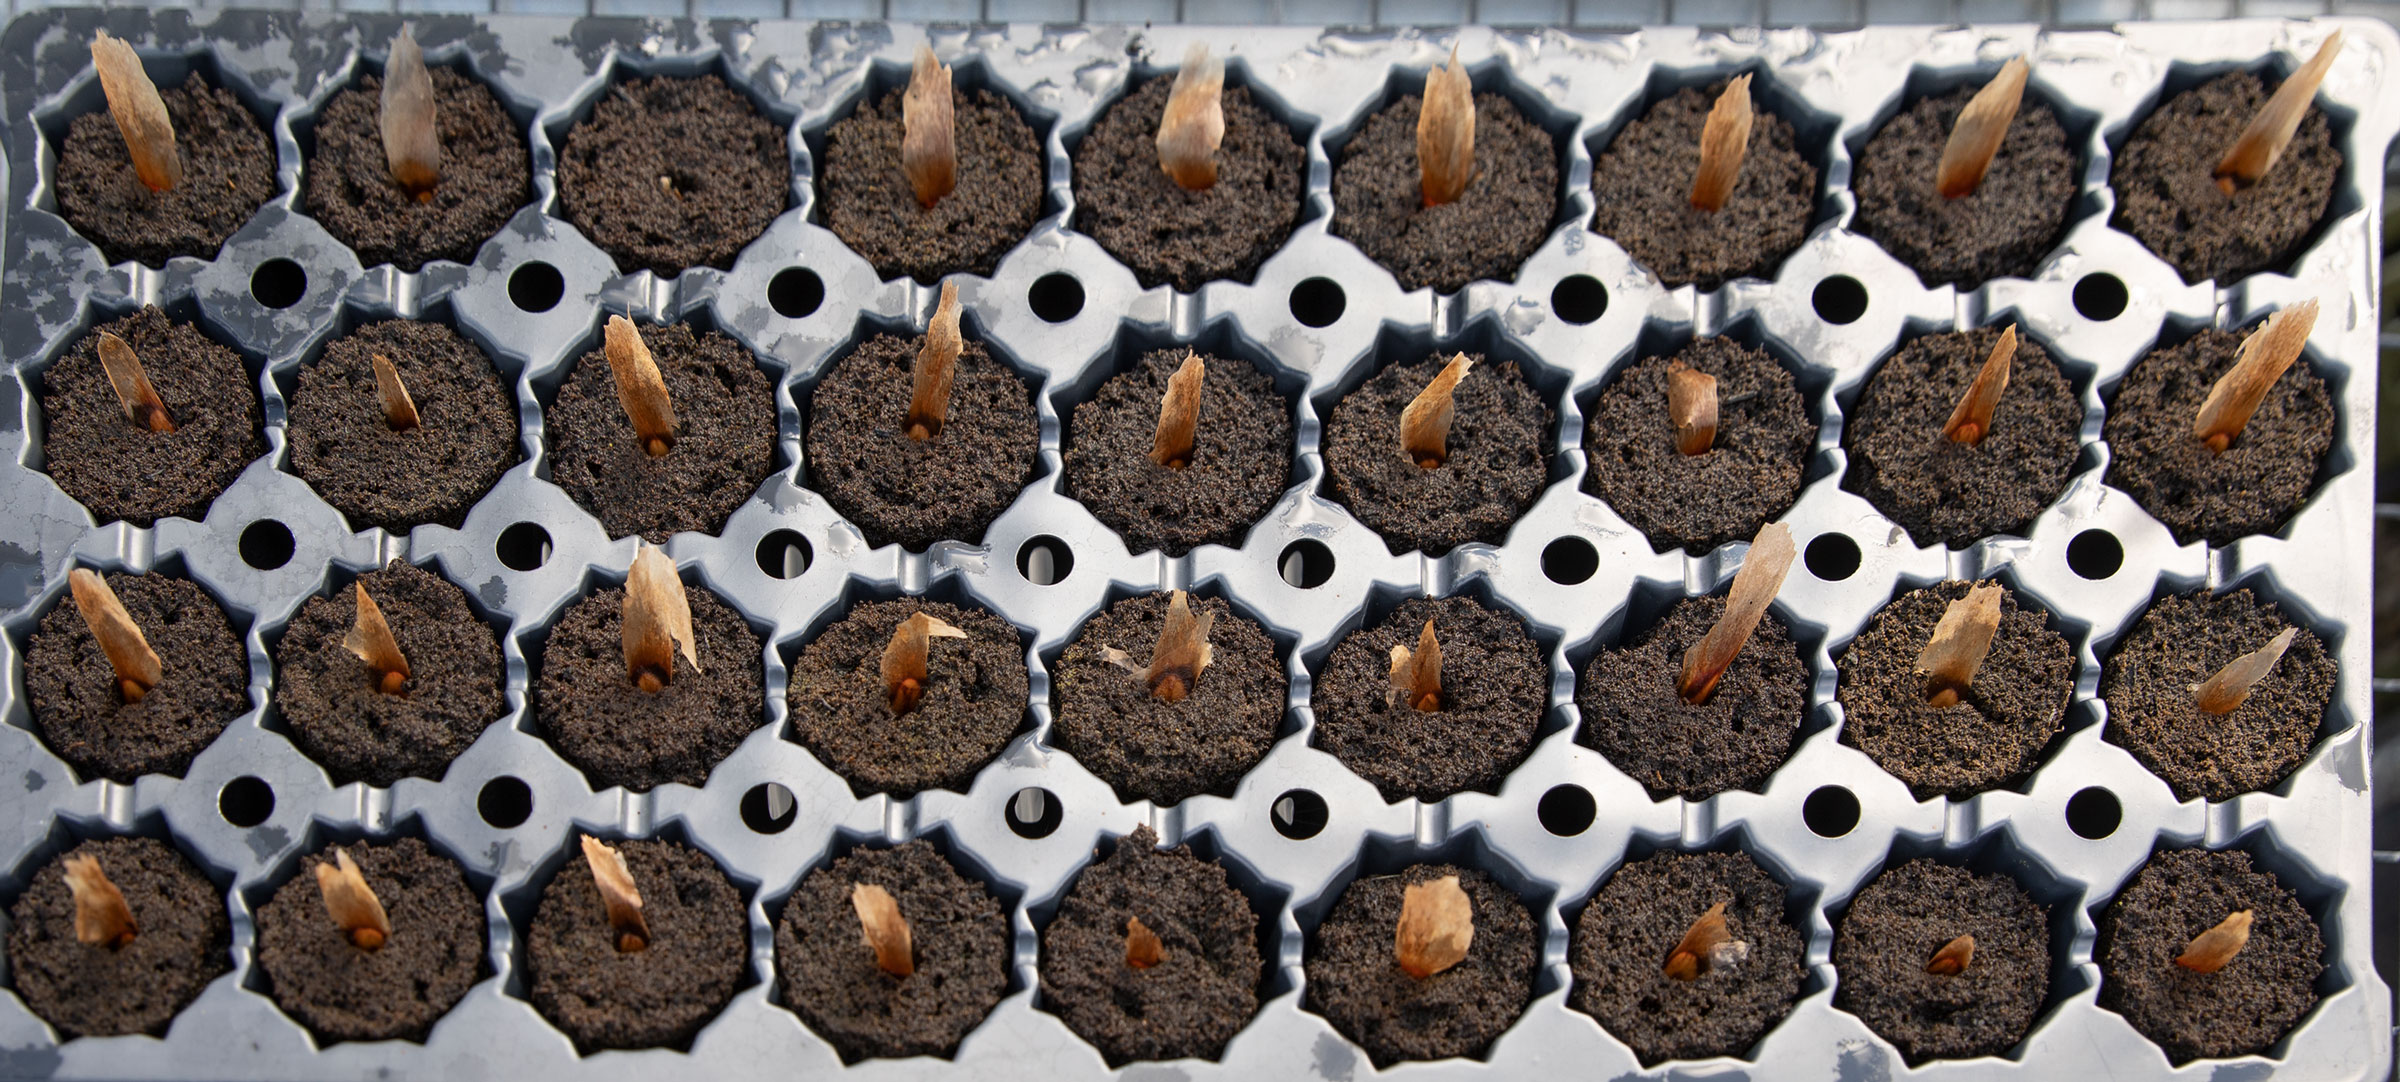
Fertilizing New Plumeria Seedlings
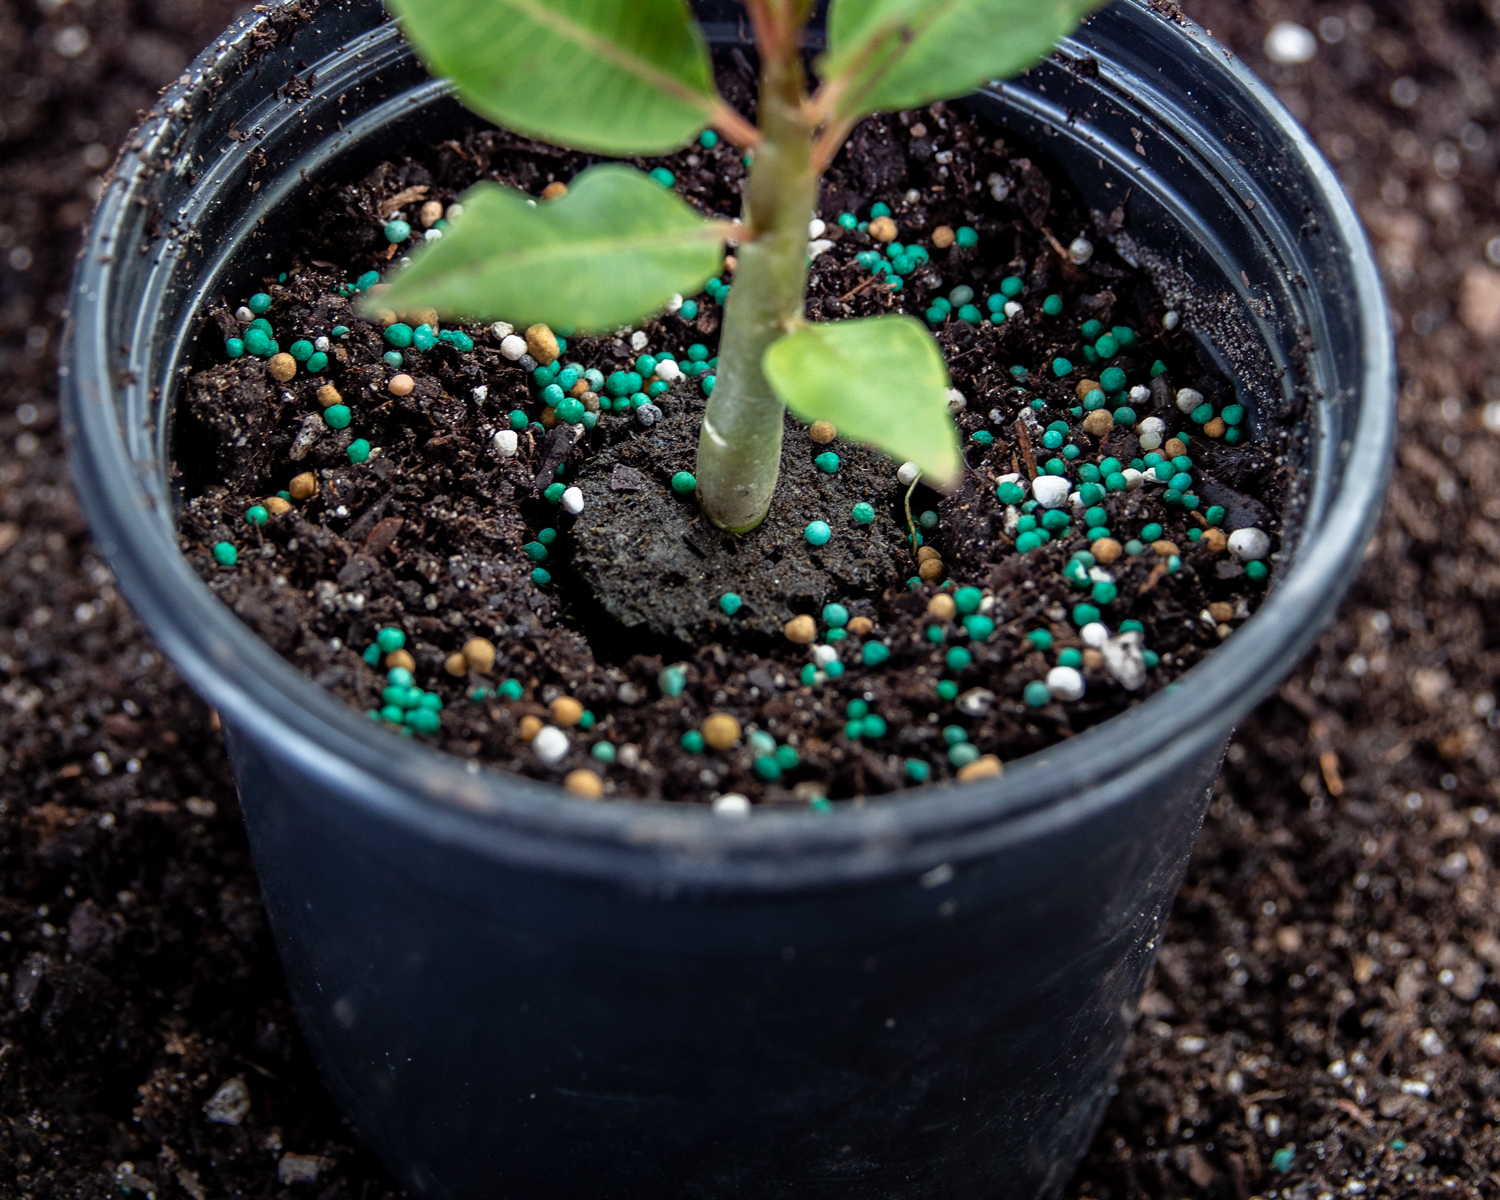
: A Detailed How-To Guide

Introduction

Proper fertilization is a key element in the successful growth and development of plumeria seedlings. Knowing when and how to fertilize, along with understanding the specific nutritional needs of young plumerias, is crucial. This guide provides a comprehensive overview of fertilizing plumeria seedlings, from identifying the right time to the selection of suitable fertilizers.

Recognizing the Right Time to Fertilize

  1. True Leaves Development:
    • Begin fertilizing plumeria seedlings when the first true leaves appear. These leaves, different from the initial cotyledons, indicate that the seedlings are ready to absorb more nutrients.
    • True leaves resemble the foliage of a mature plumeria, while cotyledons are generally rounded and smooth.
  2. Signs of Root Development:
    • The emergence of true leaves also suggests root development, a crucial phase for introducing fertilizer.

Choosing the Right Soil Mix and Fertilizer

  1. Soil Mix Composition:
    • A recommended mix consists of 1/3 pine bark, 1/3 peat, and 1/3 perlite with Mycorrhizae. This blend ensures good drainage and aeration while providing a stable growing medium.
  2. Fertilizer Selection:
    • Use a balanced granular fertilizer with micro-nutrients for young seedlings.
    • Slow-release fertilizers like Excalibur 11-11-14 are ideal for initial growth stages.
    • In stressful conditions (like heat or pests), quick-release granular or liquid fertilizers can provide immediate relief. Products like Excalibur BOOST 10-12-14 or Bioblast 7-7-7 are suitable choices.

Fertilization Schedule and Dosage

  1. Frequency:
    • Excalibur BOOST can be used every two months, while Bioblast can be applied every two weeks.
    • Follow the manufacturer’s instructions for dosage, adjusting as necessary based on the seedlings’ response.
  2. Application Technique:
    • Apply the fertilizer to the soil, avoiding direct contact with the seedlings.
    • Water the soil after applying granular fertilizers to help them dissolve and reach the roots.

Acclimatizing Seedlings to Sunlight

  1. Gradual Introduction to Sun:
    • If seedlings are not initially in full sun, start by placing them in a shaded outdoor area for a few hours each day.
    • Gradually increase their exposure to sunlight over several weeks.
  2. Hardening Off Process:
    • This gradual acclimatization helps the seedlings adapt to outdoor conditions, including brighter light, wind, and variable temperatures.
    • Aim for them to tolerate at least 6 hours of full sun daily.

Conclusion

Fertilizing plumeria seedlings is a delicate process that requires attention to detail and an understanding of the plant’s nutritional needs. By following these guidelines, gardeners can ensure their plumeria seedlings receive the right amount of nutrients to grow strong and healthy.

Further Learning

For more in-depth information on plumeria care, including advanced fertilization techniques, consider visiting resources like gardening blogs, nurseries, or dedicated websites like PlumeriaCareGuide.com. These platforms can provide valuable insights and personalized advice for plumeria enthusiasts at all levels.

Fertilizing New Seedlings

Keeping Track of you Seedlings

This is how I keep up with my seedling,
 
I create a spreadsheet for each group of seedlings with a line for each seed, with parent(s), date planted and info pertaining to how I’m growing them, fertilizing, etc.
 
 From the spreadsheet I create a code. i.e. SSxTEM-03-18-22, meaning Super Round (pod parent) crossed with Temptation (Pollen Parent), planted in March, 2018, seedling number 22. If I only know the pod parent…SS-03-18-22. Each seedling is tagged with it’s code. I like to add the parent(s) name and date planted on the opposite side of the tag.
 
When they bloom I create a folder with the code as the folder name, where I store the photos of that seedling. Sometimes I create a text file with information or history about that seedling, such as or growing conditions or anything different.
 
After the first bloom, If I decide it’s worth keeping. I update the spreadsheet with date or blooms, fragrance, growing habit, etc. I also take more detailed photos of the flower, inflo, leaves, the overall tree, etc. after the 3rd bloom cycle.
 
If a seedling dies or if it isn’t worth keeping, can be used as root stock or just destroyed. I update the spreadsheet.
 
This may seem overkill to some, but it works for me.

2019 Project – Planting and Growing Plumeria from Seeds

My favorite way to germinate and grow plumeria seeds.
After soaking I placed the Camelot seeds in FCN FlexiPlugs leaving their flags sticking out. After soaking for 4 hours, 68 out of 70 seeds passed the viability test. Usually, viable seed will soak up enough water to cause them to sink to the bottom of the container. The plumeria seed embryo is the part of a seed that contains the earliest forms of a plant’s roots, stem, and leaves. The two that didn’t sink in the water appeared to have underdeveloped embryos.

After soaking I placed the Camelot seeds in FCN FlexiPlugs leaving their flags sticking out. (Soaking Plumeria Seeds) After soaking for 4 hours, 68 out of 70 seeds passed the viability test. Usually, a viable seed will soak up enough water to cause them to sink to the bottom of the container. The plumeria seed embryo is the part of a seed that contains the earliest forms of a plant’s roots, stem, and leaves. The two that didn’t sink in the water appeared to have underdeveloped embryos.

This year my experiments are one to determine the benefits of correcting pH and two to determine if growing seedlings in nutrient saturated FlexiPlugs until time to transplant into pots is beneficial.

Similar to or maybe a version of hydroponics.

Day 1, 2/16/2019

Camelot Plumeria Seeds in FCN FlexiPlugs
Day 1, 2/16/2019
Plumeria Seeds in FCN FlexiPlugs
Day 1, 2/16/2019
Plumeria Seeds in FCN FlexiPlugs
Day 14, 3/3/2019
Hope Seedling in FCN FlexiPlugs

Hope Seedling in FCN FlexiPlugs. What I look for when evaluating my seedlings. When seedlings have a dark trunk, dark leaves with dark veins in the leaf, I believe they have a greater chance of having a colorful flower. Of course, there is no guarantee. This seedling was 19 Days old on 3/7/19 and about 3″ tall.
Camelot seedlings, March 17th, 2019. 29 days Old, time to start transplanting.

Camelot seedling, March 17th, 2019, After 29 days I’m starting to see roots emerge from the plugs.
2019 Project – Planting and Growing Plumeria from Seeds

Plumeria Seed Starter Kit

As always, we are pleased to share our experiences and technology!

I’m using the Plumeria Seed Starter Kit from FCN

After several years of experimenting with various media and products for germinating and growing seedlings, We, Florida Colors Nursery, decided to make them available on our site. The Florida Colors Nursery Plumeria Seed Starter Kit consists of a flat tray without drain holes, a plug tray and 36, pH neutral 2″ x 3″ foam injected peat plugs pre-saturated with micro-nutrients (Why I use FCN FlexiPlugs). Specific micro-nutrients have been added to promote seed germination and give young seedlings a kick start. The Plumeria Seed Germination Kit is for the serious grower who wants the most out of their seeds.

For best results always start with the freshest seeds possible. Purchase from a trusted seller known to provide quality plumeria seeds.

Nutrient Mix – 1 oz of Carl Pool’s Root Activator (Why I use Carl Pool’s Root Activator) and 1 oz Vital Earth’s Vitazyme (Why I use Vitazyme) per gal of water. The products used for the nutrient mix are products we have been using and also sell on our website, but you can certainly replace them with similar products.

Phase I – Seed Germination

If you need to test viability or speed up initial germination, you may want to soak your seeds before planting. See “How to Soak Plumeria Seeds”
https://plumeriaseeds.com/soaking-plumeria-seeds/  

There are many methods for seed germination. The method below is the best for me in my climate.

  1. Remove the plastic cover. (The tray and plugs are wrapped in plastic and sealed to keep the plugs moist.)
  2. Use a knife to make a slice in each plug, make a 1/2″ wide slice and about 2″ down into the plug.
  3. Place the seed in the slice in the plug allowing the seed’s flag to stick out.
  4. Fill the flat tray with the nutrient mix (1 oz of Root Activator and 1 oz Vitazyme per gal of water) The best way to accomplish this is to lift a plug out, add nutrients and replace the plug.
  5. Seed germination will take from 7-14 days, sometimes longer.

Phase II – Seedling Growth

Phase II is the initial seedling growth

  1. Check the flat tray every few days and add water when needed to keep the tray full. The easiest way is to lift a plug out, check and add nutrients if needed, then replace the plug.
  2. After your seedling has produced three or four real leaves, start fertilizing with Bioblast 7-7-7 (Why I use Bioblast) every two weeks (Mix: 1 teaspoon per gallon, this is half strength), early in the morning or late in the afternoon. Do not spray during the heat of the day.
  3. Check the water level in the trays often and add water as needed to keep the flat tray full of water.
  4. Check and add nutrients as needed, the same mix as above or similar.
  5. Every two weeks foliar feed with Bioblast 7-7-7 fertilize (1 teaspoon per gallon, half strength), early in the morning or late in the afternoon. Do not spray during the heat of the day.
  6. When you see substantial growth and lots of roots, it is time to transplant into soil.
  7. Initial seedling growth is usually 2-3 months before it has enough root to transplant into 1 gal or larger pots.

NOTE: Your seedlings growth will vary depending on the weather and time of year. Spring is the best time for planting and growing plumeria seeds. Seeds need warmth and moisture to germinate; seedlings need warmth, moisture, and light to grow.

 Phase III – Transplanting to Soil and Fertilizing

When you have sufficient roots, it’s time to transplant the plugs into 1 gal or larger pots. I prefer to use Pro-Mix BX with Mycorrhizae (Why I use Pro-Mix BX) for the first transplanting of seedlings in soil. Usually good for eight months before time to move to larger pots.

  1. Fill a one gal pot or larger with Pro-Mix BX with Mycorrhizae.
  2. Drench the Pro-Mix with the same mix as above, (1 oz of Root Activator and 1 oz Vitazyme per gal of water)
  3. Make a hole large enough for the plug to fit in, (we use a rooting tube to make an indention into the soil).
  4. Insert the plug in the soil (Be careful not to damage the roots).
  5. Sprinkle two tablespoons of Excalibur VI (Why I use Excalibur Plumeria Fertilizer) around the plug and the top of the soil. Excalibur should last until the seedlings are approximately eight months old. I like to use the six months because the seedling should need to be transplanted every 6 months or so.
  6. Add soil to cover the fertilizer and the plug with about 1/2″ to 1″ of soil.
  7. Tamp the soil around the plug to assure good contact between the plug and the soil.
  8. Water the first time after transplanting, until the soil is soaked with the Nutrient mix (1 oz of Root Activator and 1 oz Vitazyme per gal of water).
  9. Add soil when needed.
  10. Be sure to monitor soil moisture and water well when the soil is almost dry. (A moisture meter is a good tool to use)
  11. Every two weeks Foliage feed with Bioblast 7-7-7 fertilize (1 tablespoon per gallon, full strength), early in the morning or late in the afternoon. Do not spray during the heat of the day.
  12. Treat for insects as needed.

Now that you have labored so hard to give your seeds the best possible care to help your seeds germinate and grow all you have to do is wait. I can assure you the feeling you get when you a plumeria seedling bloom that you grew from seed is worth it. Hopefully, you will find out how it feels for yourself in a few years.

Plumeria Seed Starter Kit

Temptation x Super Round Seedlings

Temptation aka PC33 and Super Round aka J115 Hybrid Project.

Updated 9-20-2018  – Group 1: 2014 Plumeria Seed Project

In 2013 I cross-pollinated Temptation aka PC33 (pod parent) and Super Round aka J115 (pollen parent). The seed pod opened the first of March 2014, the seed pod produced 28 seeds, 24 were viable. I planted them on March 11th, 2014 and all 24 germinated. As of June 22nd, 2015 8 bloomed or had a false inflorescence. The majority bloomed in 2016 around 24 months old. As of September 18th, 2018 all but two had bloomed and the remaining two now have inflorescences. 

The one characteristic that seems to have been consistent is the parent’s compact growth habits, which I was hoping for and would expect from the parents.

The photo gallery below contains blooms from these seedlings. I posted duplicates if the blooms looked different.

As soon as they have bloomed for the third time, I will start naming the ones I find worthy of keeping. The plan is to separate each plant’s blooms into different galleries under the name of each.

I plan on having more photos and descriptions detailing each seedling. Including, fragrance, growth habit, leaf photos, inflorescence photos, etc. Basically all the information I would need for registration.

Photo Gallery of Blooms from Group 1:

All from the same seedpod.

no images were found

When do you start fertilizing plumeria seedlings

Plumeria Seeds

Plumeria seed embryos typically contain two cotyledons and are grouped as dicots or dicotyledonous plants. It’s usually easy to tell which leaves are the cotyledons. As they are the first leaves the seedling produces, they will be the lowest ones on the stem, the ones to which an empty seed case often clings. They also won’t look like any of the other leaves on the seedling.

The cotyledons or seed leaves provide the seedling with nutrients for the first few weeks of its life, but when the seed leaves dry up and fall off, the seedling needs nutrients. Some people like to pinch off the cotyledons after the true leaves emerge. Unless those leaves are in the way, it is best to allow the seedling to decide when it’s done with them, or you may accidentally break its stem instead. Plumeria cotyledons are photosynthetic producers, as photosynthetic producers, cotyledons essentially can synthesize the organic nutrients it requires for growth through photosynthesis.

Fertilizers are frequently referred to as plant food, which is really not correct. Actually, it is the carbon dioxide in the air and the water in the soil, which in the presence of sunlight are converted into sugars and carbohydrates by a process called ‘Photosynthesis’, that do the actual feeding of the plant. Fertilizer is much more analogous to vitamins. The Nitrogen, Phosphorus and Potassium, and other trace elements contained in the fertilizers are necessary for cell division and enzyme processes that allow photosynthesis and growth to proceed. Photosynthesis is the process in which organisms use the energy from sunlight to produce glucose, a type of sugar, in addition to releasing oxygen. This glucose is the plant’s food.

Many methods and products are used by different growers to fertilize plumeria and plumeria seedlings. I’ve been experimenting with different plumeria seed growing methods and products over the last 20 plus year. The methods and products below are what I’ve determined to work best for me considering my growing conditions in South Florida (Zone 10b), so far.

The following is my current method for fertilizing plumeria seedlings for the first four months.

Over the last 5 years or so, I’ve been germinating and growing my seedlings outside in the full sun. (your weather conditions should be considered, not too hot, not too cold) Conducting experiments regarding when and how much to fertilize seedlings, some are complete some are still ongoing.

For the best results. so far, I use foliage feed with a liquid fertilizer at 1/2 strength for the first month or so. As soon as the seedlings have grown 3 or 4 real leaves I start spraying at full strength.

Fertilizing Plumeria Seedlings

  1. Fertilize with Bioblast 777 or similar as a foliage spray. If you use other balanced fertilizers, you should experiment, starting with 1/2 strength and increasing over time. When using a balanced fertilizer, I get better root growth and thicker trunks.
  2. When using a fertilizer high in Nitrogen as a foliage spray, the seedlings got very lanky very quickly. Lanky stalks and light green leaves can be a result of growing in shade or in a location with too little sun.
  3. When I using high phosphorus fertilizers as a foliage feed, I noticed the seedlings seem to shut down and didn’t put on as many new leaves. I suspect the seedling was having a hard time absorbing other nutrients.
  4. Micronutrients are important to healthy seedlings, so fertilizers I experiment with all contain micronutrients. 

I’ve also fertilizes from the bottom up method by setting the pot or plug tray in a container filled with nutrients. Similar to hydroponic methods. 

I don’t use granular fertilizers until I transfer to soil. I grow my seedling for the first stage in foam-injected peat plugs and then transfer the plug and all into a good soil mix.

I will transplant in pots when plenty of roots are protruding out of the plugs. This usually takes 2-3 months, depending on the time of year and weather conditions. The 2″ x 3″ plugs allow me to transfer directly into a 1 gal or larger pot mixed with ProMix without damaging the roots.

When I transplant into pots, I add granular fertilizer. I use Excalibur VI and apply twice a year. The season is almost all year long in South Florida Zone 10B.

Why Use Flexi Plugs?  –  Why Use ProMix?  –  Why Use Bioblast?  –  Why Use Excalibur Plumeria Fertilizer?   

Plumeria Seed Selection

Plumeria seeds are fun to grow and can provide you with many years of pleasure. Before you begin you should consider seed choices and the limitations of your growing environment and conditions. Something to remember, Plumeria Rubra seeds do not grow true to their parents and they will take up lots of space and attention until they bloom. The average time to bloom is from two the three years, some shorter and some can take much longer.

Plumeria seeds in open seed pod.

Choosing the Right Plumeria Seeds

Before exploring how to best grow your plumeria seeds and seedlings, start with the right seed. If you intend to grow for grafting rootstock or you want to grow a new cultivar, you should use the best quality plumeria seeds possible.


Planting seeds to grow a new cultivar

Growing seedlings in the hope of getting new spectacular seedlings the most exciting journeys you can have with plumeria. Caring and babying of your seedlings for year after year waiting until it is old enough to bloom is a true labor of love. The anticipation when you see the first inflorescence starting to form is off the charts! If the flower turns out to be just like so many others, it is such a letdown, but you are ready to move on and plant more. But, in that rare case, your plumeria flower turns out to be a world-class spectacular flower, then it’s all worth it and you are ready to plant more. Did I mention that growing plumeria seedling IS very addictive?

Over the past 20 years, I have grown seedlings hoping to get that spectacular plumeria with some success. After joining Florida Colors in 2012 I have been fortunate to be able to dramatically increase my love for growing seedlings by growing several thousand each year for future plumeria.

What I’ve learned about seed selection while growing seedling for new cultivars:

  • Choose potential seed parents that have the characteristics you are hoping for in your seedling. 
  • Obtain seeds from trusted growers.
  • Get to know as much as possible about the pod and pollen parents as possible.
  • Find out as much as possible about what plumeria was growing next to the pod parent.
  • Do your best to research and find out if the parents have produced any good seedlings.
  • Always find out how old the seeds are. The older the seed the less of a germination rate. The germination rate depending on how old they are, how they were stored, the health of the pod tree, when and how they were harvested, and of course the cultivar.
  • Select seeds that look healthy and are not paper thin.
  • I have noticed over the last 4 years that the dark seeds seem to produce the darker seedlings.
  • Note: Seedlings with dark leaves and/or darker trunks have a better chance of producing flowers with color.
  • Note: Even the darkest seedling may produce a white flower.

Planting seeds for grafting rootstock

Growing seedlings grafting: Grafting a known plumeria cultivar onto a seedling with a superior root system is about the only way you can improve an existing plumeria cultivar. The rootstock will not cause any effects on the characteristics of the plumeria. All the characteristics above the ground, flowers, fragrance, growth habit and other characteristics will remain the same. Grafting a plumeria known to typically have weak root systems on a strong seedling root system will allow the plumeria to benefit greatly. The stronger the root system allows more nutrients to be absorbed, giving it a better chance to fight off disease and a better chance of survival. Typically seeds grown for rootstock will be allowed to grow for 1 to 3 years before being used for grafting.

Over the past 40 years, Florida Colors Nursery has grown over a hundred thousand seedlings for grafting purposes.

What we have found about selecting seeds for rootstock:

  • Seeds from pod parents with strong vigorous root systems, typically produce seedlings with a good root system.
  • Seeds from pod parents with light-colored flowers, typically produce good rootstock.
  • Seedling with light-colored stalks, leaves, typically have good root systems and are good for rootstock.
  • Dark-colored seeds will produce darker colored stalk and leaves and are typically not good for rootstock.
  • Seedlings with dark stalks and/or leaves, typically have the greatest graft failure rate.
  • Seedlings that are small and slow-growing typically are not good for grafting.
  • Of course, multi-branched and seedlings that branch a lot are typically not good for grafting.
  • And young green seedlings are typically not good for grafting.

Notice I use typically on every line because there are always exceptions to the rule when it comes to Plumeria.

1-27-2018 Updates – Seed & Seedling Projects

January 27th, 2018

Seed selection and planting, it’s time to start working on the details. My planned start date, Feb 1st is just around the corner.

Here is the list of seeds, Gina, Hope, Heirloom, Jackie, Metallica, Super Round (J115), Jack’s Purple, Dwarf Singapore Pink, Mardi Gras, Aztec Gold, Waimea, Bonnie Fox, Raspberry Sundae….so far!

Products Needed:
Plumeria Seeds, something to soak the seeds in, 2” x 3” Gro-Tech FlexiPlugs and trays, Vitazyme, Carl Pool’s Root Activator, Bioblast 7-7-7, Pro-Mix BX Mycorrhizae, Excalibur VI 11-11-13, Metal Labels or plastic plant markers and permanent felt tip marker. Hydrogen Peroxide and Merlin’s Potion for new experiments. 

2018 Seed & Seedling Projects

Basic Planned Regimen for 2018 Seed Projects

  1. Dip seeds in a mix of Vitazyme and warm (not hot) water. Caution: Allow to dry before proceeding.
  2. Soak seeds in warm water until plump. A good rule of thumb: Seeds that sink after absorbing water are usually viable. Seeds that float are normally not viable. Gives them a head start and a good way to checks viability. Caution: It’s important you do not continue to soak after you see the roots starting. They should be put in soil or plugs at that point. Waiting will only increase the chances of damaging the roots.
  3. Soak plugs in Vitazyme (1 oz. per Gal) and Root Activator (2 oz. per gal) Soak for 1 to 2 hours. (New Experiment: soak in 1 oz of hydrogen peroxide per 1 gal.) 
  4. Place seeds in plugs with the flags and deep enough to cover the body of the seed with the flag sticking up and above the soil and water well. Plumeria seeds will also germinate by placing them on the side and covering with 1/2″ of so of soil.
  5. Place in sunny location, I think full sun is the reason I’ve had almost no problems with damping off or seedling rot. Caution: In hot regions you may need some shade
  6. Water often to keep plugs very moist. 2-3 times a day. The FlexiPlugs are foam injected peat plugs, that have proven to provide great air circulation even when wet and the plumeria seeds grow great. Although decomposition takes much longer than normal plugs, I feel it is worth the trade off. Caution: In areas where you sun will burn leaves, you may have to only water well in morning and evening.
  7. Start Foliar feeding with Bioblast (1 tablespoon per gal) as soon as they all have an average of 3-4 leaves. Remember when the seed leaves go away the seedling will need nutrients from the soil or fertilizer. Caution: Apply only Early or Late in the day, not in strong sunlight, it may burn the leaves.
  8. When you see several roots coming out the bottom and or sides of the plug transplant to 1 gal pot. Caution: Be sure the Plugs are complete covered by soil, this will help the decomposing and prevent premature drying out. (New Experiment: I plan on transplanting the 2″x3″ plugs to a 7.5 gal squat pots)
  9. I suggest using Pro-Mix BX Mycorrhizae for your soil mix.
  10. Fertilize with Excalibur IX 11-11-13 (1 tablespoon per gal pot) Mix in top 1” of soil to cover fertilizer granules and water well. I suggest 9 month because you can apply again in 9 months providing nutrients all year long. Caution: If you can’t keep the seedling growing all year long, It may be better to use Excalibur IX at the beginning of the growing season.
  11. If possible keep seedlings growing for the first year by keeping in a warm, sunny location. Additional Lighting may be needed.
  12. Water as needed, allow pot to almost dry out and water well making sure all the soil is evenly watered. A moisture meter is always a good tool to have.

2018 Planned Experiment 1 – (Hydrogen Peroxide)

  1. Dip seeds in a mix of Vitazyme, Hydrogen Peroxide and warm (not hot) water. Caution: Allow to dry before proceeding. Optional will dip some and not dip some.
  2. Soak seeds in warm water and Hydrogen Peroxide until plump. (1 oz of hydrogen peroxide to 1 gal, final mix to be determined) A good rule of thumb: Seeds that sink after absorbing water are usually viable. Seeds that float are normally not viable. Gives them a head start and a good way to checks viability.
  3. Soak plugs in Vitazyme (1 oz. per Gal), Root Activator (2 oz. per gal) and Hydrogen Peroxide (1 oz to 1 gal) Soak for 1 to 2 hours. 
  4. Place seeds in plugs with the flags and deep enough to cover the body of the seed with the flag sticking up and above the soil and water well.
  5. Place in sunny location, I think full sun is the reason I’ve had almost no problems with damping off or seedling rot. 
  6. Water often to keep plugs very moist. 2-3 times a day work for me.
  7. Start foliar feeding with Bioblast (1 tablespoon per gal) as soon as they all have an average of 3-4 leaves. Remember when the seed leaves go away the seedling will need nutrients from the soil or fertilizer. 
  8. When you see several roots coming out the bottom and or sides of the plug transplanting the 2″x3″ plugs directly into 7.5 gal squat pots and 3 gal pot.
  9. Soil is Pro-Mix BX Mycorrhizae or a mix with Florida Colors soil and Pro-Mix Mycorrhizae. Details of the mix coming at time of transplanting.
  10. When transplanting, fertilize with Excalibur VI 11-11-13 (1 teaspoon per gal pot) Mix in top few inches of soil, it is best to completely cover fertilizer granules and water well. I use 6 month I keep seedling growing year around and I apply again in 6 months providing nutrients all year long.
  11. If possible keep seedlings growing for the first year by keeping in a warm and in a sunny location. Additional Lighting may be needed.
  12. Water as needed, allow pot to almost dry out and water well making sure all the soil is evenly watered. A moisture meter is always a good tool to have.

2018 Planned Experiment 2 – (Merlin’s Magic Potion – MMP)

  1. Dip seeds in mix of Merlin’s Magic Potion and warm water and allow to dry before proceeding.
  2. Soak seeds in warm water and Hydrogen Peroxide until plump. (1 oz of hydrogen peroxide to 1 gal)
  3. Soak plugs in Merlin’s Magic Potion (2 oz per gal) Soak for 1 to 2 hours. 
  4. Place seeds in plugs with the flags and deep enough to cover the body of the seed with the flag sticking up and above the soil and water well.
  5. Place in sunny location, I think full sun is the reason I’ve had almost no problems with damping off or seedling rot. 
  6. Water often to keep plugs very moist. 2-3 times a day has worked for me.
  7. Start foliar feeding with Bioblast (1 tablespoon per gal) as soon as they all have an average of 3-4 leaves. Remember when the seed leaves go away the seedling will need nutrients from the soil or fertilizer. Foliar feed every two weeks (1 oz to 1 gal of water) 
  8. After two weeks or so, but before transplanting into pots, soak plugs with seeds in a mix of Merlin’s Magic Potion and water. (1 oz to 1 gal of water)
  9. When you see several roots coming out the bottom and or sides of the plug transplanting some of the 2″x3″ plugs directly into 7.5 gal squat pots and some in 2-3 gal pot.
  10. Before transplanting into pots, soak plugs with seeds in a mix of Merlin’s Magic Potion and water. (1 oz to 1 gal of water)
  11. Soil is Pro-Mix BX Mycorrhizae or a mix with Florida Colors soil and Pro-Mix Mycorrhizae. Details of the mix coming at time of transplanting.
  12. When transplanting, fertilize with Excalibur VI 11-11-13 (1 teaspoon per gal pot) Mix in top few inches of soil, it is best to completely cover fertilizer granules and water well. I use 6 month I keep seedling growing year around and I apply again in 6 months providing nutrients all year long.
  13. If possible keep seedlings growing for the first year by keeping in a warm and in a sunny location. Additional Lighting may be needed.
  14. Water as needed, allow pot to almost dry out and water well making sure all the soil is evenly watered. A moisture meter is always a good tool to have.
  15. Drench with Merlin’s Magic Potion (2 oz to 1 gal of water)
  16. Continue foliar spraying with Bioblast every two weeks (1 oz to 1 gal of water) 

Depending on the weather, I planning on starting this project on Feb 1, 2018. Come back then.

1-27-2018 Updates – Seed & Seedling Projects

Optimizing Seed to Seedling Growth

My 2018 projects are designed to determine how to speed up the growth of seeds and seedlings to the point of maturity without causing them to grow excessively tall and lanky. The goal is to grow seedlings to maturity and produce blooms as soon as possible. It is important to understand all about the Plumeria seeds and seedlings growing habits and of course the limitations. Using different products, strength and methods can produce different results at different stages during the growing period and in different growing environment and conditions. I’ve experimented with many growing methods and products to determine what works best for me. A short cut would be finding someone in your area and start with what they have had success with and see if it’ll work for you. 

Plumeria are Dicots (Two-seed Leaves)

The primary root, called the radicle, is the first thing to emerge from the seed. The primary root anchors the plant to the ground and allows it to start absorbing water. After the root absorbs water, the shoot emerges from the seed. In dicots, the shoot has three main parts: the cotyledons (seed leaves), the section of the shoot below the cotyledons (hypocotyl), and the section of shoot above the cotyledons (epicotyl). The way the shoot emerges from soil or growing media follows two main patterns. In plumeria, the section of the shoot below the cotyledons elongates and forms a hook, pulling the cotyledons and the growing tip through the soil. Once it reaches the surface, it straightens and pulls the cotyledons and shoot tip of the growing seedlings into the air. This is called epigeous germination. 

After the shoot emerges, the seedling grows slowly while the storage tissue of the seed diminishes. Soon, the plant develops a branched root system or taproot. Then, true leaves that look like the leaves of the mature plumeria appear. These leaves, unlike cotyledons, photosynthesize light into energy, allowing the plant to grow and develop. When the true leaves start converting light into energy, the seedling needs a source of nutrients.

How Plumeria Seeds Form and Germinate – Before You Start Growing Plumeria From Seed

 About Plumeria Seed Selection

Optimizing Seed Germination

We know that plumeria seeds need optimal amounts of water, warm temperatures to germinate. If we don’t create the most optimal environment possible, then plants tend to germinate slowly and unevenly. Generally, space is limited, so we want plants to germinate as quickly as possible. Uneven germination can also cause problems. If you have ever had to transplant a flat of seedlings where half are ready to plant and the other half are too small with root balls that don’t slide easily out of their cells, you will understand why. Damage to roots can cause a setback in the growth of the seedling.

One common option to achieve optimal germination temperature in growing media is to use germination mats. These mats allow you to set the temperature according to seed requirements. For Plumeria I’ve found 85 degrees or above seems to be good. Plumeria will germinate in 7 days at 85°F but may take more than 15 days to germinate at 65°F.

Make sure you maintain optimal temperatures for your plumeria seeds. It is also critical to promote air circulation to mitigate fungal pathogens such as those causing damping off. I’ve been growing outside in the sun with very little dampening off problems. 

Starting Seedlings in Plugs 

Additional information about seeds and seedlings is available on Plumeria Care

Optimizing Seed to Seedling Growth

Typical seedling growth after 12 day in Plugs

Typical seedling growth in tray after 12 days

The optimal temperature for growing seedlings may be different from seeds. Remember, the optimal temperature will stimulate optimal growth. Cooler temperatures generally slow down growth, and warmer ones speed up growth to a point. 

Temperature and time required for growing Plumeria seedlings to transplanting size using FlexiPlugs. Day (F) 75-90, Night (F) 60 or above, Time 15-20 days. I plan on transplanting to pots when I see plenty of roots and three or four real leaves. The photos show seedling at 12 days, the roots are there, but they need a few more leaves.

Over the last four years, I’ve been experimenting with different media for seeds and seedlings. I’ve determined the 2″ x 3″ FlexiPlugs are the best choice for my growing conditions. They give me the ability to water 3 or more times a day and the plugs still provide adequate oxygen to the roots. I soak the FlexiPlugs in Vitazyme and Carl Pool’s Root Activator and the plug does a good job of holding the nutrients. The plugs also provide the best way I’ve found to allow transplanting with minimum root damage. The only issue I found is the slow decomposition rate of the plugs, but I haven’t noticed any negative effects on the growth of the seedlings.

As the seeds germinate and the seedlings grow, it is important to keep the plugs moist by watering less often but longer to accommodate developing root systems. I check my seedling several times a day by pressing the top of the plugs with my finger to check for moisture. If they don’t feel moist or if they look a little dry, I will water. Remember to carefully monitor and water the plants at the edges of trays. They dry out faster than those in the middle. Something else I like about the FlexiPlugs, I actually watered the Plugs every hour or so during the day for 4 days, the seedlings did fine.  But you should remember using some other methods, overwatering can increase the probability of plumeria developing damping off or stem rot.

Why Use FlexiPlugs

Fertilizing Young Plumeria Seedling – About Growing Plumeria Seedlings

Additional information about seeds and seedlings is available on Plumeria Care

Optimizing Seed to Seedling Growth

About Growing Plumeria Seedlings

Growing plumeria from seeds can be a rewarding and exciting way to add new cultivars to your collection. But in order to grow plumeria from seed you must know something about caring for plumeria seedlings. 

If you germinate you seed between wet paper towels or use other methods of germination other than planting straight in plugs or soil, you should plant the seedling as soon as you see a root. Leaving them too long or allowing them to dry out could damage or even kill the new seedling. 

A seed turns into a seedling as soon as it germinates. When you plant a seed, the first leaves to emerge are the cotyledons. These leaves will look different from leaves that will grow later. The purpose of these leaves is to provide stored food to the seedling for a short period of time. True leaves grow shortly after the cotyledons. When your seedling has three of four true leaves it need light to start generating energy through photosynthesis that will help feed the plant for the rest of its life.

Common Questions

  • How much water should my seedling get?
    Watering is very important, you should keep the soil moist but not wet. In the sun small pots will dry out very quick. As you transplant into larger pots the soil will be able to hold more water and watering is needed less often.
      
  • When do I transplant my seedlings?  
    Transplanting seedlings at the proper time is crucial to their development later on. If you transplant them before they are ready, they may have a hard time surviving. If you wait too long, your seedlings growth may be slowed down or become pot bound in its original container. When it comes to how to transplant seedlings, there is no hard and fast rule to how tall a seedling should be before you transplant or put outside in the garden, due to the fact that different plumeria grow to different sizes. A general rule is when a seedling has three or more true leaves and you see roots coming out of the bottom of the pot, it’s large enough to transplant or place out in the garden (after it has been hardened off).Making sure that the plant has enough of these leaves to keep it sustained when planted out in your garden is important to its proper growth. Just remember, it isn’t how tall but how many true leaves your plant has that will determine when you should be planting seedlings out. But even when your seeds are big enough to plant out, make sure you harden off your seedlings before planting them. 
     
  • When and how to fertilize seedlings?
    When the seedling has true leaves and roots it is capable of absorbing nutrients from the soil or from fertilizer. When cotyledons are gone, the seedling needs other sources of nutrients. We recommend adding a balanced slow release fertilizer, such as Excalibur to the soil or spray with a foliar fertilizer such as Bioblast at half strength. More info on Nutrients and Fertilizer
      
  • What size pots are best for my seedlings?
    Start with a small sized pot and transplant into larger pots as your root system develops. Transplanting or starting with a 4″ pot will allow plenty of room for the roots and provide the pot to almost dry out between watering. When you see roots coming out of the pot it is time to transplant to a 1 gal pot. Do not allow the roots to become root bound in the pot. If you slip a couple of pot sizes and go to a much larger pot, the soil will have harder time dissipating the moisture and heat has less chance of helping the roots grow.
       
  • Can I plant my seedling in the ground?
    Spring is the best time to plant in the ground, after the last frost and best when the night time lows are above 60s. Planting in the ground is a good idea as soon as they have established a good root system.  I would allow to grow to minimum of 18″ before putting them in the ground. At that point you can treat your seedling as you would mature plumerias. They still need a supply of nutrients, good sun, good soil with good drainage. Some use raised beds to allow the benefits of the in ground space for the roots to grow. Just remember to protect from cold and to provide plenty of room to grow. 
       
  • What soil is best for my seedlings?
    When preparing to transplant you need to get quality soil for seedlings. The soil is the key to success with any plumeria and should give your seedling the optimum growth. Any good soil suggested for seedling is ok, but the best soil I have found is ProMix BX with Mycorrhizae. The soil must be well draining no matter what soil you use.