2019 Project – Planting and Growing Plumeria from Seeds

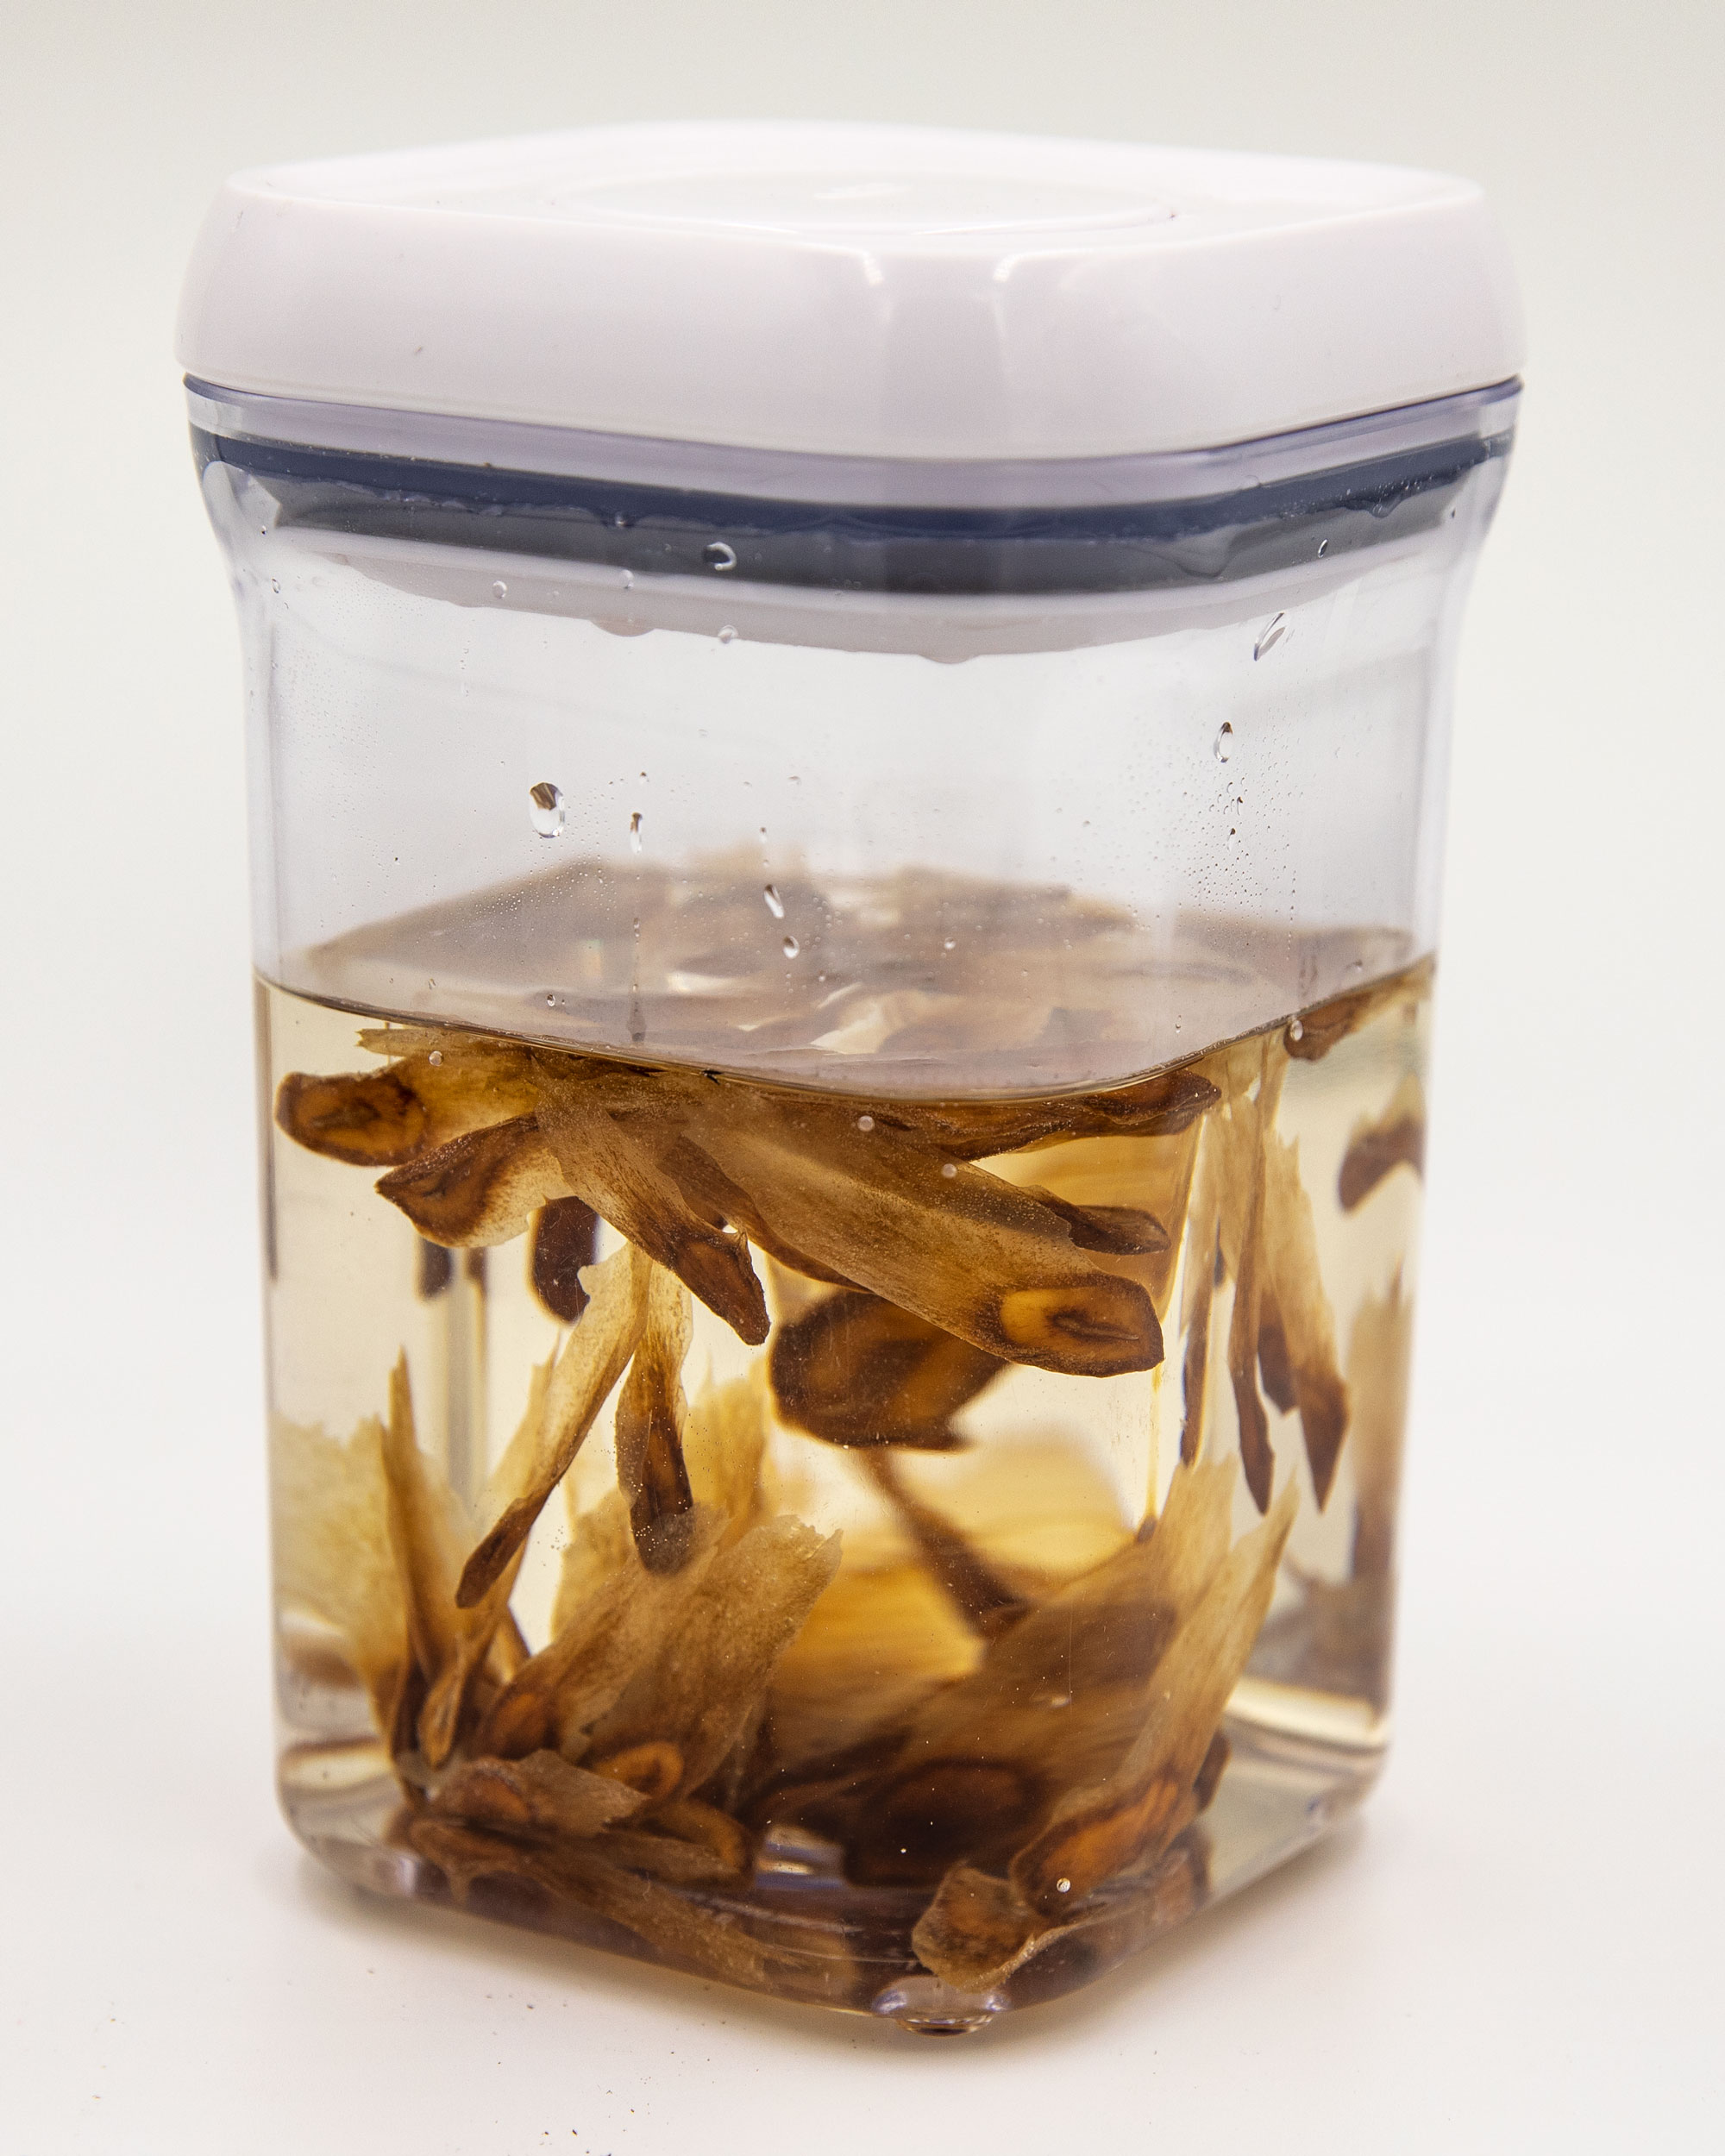
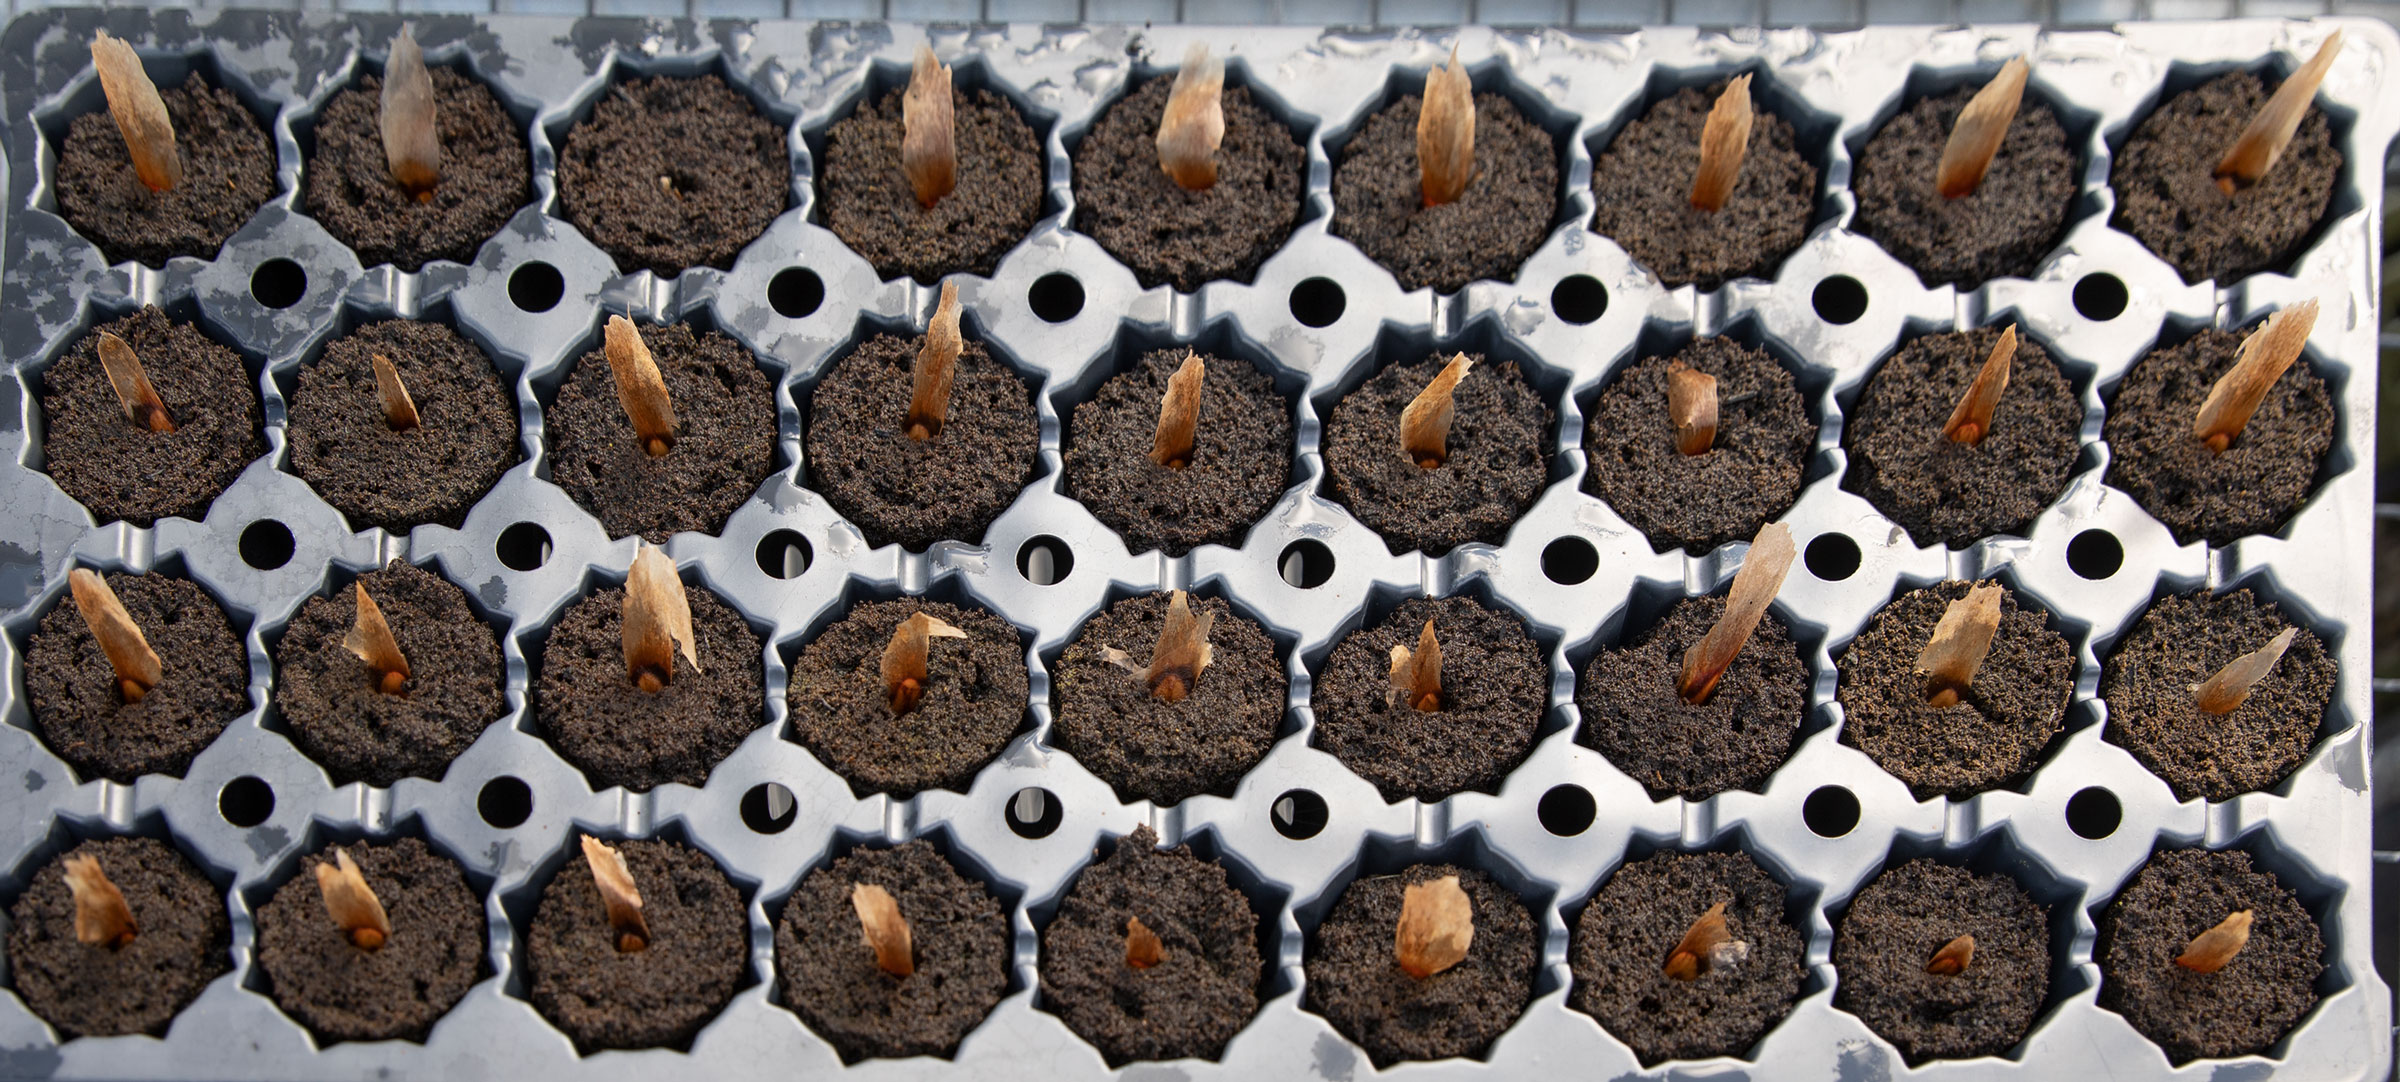
My favorite way to germinate and grow plumeria seeds.
After soaking I placed the Camelot seeds in FCN FlexiPlugs leaving their flags sticking out. After soaking for 4 hours, 68 out of 70 seeds passed the viability test. Usually, viable seed will soak up enough water to cause them to sink to the bottom of the container. The plumeria seed embryo is the part of a seed that contains the earliest forms of a plant’s roots, stem, and leaves. The two that didn’t sink in the water appeared to have underdeveloped embryos.

After soaking I placed the Camelot seeds in FCN FlexiPlugs leaving their flags sticking out. (Soaking Plumeria Seeds) After soaking for 4 hours, 68 out of 70 seeds passed the viability test. Usually, a viable seed will soak up enough water to cause them to sink to the bottom of the container. The plumeria seed embryo is the part of a seed that contains the earliest forms of a plant’s roots, stem, and leaves. The two that didn’t sink in the water appeared to have underdeveloped embryos.

This year my experiments are one to determine the benefits of correcting pH and two to determine if growing seedlings in nutrient saturated FlexiPlugs until time to transplant into pots is beneficial.

Similar to or maybe a version of hydroponics.

Day 1, 2/16/2019

Camelot Plumeria Seeds in FCN FlexiPlugs
Day 1, 2/16/2019
Plumeria Seeds in FCN FlexiPlugs
Day 1, 2/16/2019
Plumeria Seeds in FCN FlexiPlugs
Day 14, 3/3/2019
Hope Seedling in FCN FlexiPlugs

Hope Seedling in FCN FlexiPlugs. What I look for when evaluating my seedlings. When seedlings have a dark trunk, dark leaves with dark veins in the leaf, I believe they have a greater chance of having a colorful flower. Of course, there is no guarantee. This seedling was 19 Days old on 3/7/19 and about 3″ tall.
Camelot seedlings, March 17th, 2019. 29 days Old, time to start transplanting.

Camelot seedling, March 17th, 2019, After 29 days I’m starting to see roots emerge from the plugs.
2019 Project – Planting and Growing Plumeria from Seeds

Soaking Plumeria Seeds

This is a method I’m using to start the first batch of 70 Camelot seeds this year on Feb. 16th, 2019. From the first double pod to open this year at 9:30 AM. I filled one of Kay’s plastic containers about half full of hot tap water (not so hot that I couldn’t hold my finger in it). FYI, We are on well water. The seed will absorb hot water quicker and it adds some heat to the germination process. The seeds are less than 2 weeks old.

It all comes down to water’s viscosity. Cold water is more viscous than hot water, which means that its molecules more readily cling to one another. When water is heated, the water molecules begin to move around much more rapidly, keeping them from clinging together and making the water runnier, that is, less viscous.


Camelot plumeria seeds put on to soak in sealed container with hot water.

Plumeria seeds after 2 hours soaking in sealed container, water still warm.

The third picture is after 3 hours of soaking. Only a few left floating…I knew two very thin ones looked like they would not be viable.

The Camelot seeds are fresh, less than two weeks old. Older seeds will take longer to absorb enough water. I like to soak a minimum of 4 hours, (overnight is good) especially if they are 3 years old or older seeds. When I plant for rootstock, I do not soak them.

Next: Planting Plumeria Seeds in FCN FlexiPlugs

Soaking Plumeria Seeds

Plumeria Seed Starter Kit

As always, we are pleased to share our experiences and technology!

I’m using the Plumeria Seed Starter Kit from FCN

After several years of experimenting with various media and products for germinating and growing seedlings, We, Florida Colors Nursery, decided to make them available on our site. The Florida Colors Nursery Plumeria Seed Starter Kit consists of a flat tray without drain holes, a plug tray and 36, pH neutral 2″ x 3″ foam injected peat plugs pre-saturated with micro-nutrients (Why I use FCN FlexiPlugs). Specific micro-nutrients have been added to promote seed germination and give young seedlings a kick start. The Plumeria Seed Germination Kit is for the serious grower who wants the most out of their seeds.

For best results always start with the freshest seeds possible. Purchase from a trusted seller known to provide quality plumeria seeds.

Nutrient Mix – 1 oz of Carl Pool’s Root Activator (Why I use Carl Pool’s Root Activator) and 1 oz Vital Earth’s Vitazyme (Why I use Vitazyme) per gal of water. The products used for the nutrient mix are products we have been using and also sell on our website, but you can certainly replace them with similar products.

Phase I – Seed Germination

If you need to test viability or speed up initial germination, you may want to soak your seeds before planting. See “How to Soak Plumeria Seeds”
https://plumeriaseeds.com/soaking-plumeria-seeds/  

There are many methods for seed germination. The method below is the best for me in my climate.

  1. Remove the plastic cover. (The tray and plugs are wrapped in plastic and sealed to keep the plugs moist.)
  2. Use a knife to make a slice in each plug, make a 1/2″ wide slice and about 2″ down into the plug.
  3. Place the seed in the slice in the plug allowing the seed’s flag to stick out.
  4. Fill the flat tray with the nutrient mix (1 oz of Root Activator and 1 oz Vitazyme per gal of water) The best way to accomplish this is to lift a plug out, add nutrients and replace the plug.
  5. Seed germination will take from 7-14 days, sometimes longer.

Phase II – Seedling Growth

Phase II is the initial seedling growth

  1. Check the flat tray every few days and add water when needed to keep the tray full. The easiest way is to lift a plug out, check and add nutrients if needed, then replace the plug.
  2. After your seedling has produced three or four real leaves, start fertilizing with Bioblast 7-7-7 (Why I use Bioblast) every two weeks (Mix: 1 teaspoon per gallon, this is half strength), early in the morning or late in the afternoon. Do not spray during the heat of the day.
  3. Check the water level in the trays often and add water as needed to keep the flat tray full of water.
  4. Check and add nutrients as needed, the same mix as above or similar.
  5. Every two weeks foliar feed with Bioblast 7-7-7 fertilize (1 teaspoon per gallon, half strength), early in the morning or late in the afternoon. Do not spray during the heat of the day.
  6. When you see substantial growth and lots of roots, it is time to transplant into soil.
  7. Initial seedling growth is usually 2-3 months before it has enough root to transplant into 1 gal or larger pots.

NOTE: Your seedlings growth will vary depending on the weather and time of year. Spring is the best time for planting and growing plumeria seeds. Seeds need warmth and moisture to germinate; seedlings need warmth, moisture, and light to grow.

 Phase III – Transplanting to Soil and Fertilizing

When you have sufficient roots, it’s time to transplant the plugs into 1 gal or larger pots. I prefer to use Pro-Mix BX with Mycorrhizae (Why I use Pro-Mix BX) for the first transplanting of seedlings in soil. Usually good for eight months before time to move to larger pots.

  1. Fill a one gal pot or larger with Pro-Mix BX with Mycorrhizae.
  2. Drench the Pro-Mix with the same mix as above, (1 oz of Root Activator and 1 oz Vitazyme per gal of water)
  3. Make a hole large enough for the plug to fit in, (we use a rooting tube to make an indention into the soil).
  4. Insert the plug in the soil (Be careful not to damage the roots).
  5. Sprinkle two tablespoons of Excalibur VI (Why I use Excalibur Plumeria Fertilizer) around the plug and the top of the soil. Excalibur should last until the seedlings are approximately eight months old. I like to use the six months because the seedling should need to be transplanted every 6 months or so.
  6. Add soil to cover the fertilizer and the plug with about 1/2″ to 1″ of soil.
  7. Tamp the soil around the plug to assure good contact between the plug and the soil.
  8. Water the first time after transplanting, until the soil is soaked with the Nutrient mix (1 oz of Root Activator and 1 oz Vitazyme per gal of water).
  9. Add soil when needed.
  10. Be sure to monitor soil moisture and water well when the soil is almost dry. (A moisture meter is a good tool to use)
  11. Every two weeks Foliage feed with Bioblast 7-7-7 fertilize (1 tablespoon per gallon, full strength), early in the morning or late in the afternoon. Do not spray during the heat of the day.
  12. Treat for insects as needed.

Now that you have labored so hard to give your seeds the best possible care to help your seeds germinate and grow all you have to do is wait. I can assure you the feeling you get when you a plumeria seedling bloom that you grew from seed is worth it. Hopefully, you will find out how it feels for yourself in a few years.

Plumeria Seed Starter Kit